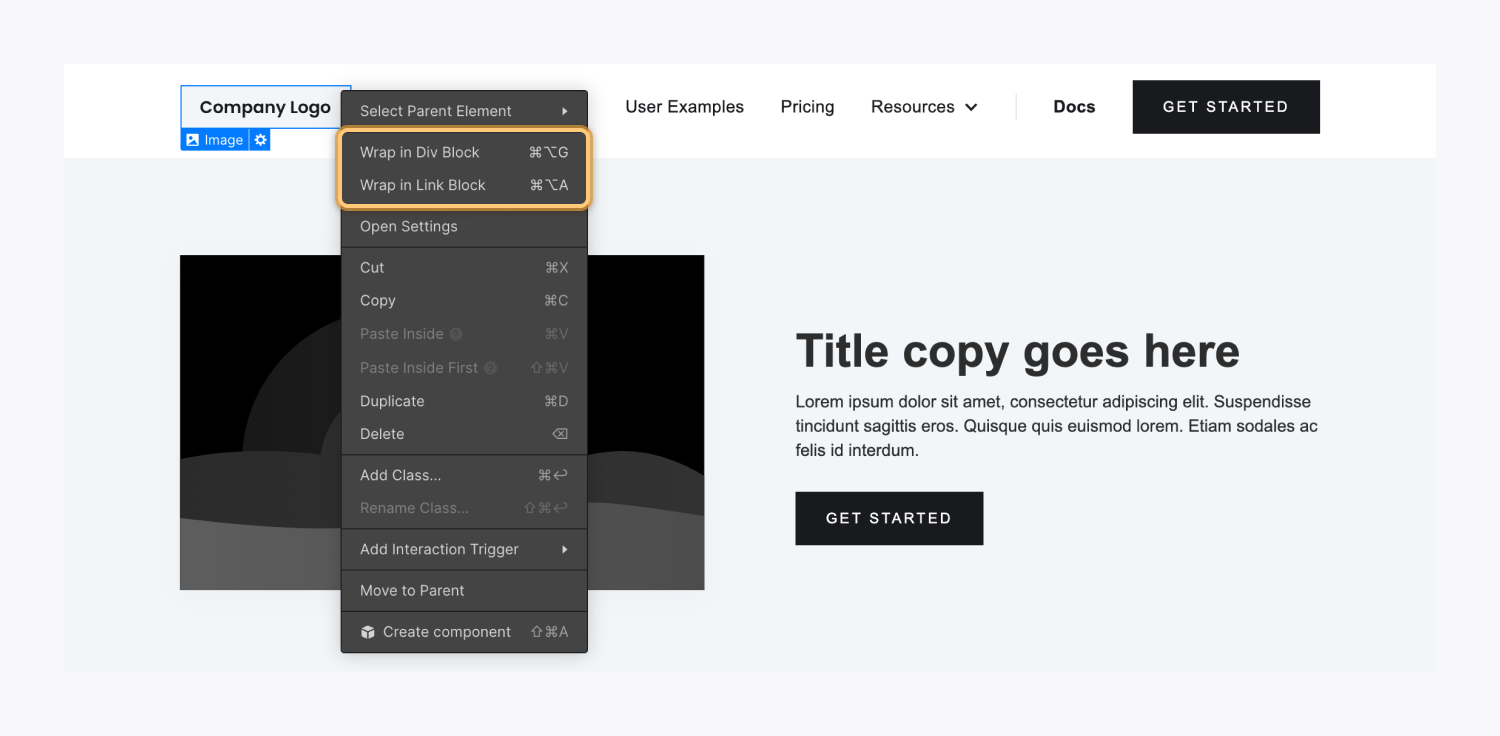
As you design your sites in Webflow, you may want to wrap elements within a parent element like a div or link block to style them more easily. Now, you can wrap an element in a div or link block in seconds, saving you clicks and maximizing efficiency in your design workflow.
In this lesson, you’ll learn:
Note: You can wrap any element using these methods, including elements that are bound to the CMS. Note that you can also wrap individual component instances as well as elements inside components, but you cannot wrap main components.
How to wrap an element in a div block
Div blocks are basic, versatile elements in web design. They can be used to create space or as dividers, but are commonly used to group elements together.
To wrap an element in a div:
- Select the element you want to wrap on the Designer canvas
- Press Command + Option + G (on Mac) or Control + Alt + G (on Windows)
You can also wrap an element in a div using the on-canvas menu:
- Right-click the element you want to wrap on the Designer canvas
- Click Wrap in div block

Once you’ve wrapped the element, the new wrapping element (i.e., the div block) will be automatically selected and expanded in the Navigator panel.
Pro tip: You can press Command + Enter (on Mac) or Control + Enter (on Windows) to add a class after wrapping your element in a div block.
How to wrap an element in a link block
Link blocks are similar to div blocks in that they’re commonly used for structure and layout, but the area inside of the link block becomes a link.
To wrap an element in a link block:
- Select the element you want to wrap on the Designer canvas
- Press Command + Option + A (on Mac) or Control + Alt + A (on Windows)
To wrap an element in a link block using the on-canvas menu:
- Right-click the element you want to wrap on the Designer canvas
- Click Wrap in link block

Once you’ve wrapped the element, the new wrapping element (i.e., the link block) will be automatically selected and expanded in the Navigator panel.


