In this lesson:
- Set up the composition in After Effects
- Build an orbital animation
- Export
- Bring the animation into Webflow
- Configure an interaction trigger
Set up the composition in After Effects
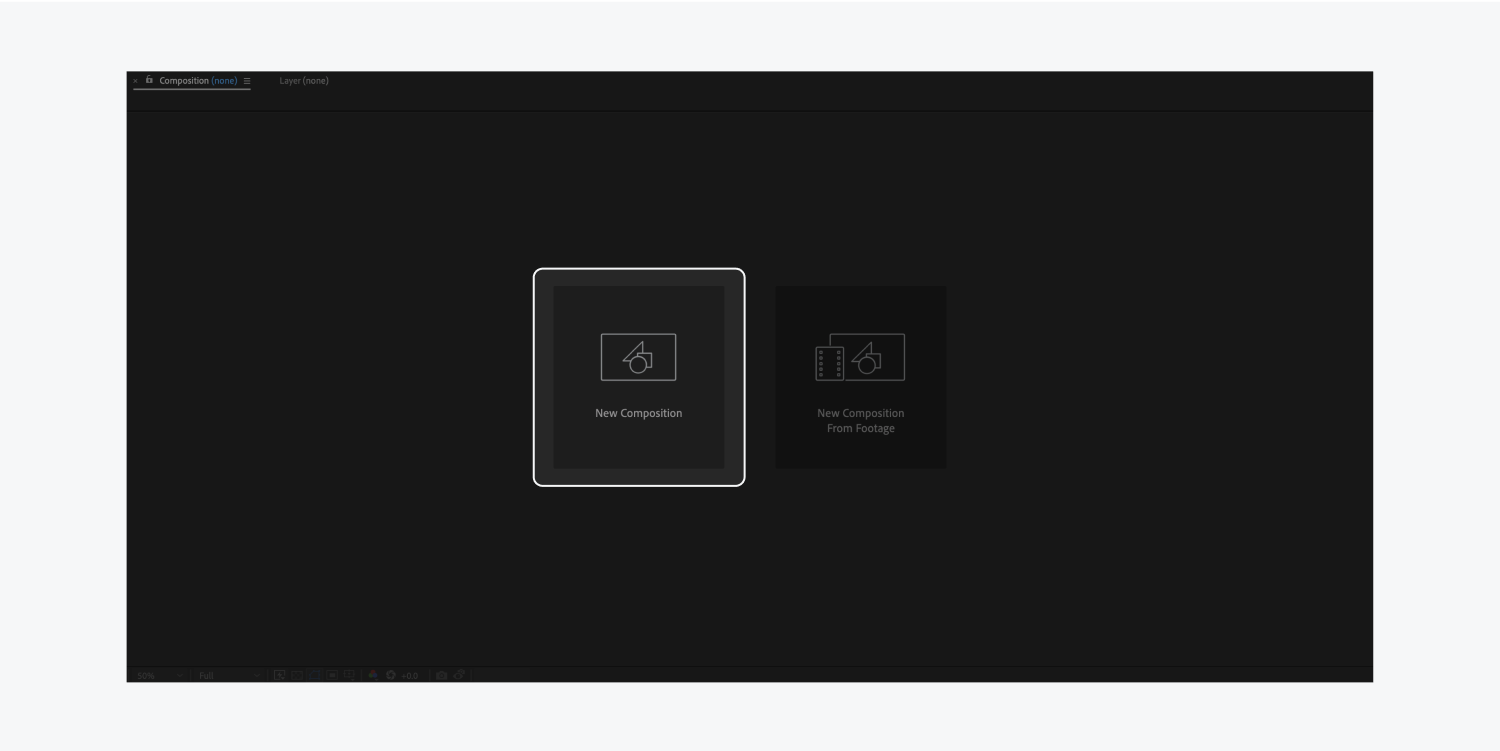
Something to consider when setting up a composition in After Effects — this is the starting point, but you can always make changes later. You can change dimensions, timing, or frame rate. For this example, let's create a 1000px wide by 1000px tall composition using 60 frames per second.
Create a composition in After Effects:
- Open After Effects
- Click New Composition
- Enter 1000px for the Width
- Enter 1000px for the Height
- Enter 60 for the Frame rate
- Enter 5 seconds for the Duration
- Set Background color to white
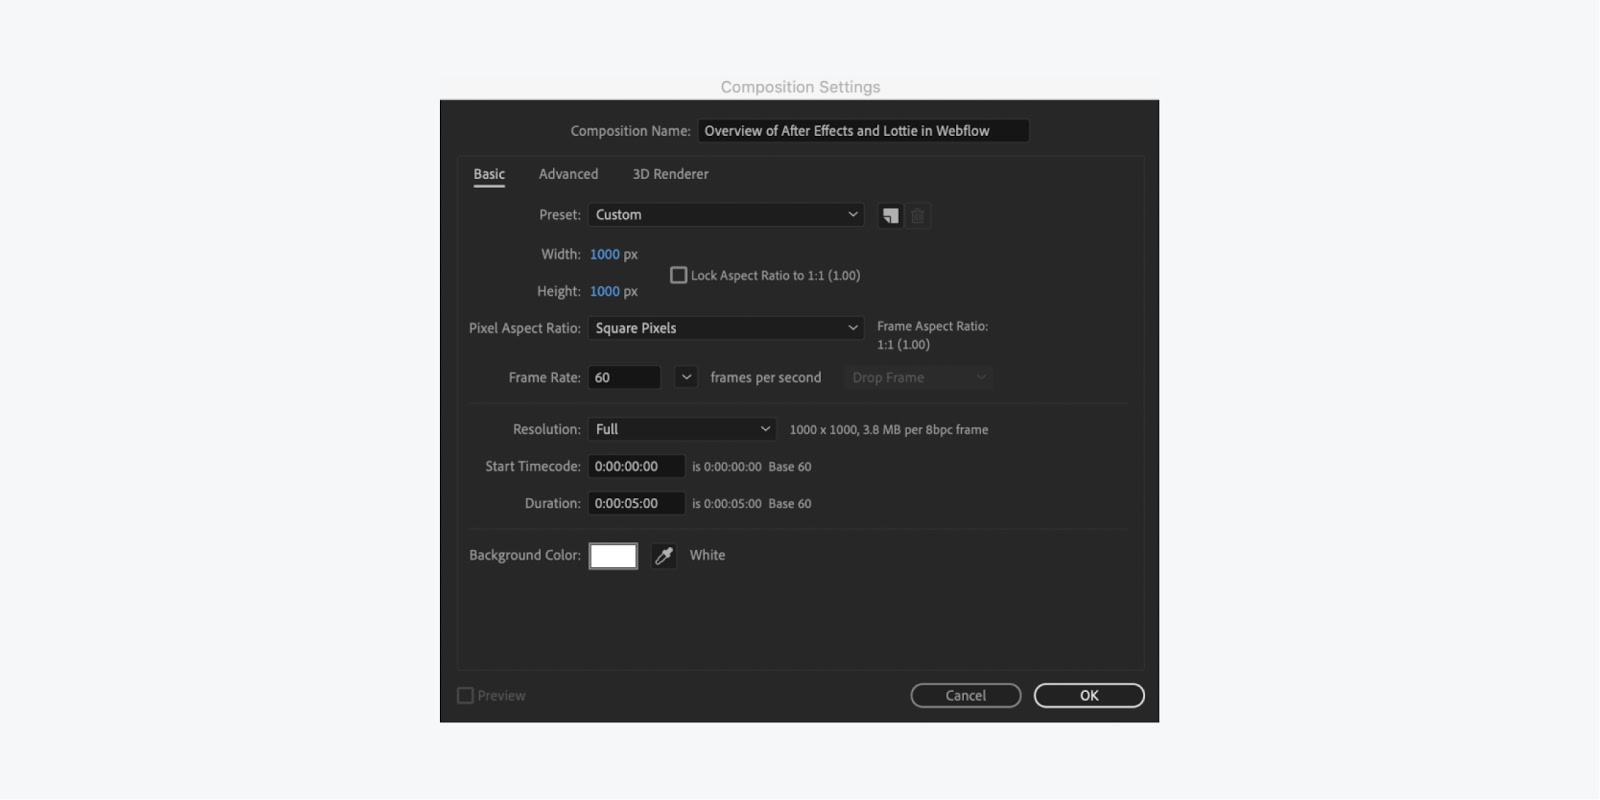
Note: make sure Lock Aspect Ratio to 1:1 (1.00) is unchecked to create a custom dimension
If you want to go back and make a change, right-click your composition and access the settings.
Build an orbital animation
Step two is where things get really interesting. Let's start by adding a new shape layer to your composition.
Add a shape layer:
- Right click in the layers panel
- Hover over New
- Select Shape layer
Now you can create any shape you want. Open the settings of your shape by clicking the dropdown arrow of your Shape layer > Add > Ellipse. And now you have an ellipse.
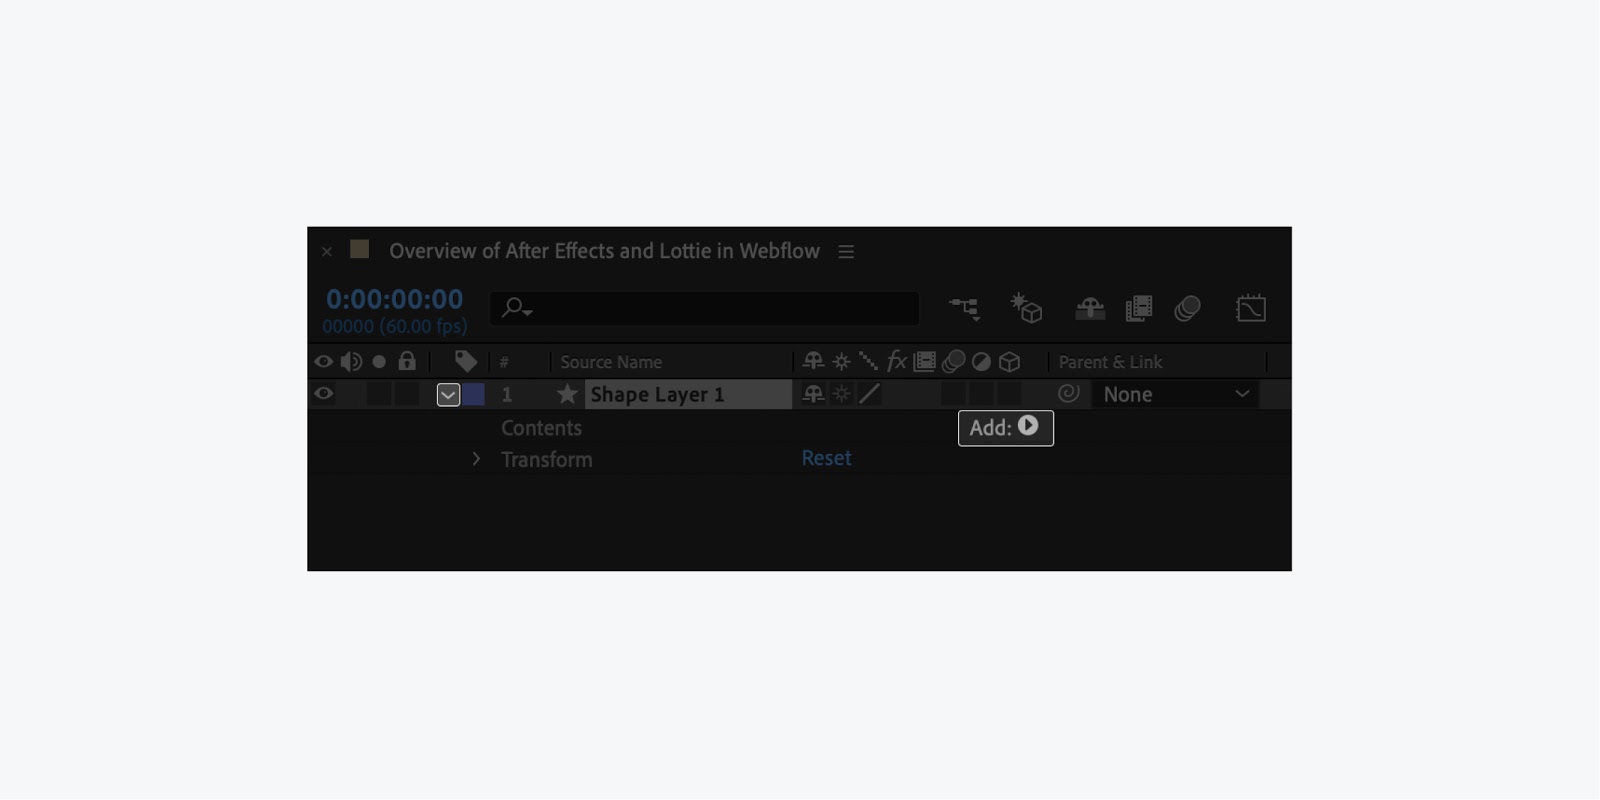
Add a stroke and increase the size so your ellipse is visible:
- Click Add on your shape layer
- Select Stroke
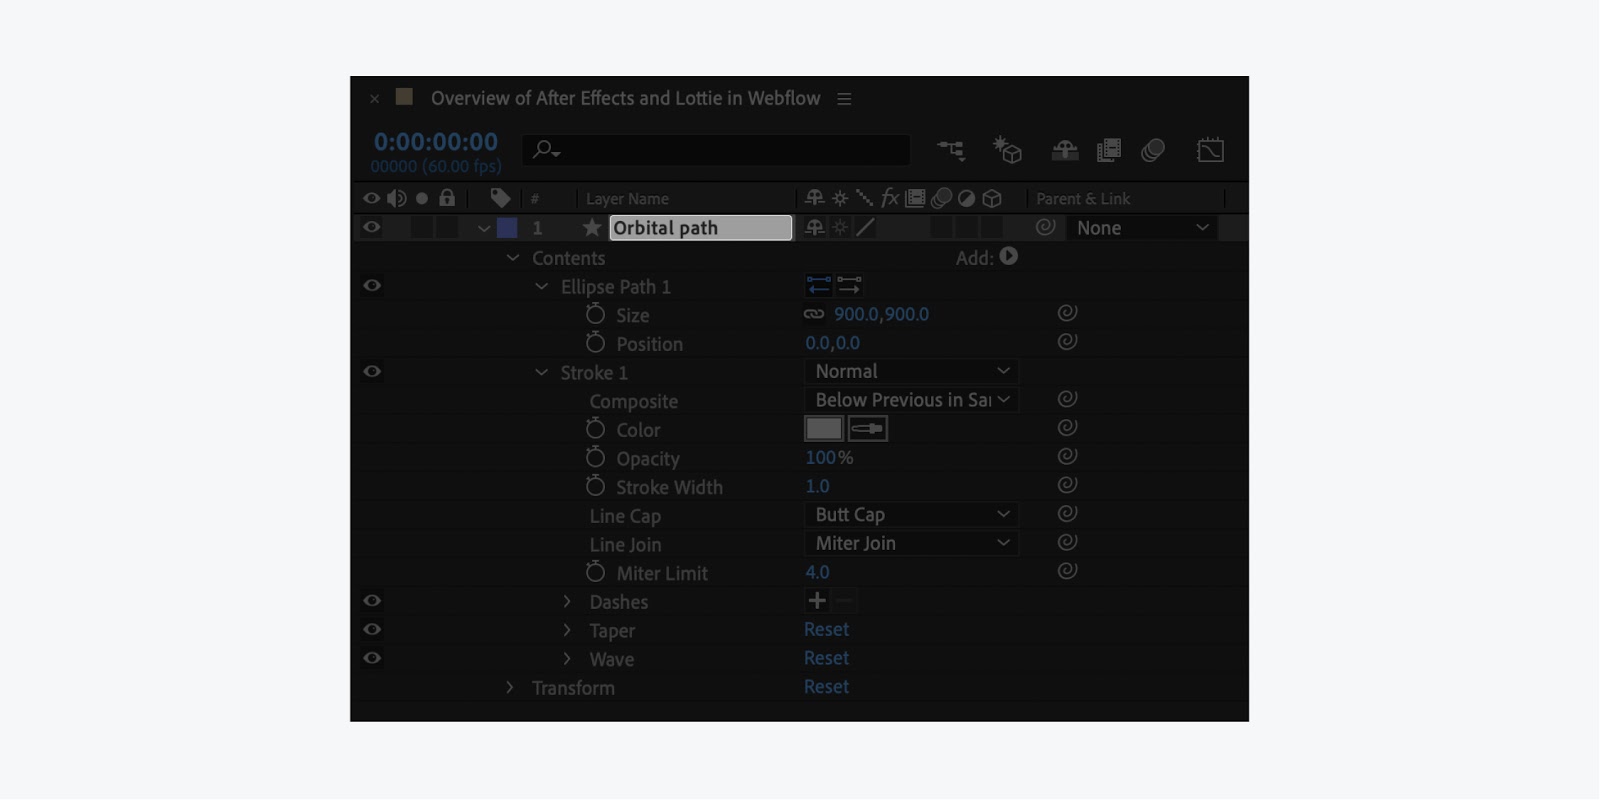
- Change stroke color to grey, or something different from your background color
- Change the stroke width to 1px
- Click the dropdown arrow of the Ellipse path
- Enter 900 for the Size
So now you have an outer orbital path. And if you click on the layer and press the return key on your keyboard — you can enter a name (e.g., Orbital path) to keep things organized.
Add a fill and choose the color:
- Click the Add button within the layer
- Select Fill
- Change the Fill color to black
- Reduce the opacity in the Fill settings to 3%
Copy, paste, and change the size for the second ellipse:
- Select the Orbital path layer
- Press Command + C (on Mac) or Control + C (on Windows)
- Press Command + V (on Mac) or Control + V (on Windows)
- Click the dropdown arrow of the layer (e.g., Orbital path 2)
- Click the dropdown arrow of Contents in the copied ellipse
- Click the dropdown arrow of Ellipse Path in the copied ellipse
- Change the Size from 900 to 700
Note: we're adjusting the Size on the ellipse path itself instead of going into transform — if we transformed, the stroke would also scale down. For this example, we want a consistent stroke, so we're using the ellipse path Size property.
Copy and paste multiple times, to reduce the size by 100 for each new path, and create a total of seven orbital paths.
Create five more orbital paths:
- Select the recently copied layer
- Press Command+ C (on Mac) or Control + C (on Windows)
- Then press Command + V (on Mac) or Control + V (on Windows)
- Press the arrow of the copied ellipse
- Press the arrow of the Ellipse Path within the copied ellipse
- Reduce the Size by 100 (e.g., changing from 700 to 600)
- And, repeat the above steps four more times
Note: you can vary the Size difference of your copied ellipses to make the paths look more natural instead of reducing each by 100
Great! You now have seven orbital paths. That means you’ll have seven different planets.
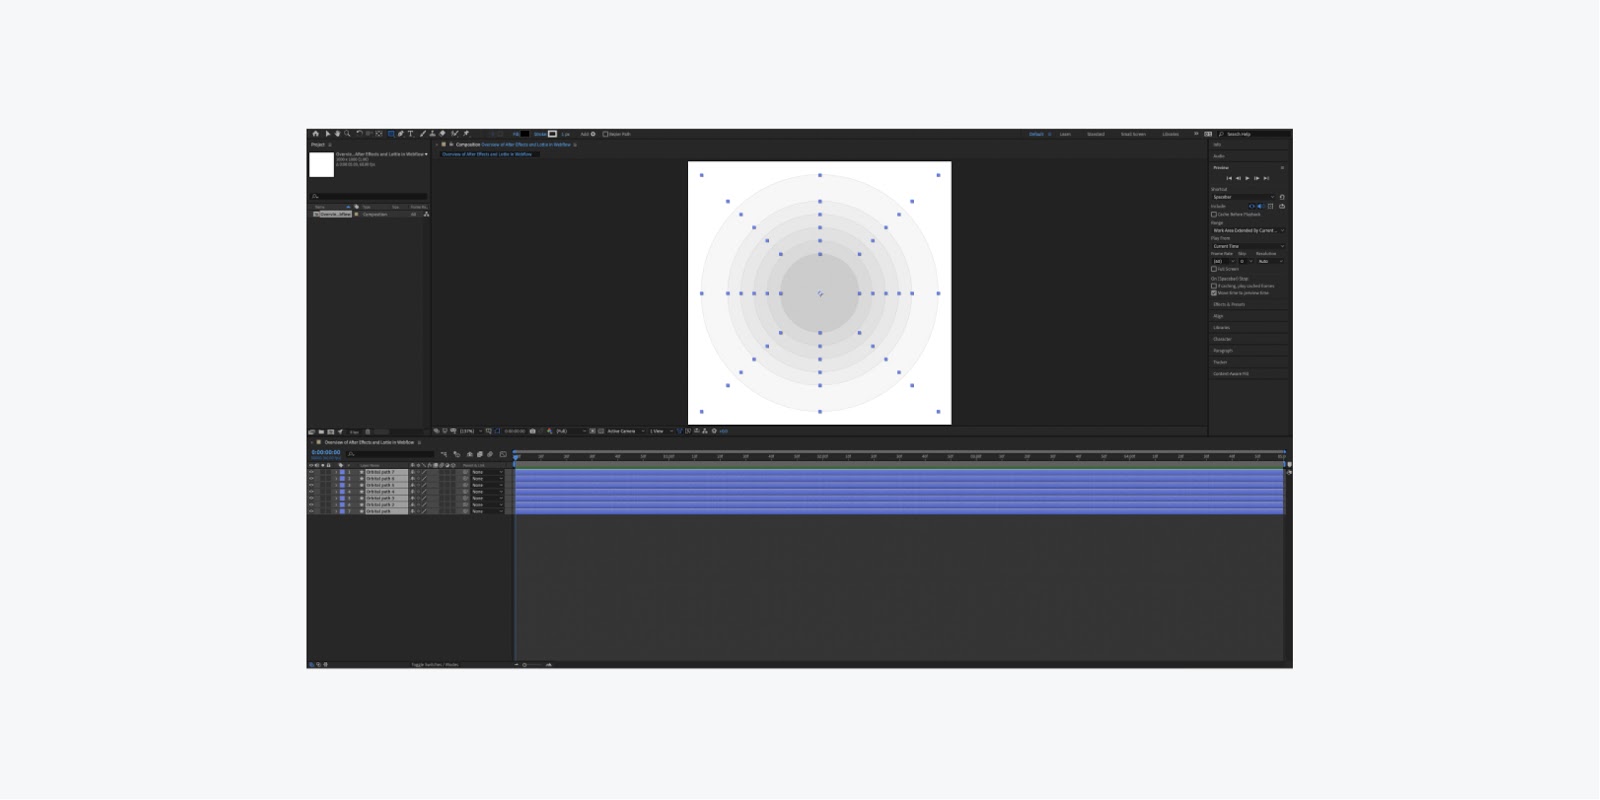
Next, press Command + A (on Mac) or Control + A (on Windows) to select all, and then we can just hit the dropdown arrow next to a layer to collapse all of them. This helps organize our paths for this example.
Now for the star. Rather than doing this from scratch, you can use one of the copied orbital paths you created (e.g., Orbital path 7) as a template.
Create a star:
- Select the recently copied layer (e.g., Orbital path 7)
- Press Command + C (on Mac) or Control + C (on Windows)
- Then press Command + V (on Mac) or Control + V (on Windows)
- Click the dropdown arrow of the copied layer
- Click the dropdown arrow of the Ellipse Path within the copied ellipse layer
- Reduce the Size to 40
- Click on the label (e.g., Orbital path 8) and press the return key
- Then, enter a name (e.g., Star)
You’ll use the same stroke color, but you want the fill to be a little bit different.
Let's go in and choose a color of white, with an opacity of 100%.
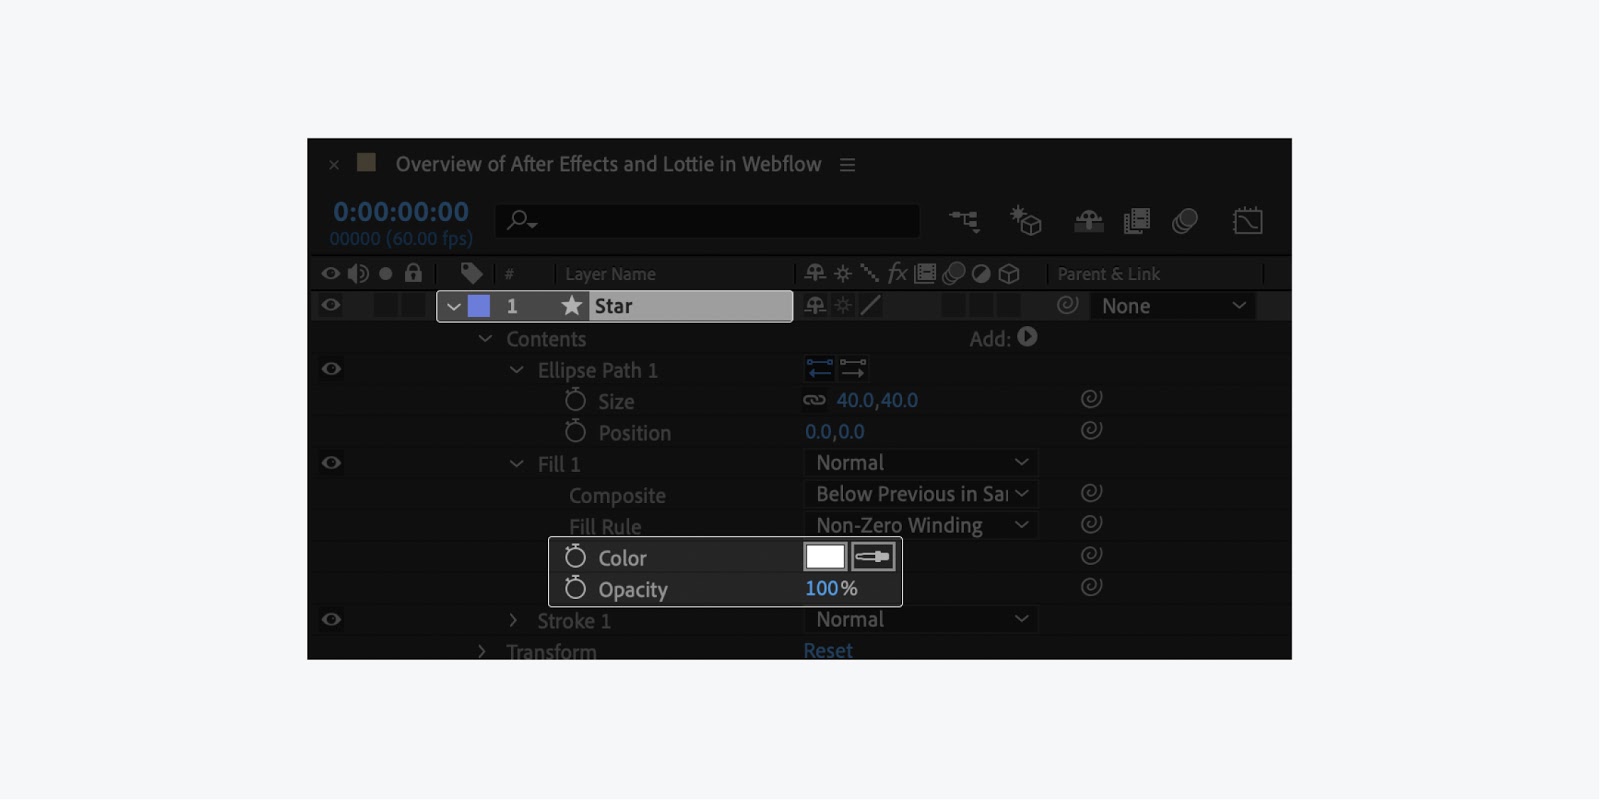
You'll use the same type of design for your planets, but there's a little bit of a difference with the planet.
Create a planet:
- Copy and paste the Star layer
- Name the copied layer (e.g., Planet)
- Within the Contents > Ellipse path of the copied layer: change the Size (e.g. change from 40 to 15)
- Within the Contents > Ellipse path of the copied layer: click and hold the first Position input (i.e. the x-axis) and drag the value until the Planet rests on the stroke of the first orbital path
Let’s create 6 more planets using your first planet as a template.
Creating more planets:
- Copy and paste the recently copied planet.
- Within the Contents of the copied layer: click and hold the first Position input (i.e. the x-axis) and drag the value until the Planet rests on the stroke of the next orbital path
Note: you can vary the Size difference of your copied ellipses to make the paths look more natural instead of reducing each by 100

Now that everything's placed correctly, you can adjust the rotation of your planets.
Adjust the rotation of the planet:
- Click the arrow of a planet layer to open the settings
- Within the Transform dropdown, click the stopwatch icon next to Rotation to place the first keyframe (making sure that you are at the beginning of the timeline at frame 0)
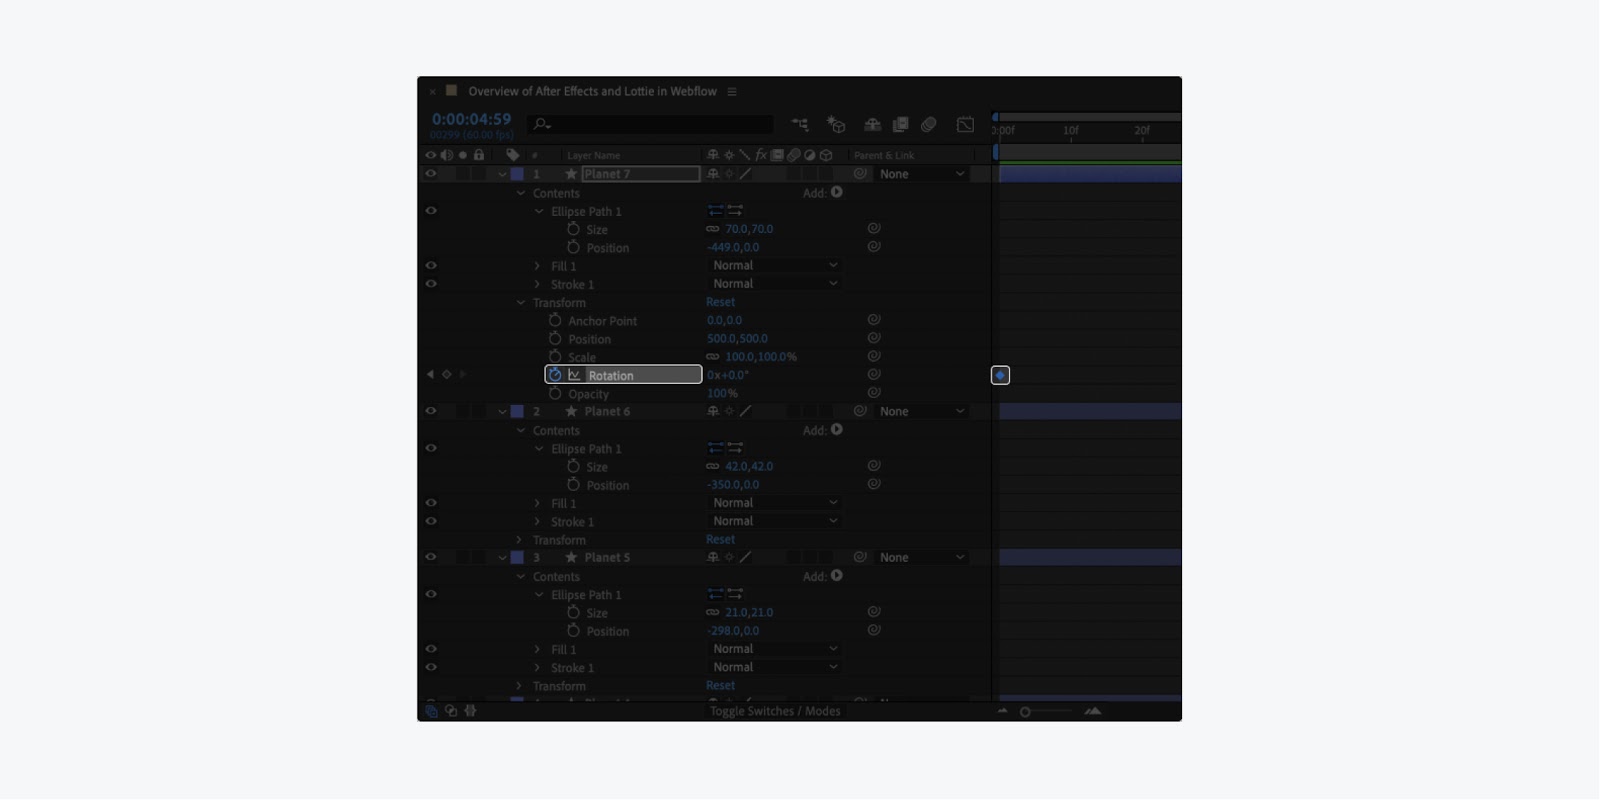
- Then, drag the timeline to the end
- Next, click the stopwatch next to Rotation icon to place the last keyframe (making sure that you are at the end of the timeline)
- Lastly, change the value of the Rotation. Entering a value in the first input sets the number of rotations, and entering a value in the second input sets the degrees within the rotation. (e.g. 1x70.0° will rotate 1 full rotation and 70 degrees)
Note: you can change the starting and ending Rotation values to what best suits your animation
Now you can create rotation animations for the other 6 planets by repeating the above steps. Once all of the planets have had keyframes and rotations added, pressing the space bar from the first frame will let you preview the animation.
Export
You’ve built your animation, now you can export it.
You’ll use a plugin called Bodymovin (learn how to nstall the Bodymovin extension) to take your After Effects composition and turn it into a single JSON file. If the Bodymovin extension is already installed, you can find that extension in your After Effects menu by clicking Window, hovering over Extensions, and selecting Bodymovin.
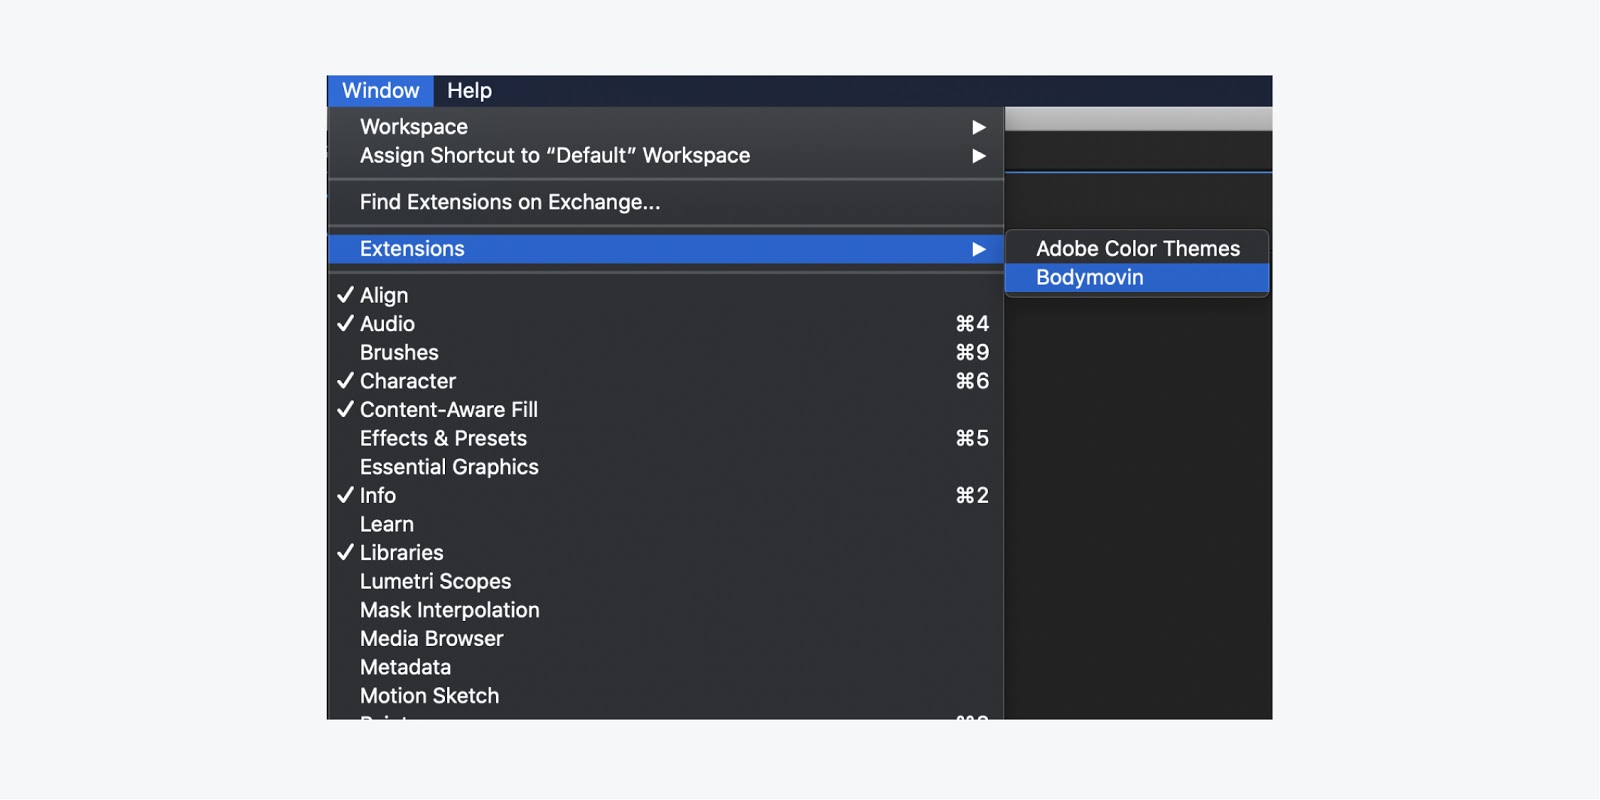
To export, make sure your composition is selected, set a destination folder where the export will save the file, and press render.
Bring the animation into Webflow
Now to import your exported file.
Import your After Effects animation into Webflow:
- Access your Webflow project in the Designer
- Click the Assets icon, or press J on your keyboard, to open the Assets panel
- Click the Upload button and select your After Effects animation, or drag your After Effects JSON file into the Assets panel
- Drag your animation into the canvas of your project
When you preview the project by clicking on the Toggle Preview icon (the eye icon), you’ll notice that the animation begins playing automatically. Next, you can create an on-click trigger to begin the animation when it is clicked.
Configure an interaction trigger
This is the big part. We're going to set up an on-click trigger. Learn more about triggers and animations.
To set up the trigger:
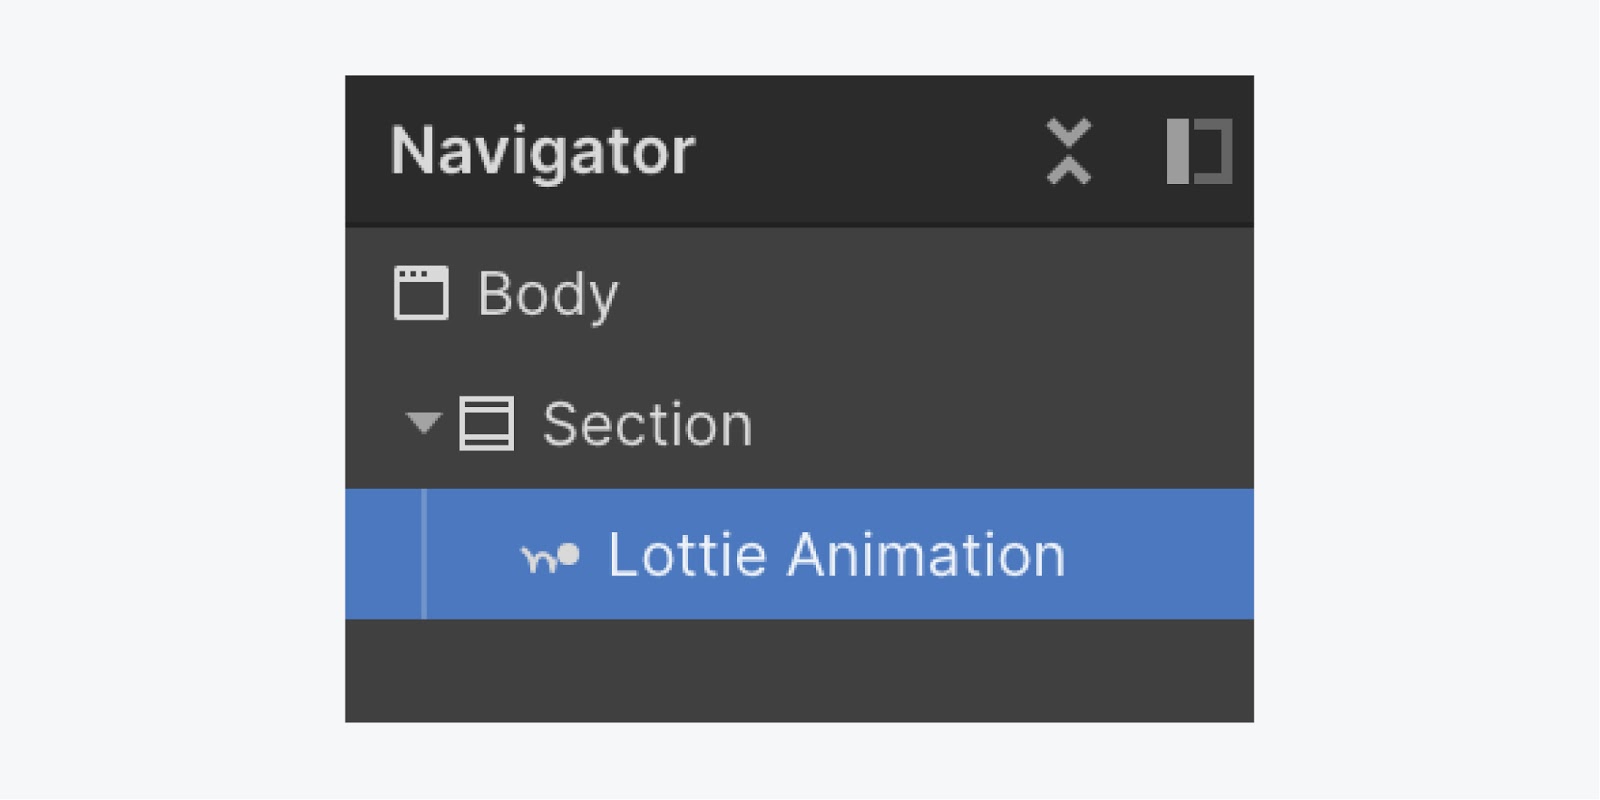
Select the animation element in the Navigator
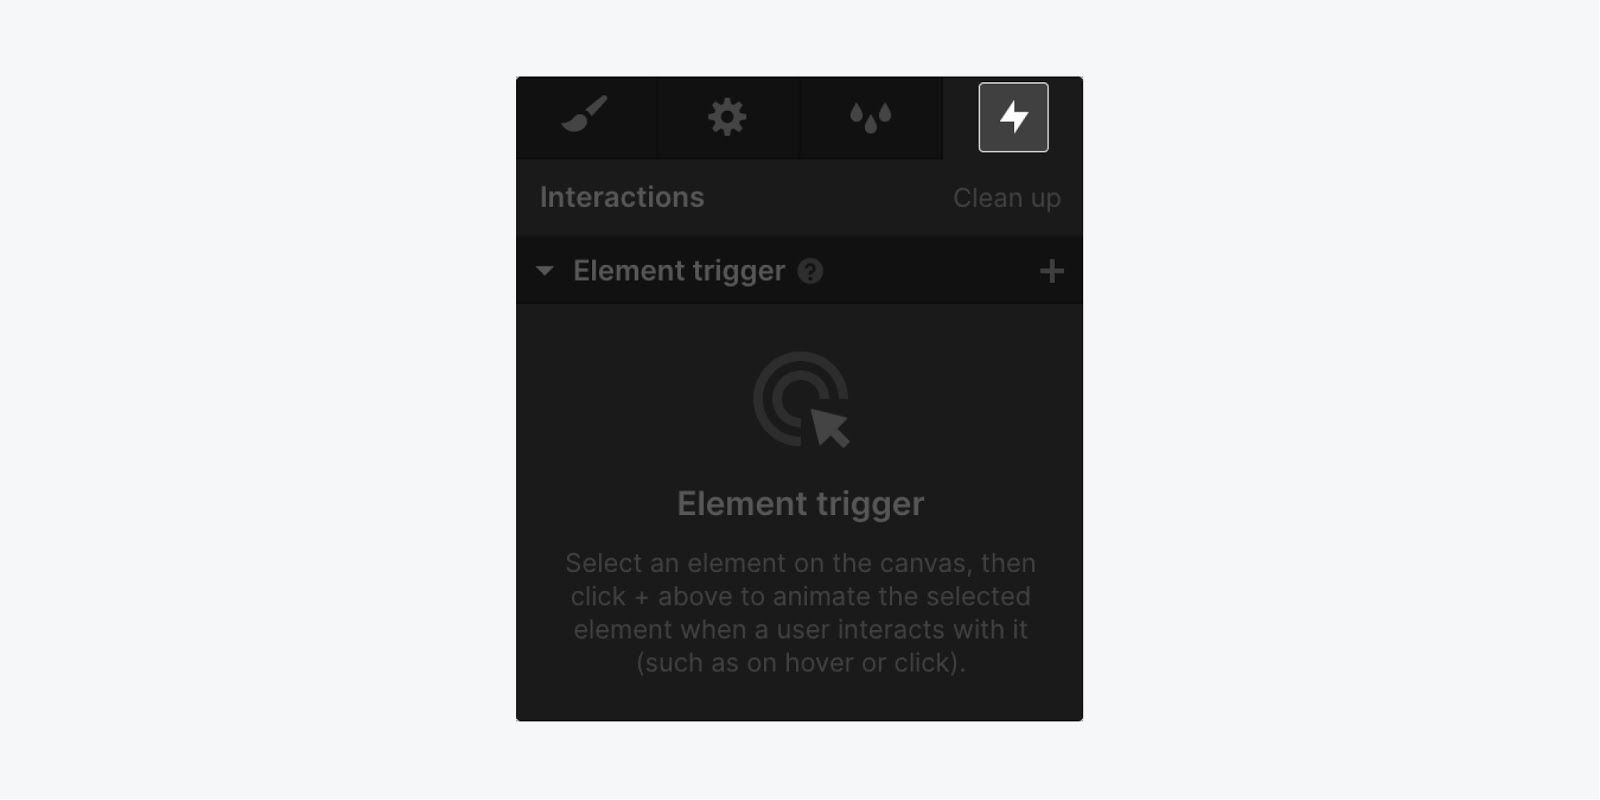
Click the Interactions icon, or press H on your keyboard, to open the Interactions panel
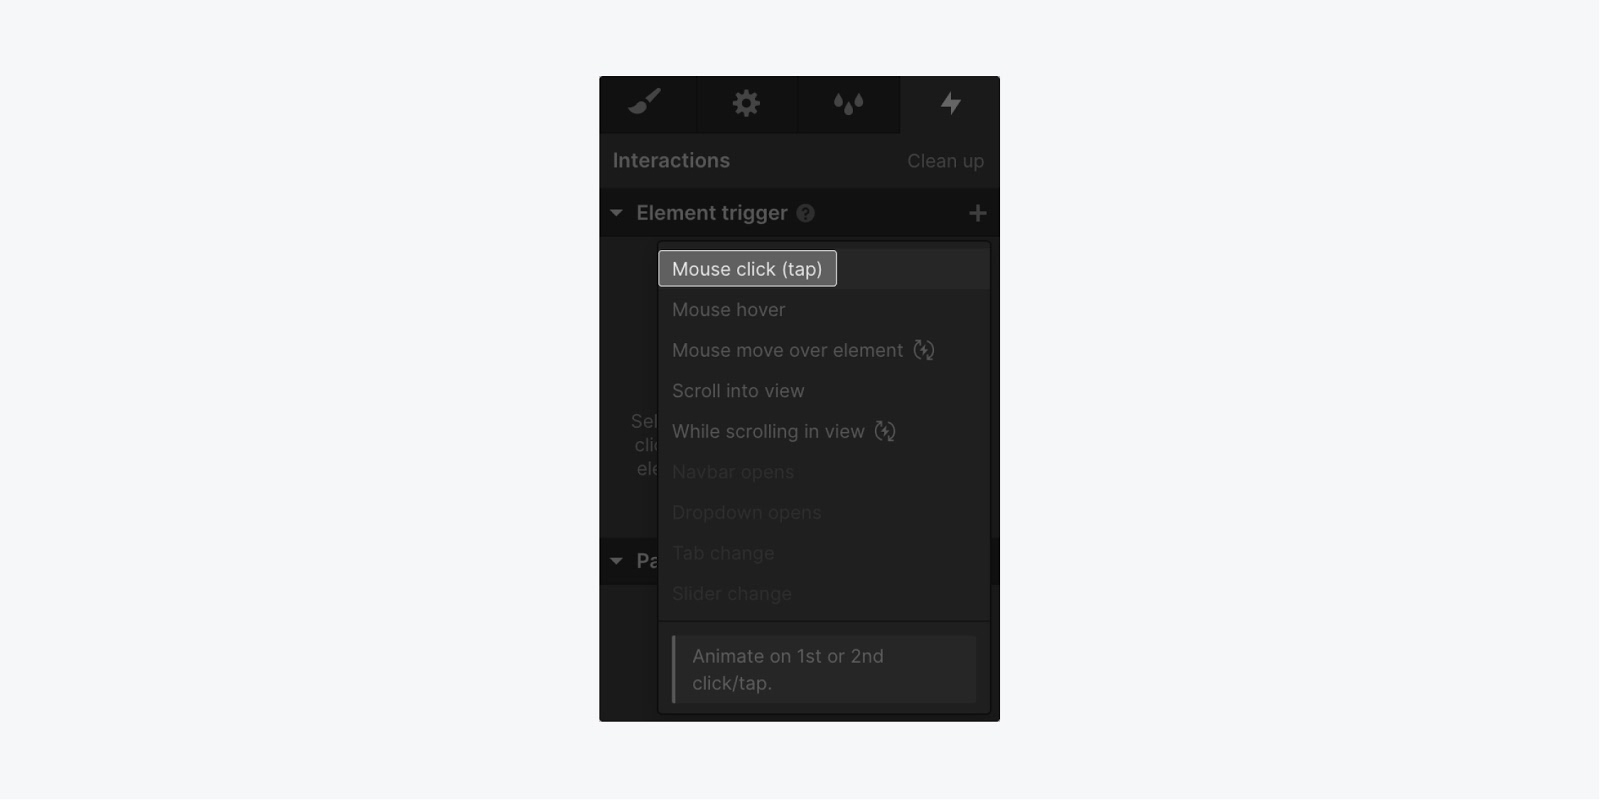
Click the plus sign (+) and select the Mouse click (tap) option
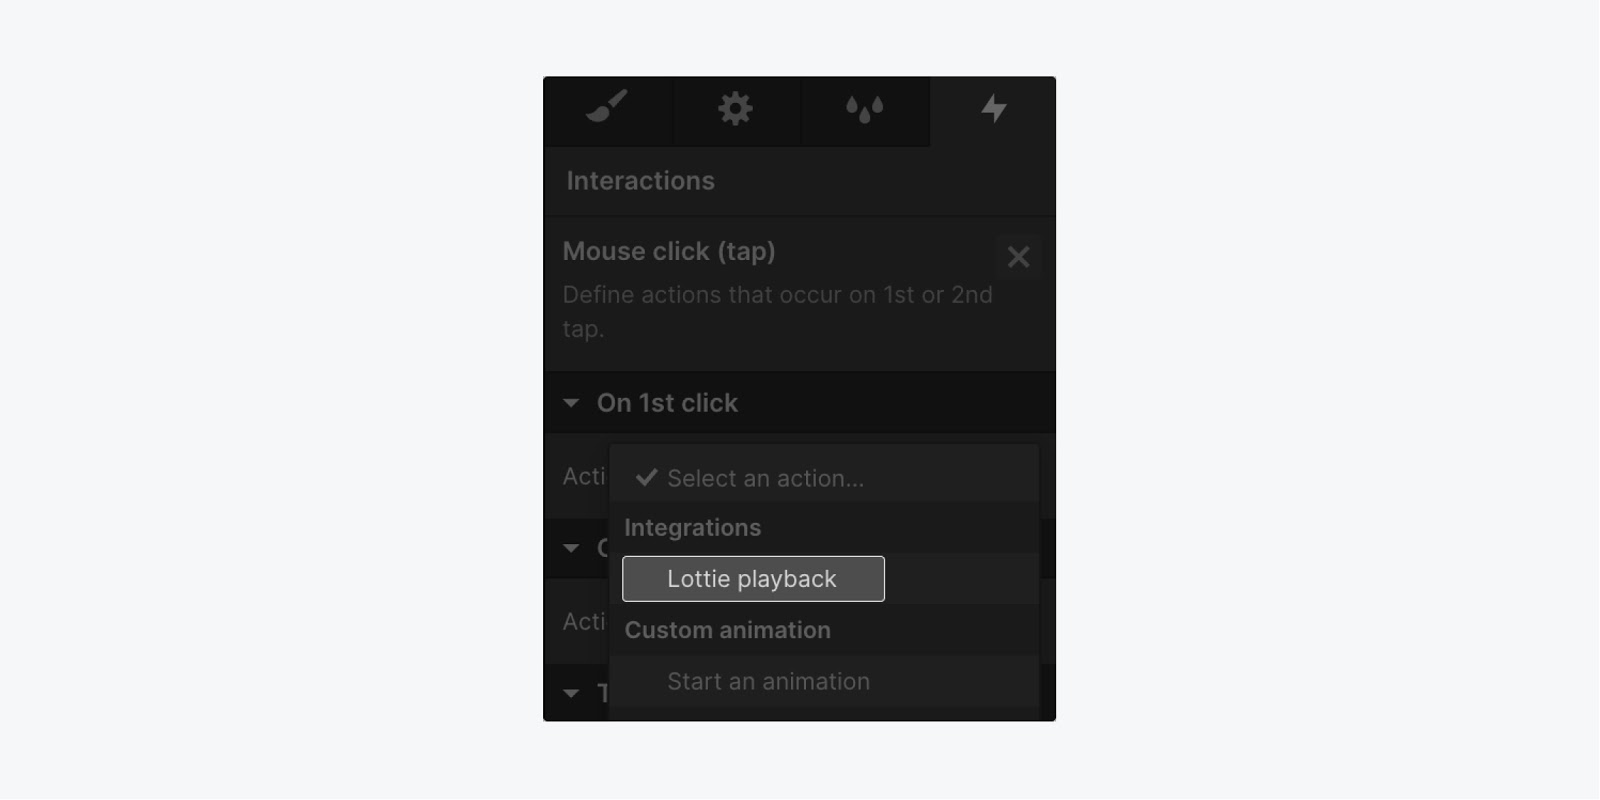
Within the On 1st click dropdown: select the Lottie playback option
Exit out of the interaction, and publish your project to test your animation
Now, there are trillions of things you can do with this. So, feel free to learn more about After Effects, triggers, and animations to bring your project to life.


