Logic is currently in beta and available to any interested customers. Sign up to join the beta.
Hubspot is a popular Customer Relationship Management (CRM) platform where you can track customer data and streamline sales and marketing efforts. With Logic, you can send contacts from a form submission directly to Hubspot and link your Webflow site to your CRM.
Before you get started: If you haven’t already, set up a Hubspot Account. You’ll also need to add a form to your Webflow site with fields that correspond to the fields you’ve set to required in Hubspot.
In this lesson, we’ll cover:
- How to create your Hubspot API key
- How to set up your Logic flow’s authentication
- How to find your Hubspot API documentation
- How to set up your HTTP request
- How to test and publish your flow
- How to troubleshoot issues with your flow
How to create your Hubspot API key
Note: Hubspot offers 2 authentication methods (i.e., OAuth and private app access tokens). This lesson will cover the private app access tokens method.
- Go to your Hubspot account and create a private app, if you haven’t already
- Click the Scopes tab and choose what you’d like to do with this API key under the CRM dropdown (at minimum, you’ll need to select crm.objects.contacts.write to send contacts to Hubspot)
- Click Show token and copy your API key
How to set up your Logic flow’s authentication
- Open your site in the Webflow Designer in a new tab
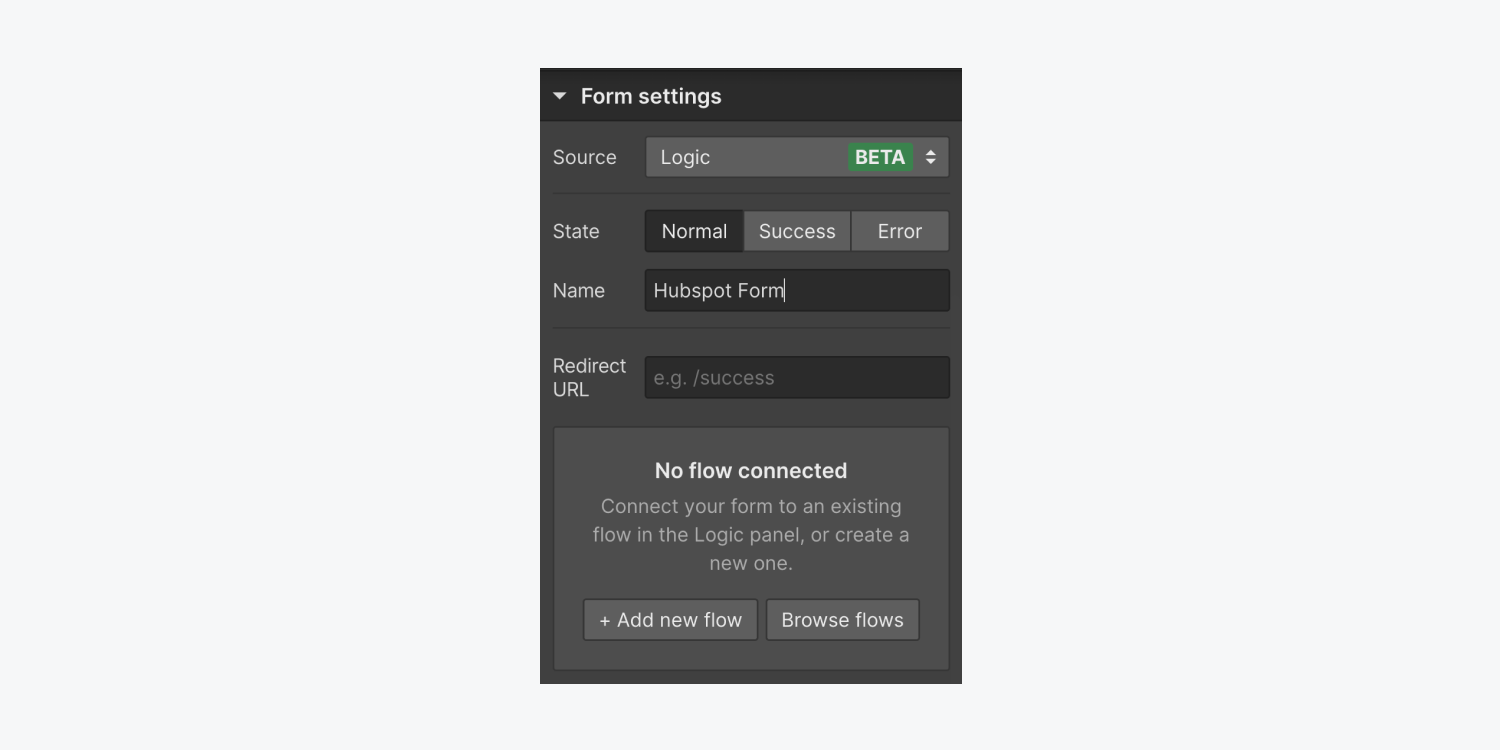
- Select your form on the Designer canvas and open Form settings
- Click the Source dropdown and choose Logic
- Click Add new flow
- Give your new flow a name (e.g., “Create contacts in Hubspot”) in the Name field and add a description to the Description field if you’d like
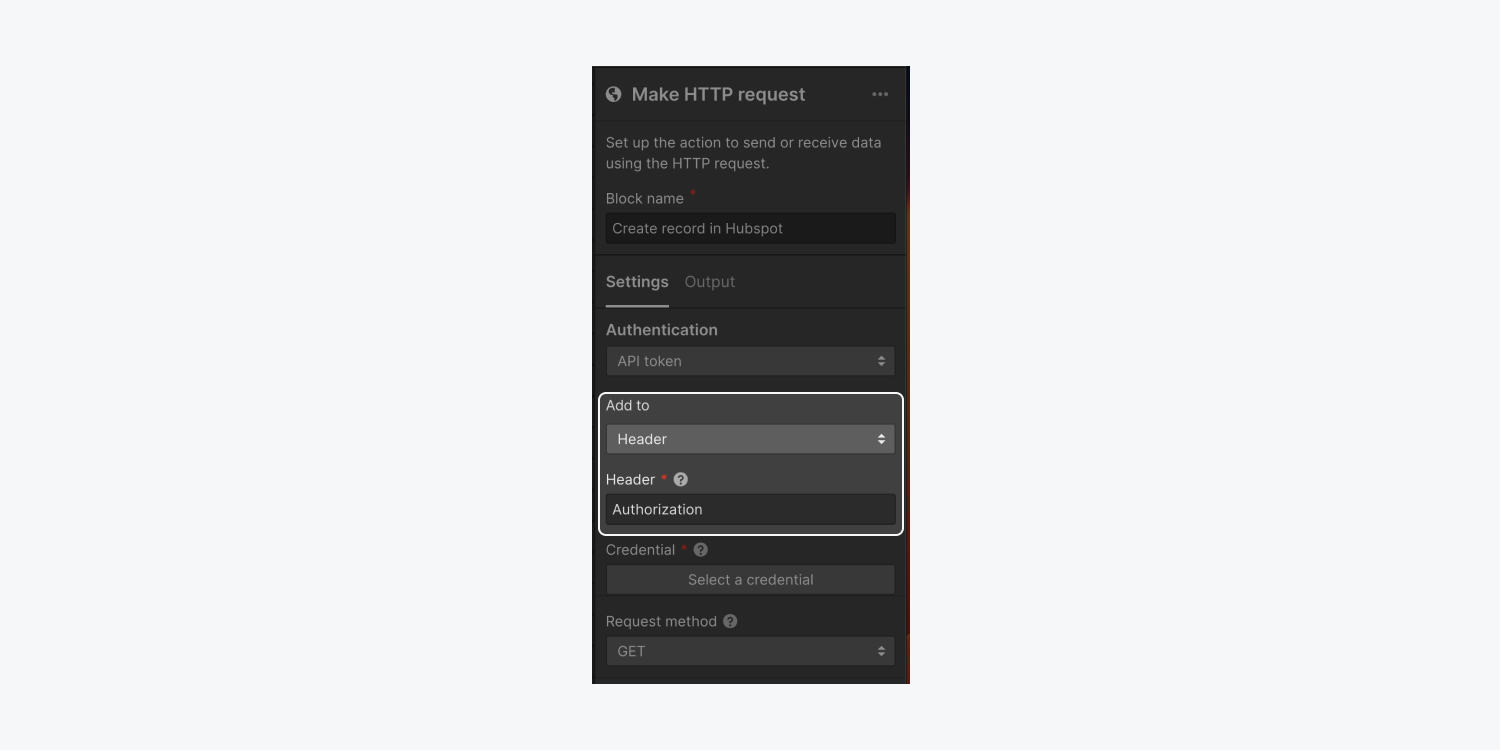
- Drag a Make HTTP request block to the flow editor canvas and give it a name (e.g., “Create new contact in Hubspot”)
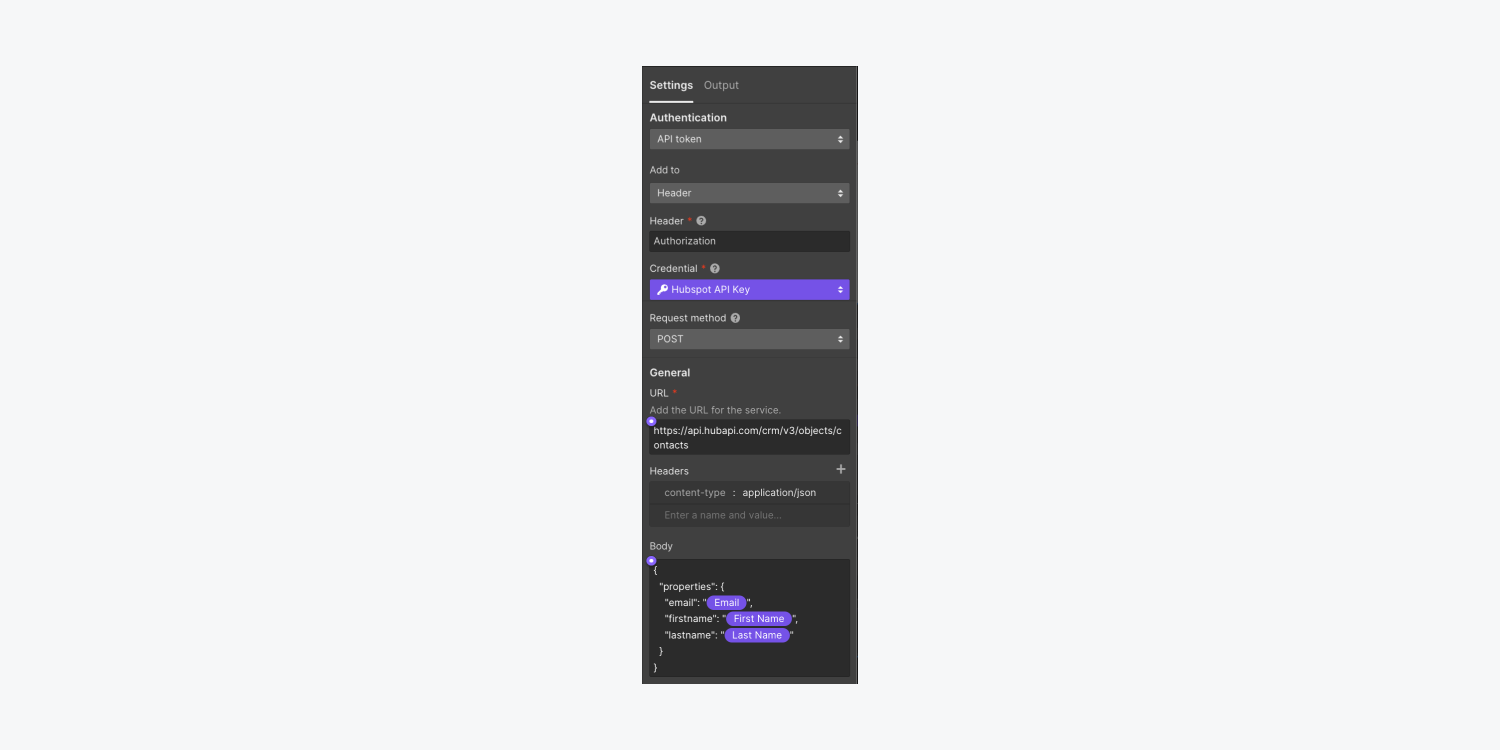
- Choose API token from the Authentication dropdown
- Choose Header from the Add to dropdown
- Enter “Authorization” in the Header field
- Click Select a credential > Add new credential
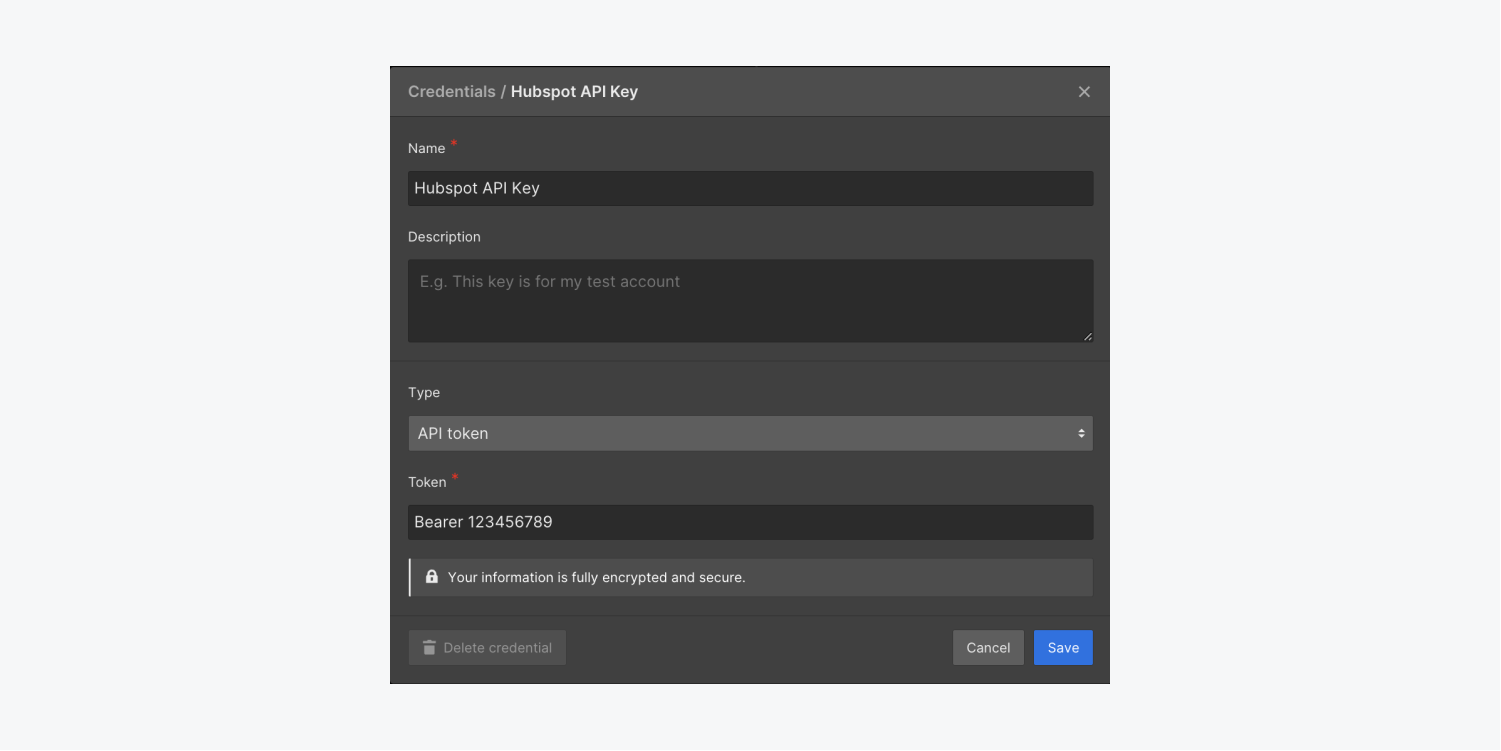
- Give your API token a name (e.g., “Hubspot API token”) in the Name field and add a description to the Description field if you’d like
- Enter “Bearer {API key}” in the Token field, replacing the {API key} with the API key you copied from Hubspot
- Click Create to save your new credential and keep this tab open!
Pro tip: You can also connect your form to a new Logic flow from the Logic panel > Flows tab. Learn more about form submission triggers in Logic.
How to find your Hubspot API documentation
- Go to the Hubspot API reference documentation
- Scroll down to CRM in the left panel
- Go to Objects > Contacts > Create contacts and keep this tab open for reference!
How to set up your HTTP request
Now that you’ve created your Logic flow and Hubspot authentication credentials, you’ll need to return to Webflow and set up an HTTP request in your flow. The HTTP request you configure in this step will create a new contact in Hubspot each time a site visitor submits your form.
Note: If you closed the tab where your Webflow site was open, go to Logic panel > Flows tab and choose the flow you set up in the previous steps. Select the Make HTTP request block on the flow editor canvas to open block settings and complete the following steps.
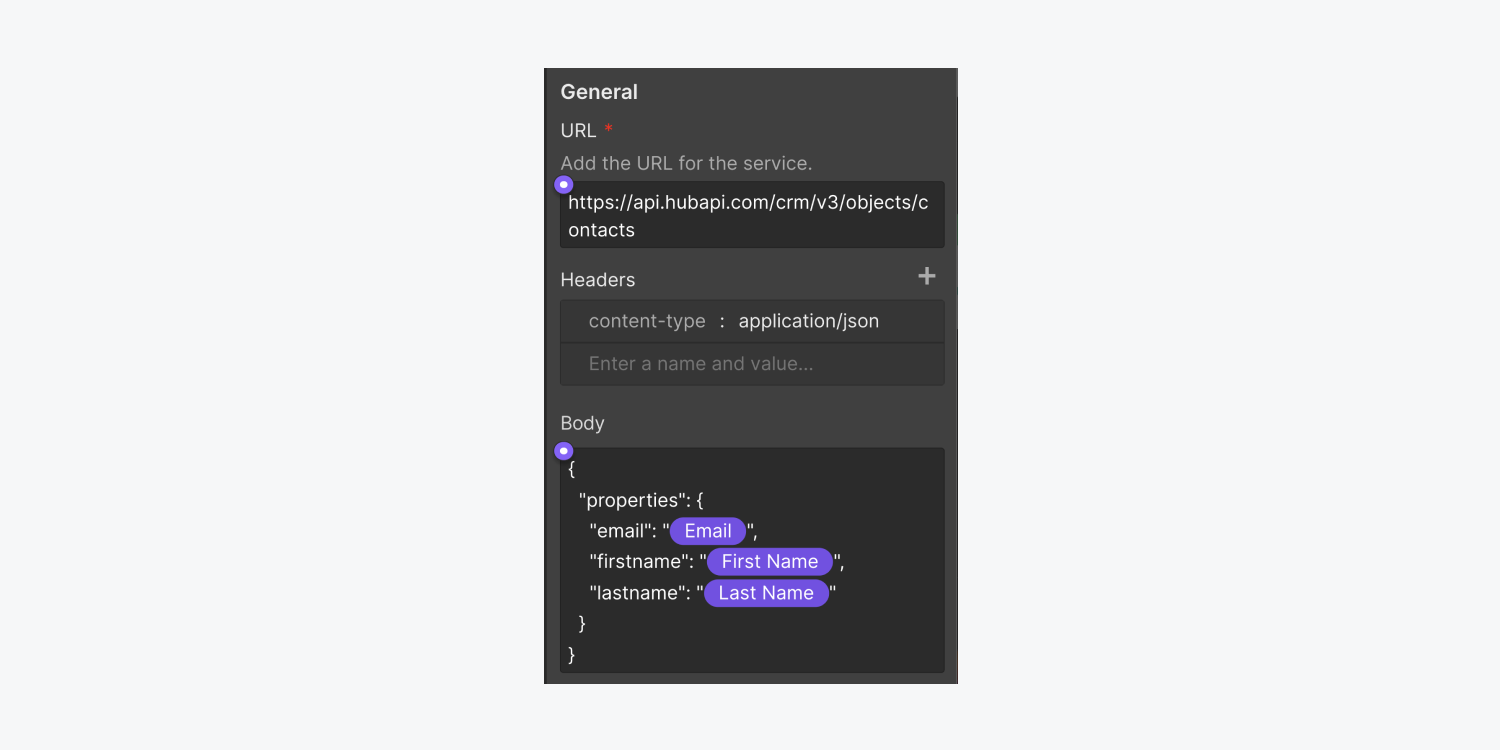
- Click the Request method dropdown and choose POST.
- Paste “https://api.hubapi.com/crm/v3/objects/contacts” in the URL field
- Click the “plus” icon next to Headers to create a new header
- Enter “content-type” in the Name field and “application/json” in the Value field
- In the Body field, paste the code block for creating contacts from Hubspot’s API documentation — it will resemble this (but contain properties from your Hubspot contacts):
Then, you’ll need to add dynamic data to your HTTP request to capture information from your form submissions:
- Delete the values from your Hubspot contacts and place your cursor between the empty quotation marks in the Body field
- Click the purple “dot” icon and select the corresponding dynamic form field (e.g., name, email, etc.)
How to test and publish your flow
- Click Run test to complete setup
- Enter sample values in the corresponding input field
- Click Run test
- Click Cancel or Apply data to exit the test modal
- Click Apply changes and check “Turn the flow on after applying changes,” then click Apply changes again
- Publish your site
Note: If you receive an error message while testing your flow, follow our troubleshooting steps, then retry the above steps. Learn more about testing HTTP requests.
How to troubleshoot issues with your flow
If you’re receiving an error when testing your flow, try the following:
- Make sure you entered “Bearer” (and a space) before your API key when setting up your credentials (e.g., Bearer 123456789)
- Check for errors in your request body using a free tool like JSONLint


