You can use Lottie animations in your site designs to make them interactive and engaging. Then, control the animation’s playback with Lottie element settings and interactions.
In this article, you’ll learn:
- How to get Lottie JSON and dotLottie animation files
- How to add animations to your website
- How to adjust animation settings
- How to control the animation with interactions
How to get Lottie JSON and dotLottie animation files
You can upload Lottie animations to your site in the form of Lottie JSON or dotLottie files.
There are 2 ways to get a Lottie JSON file:
- Export an After Effect animation as a JSON file with the free After Effects bodymovin plugin
- Download JSON animation files from Lottiefiles.com (or another online animation library)
There are 3 ways to get a dotLottie file:
- Convert your existing Lottie JSON file to dotLottie using the JSON to dotLottie conversion tool
- Export a dotLottie file directly from After Effects using the LottieFiles plugin
- Download a prebuilt dotLottie file from LottieFiles.com.
Other resources
- Learn how to create animations for Lottie in After Effects
- Learn about After Effects features supported by Lottie
- Learn more about After Effects and Lottie in Webflow
How to add animations to your website
You can use Lottie JSON or dotLottie animations as icons, thumbnails, page backgrounds, page loaders, custom animated cursors, and much more.
To add Lottie JSON and dotLottie files to the Assets panel:
- Click the “Assets” icon in the left toolbar
- Click the “cloud” upload icon
- Select 1 or multiple files from your computer
Then, you can add the animations to your site. You can either drag and drop them directly from the Assets panel onto the canvas, or you can use the Lottie animation element. To use the Lottie animation element:
- Go to Add panel > Media section
- Drag the Lottie animation element onto the Webflow canvas
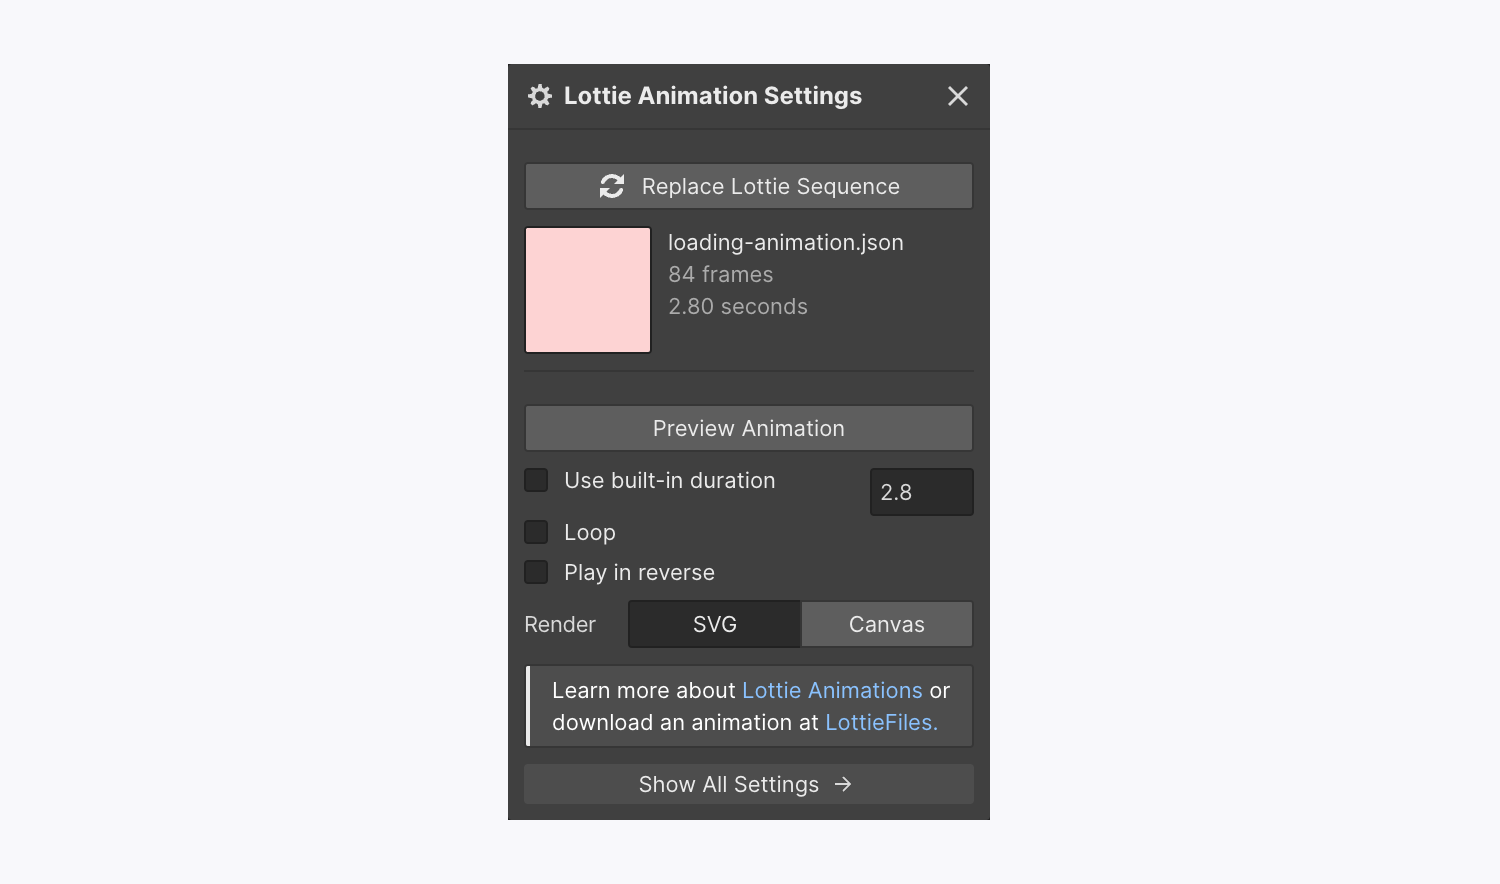
- Click Replace Lottie sequence in the Lottie animation element settings
- Select your Lottie JSON or dotLottie file from the Assets panel
How to adjust animation settings
The Lottie animation element settings control how the animation plays on the site page. To adjust the settings, select the Lottie animation element and go to Element settings panel > Lottie animation settings. Then, you can adjust the animation’s settings for:
- Built-in duration — how long the animation plays
- Loop — whether the animation plays on an infinite loop
- Play in reverse — whether the animation plays in reverse
- Render — SVG or canvas

Pro tip: By default, all animations play as the page loads. That means that page visitors won’t see an animation playing below the fold (i.e., the part of the page visitors must scroll to see) unless you set the animation to loop or control the animation’s playback with interactions.
How to control the animation with interactions
You can control your Lottie animations with interactions to adjust how and and when the animations play. Interactions let you set triggers to initiate the animation, choose what portion of the animation to play, and choose where to stop the animation playback.
There are 2 available interactions for Lottie animations:
- The Lottie playback animation
- The Lottie action
Note that these interactions are only available for Lottie animations.
Note: If you need to adjust the duration/speed of the animation, you can do so through the Lottie animation settings section in the Elements settings panel. Note that settings in the Lottie animation settings section will be overwritten by Lottie playback settings in the Interactions panel.
Pro tip: By default, all animations play as the page loads. That means that page visitors won’t see an animation playing below the fold (i.e., the part of the page visitors must scroll to see) unless you set the animation to loop or control the animation’s playback with interactions.
Example 1: Play an animation on click
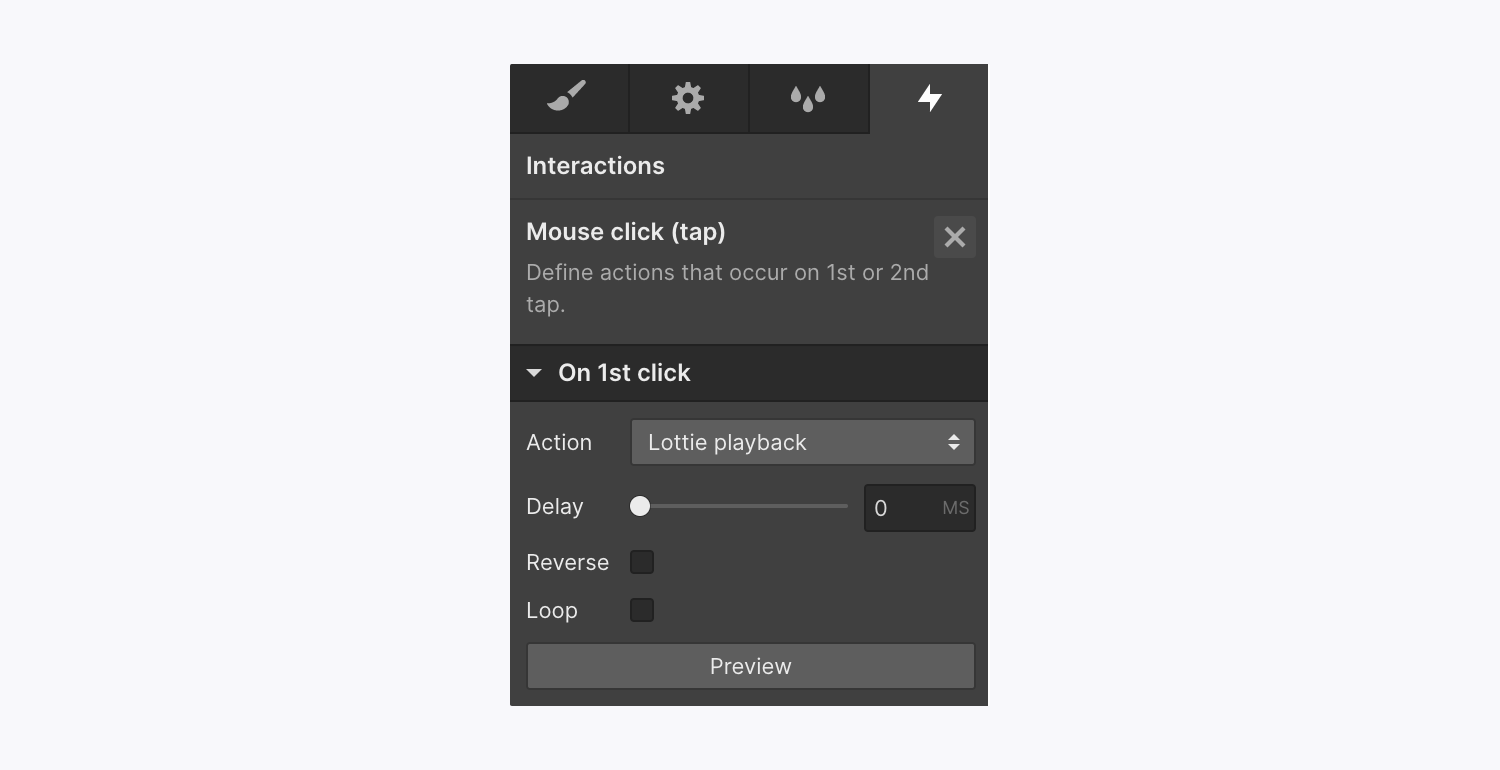
With interactions, you can set an animation to play when a user clicks on it:
- Select your Lottie animation element on the canvas
- Go to Interactions panel
- Click the “plus” icon next to Element trigger
- Choose “Mouse click (tap)”
- Click “Select an action” next to Action in the On 1st click section
- Choose “Lottie playback” under Integrations
You can also choose to delay the playback, reverse the animation, or set the animation to loop.

Example 2: Play an animation when it scrolls in and out of view
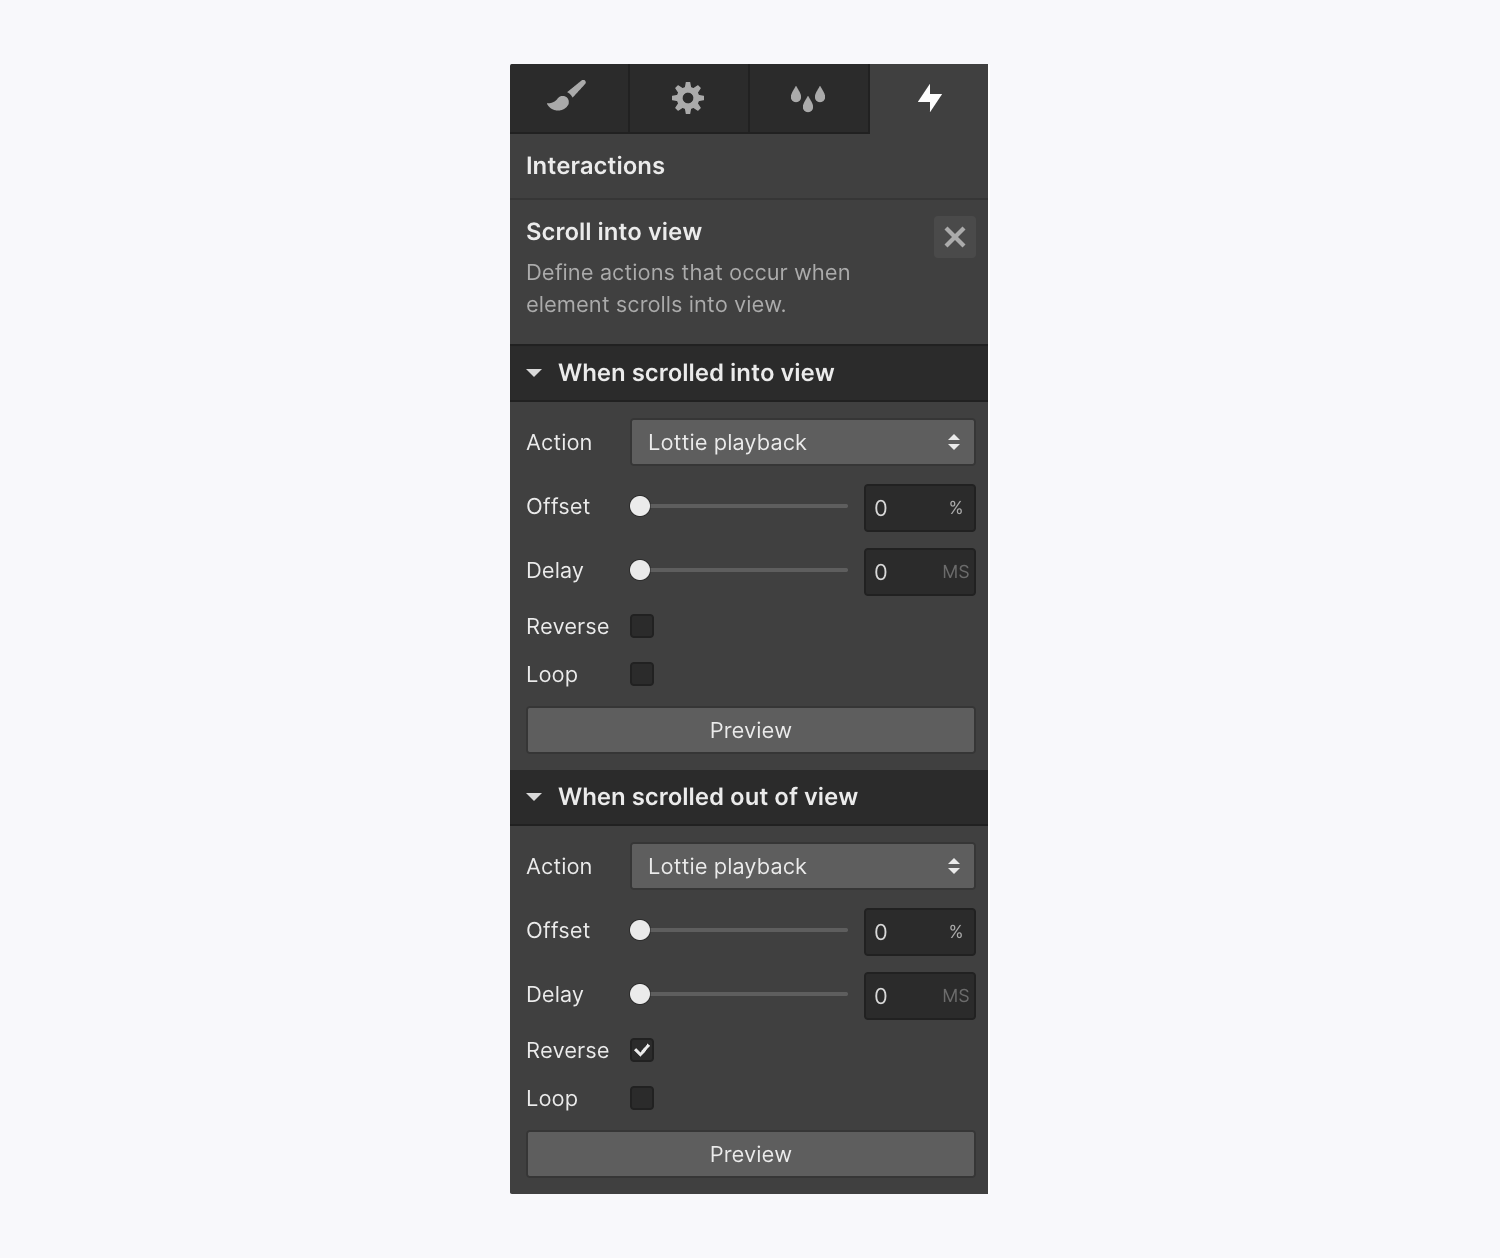
You can also set your animation to play when it scrolls into and out of view in the viewport:
- Select your Lottie animation element on the canvas
- Go to Interactions panel
- Click the “plus” icon next to Element trigger
- Choose “Scroll into view”
- Click “Select an action” next to Action in the When scrolled into view section
- Choose “Lottie playback” under Integrations
- Click “Select an action” next to Action in the When scrolled out of view section
- Choose “Lottie playback” under Integrations
- Check the Reverse checkbox
You can also set an offset or a delay.

Example 3: Play a part of the animation on page load
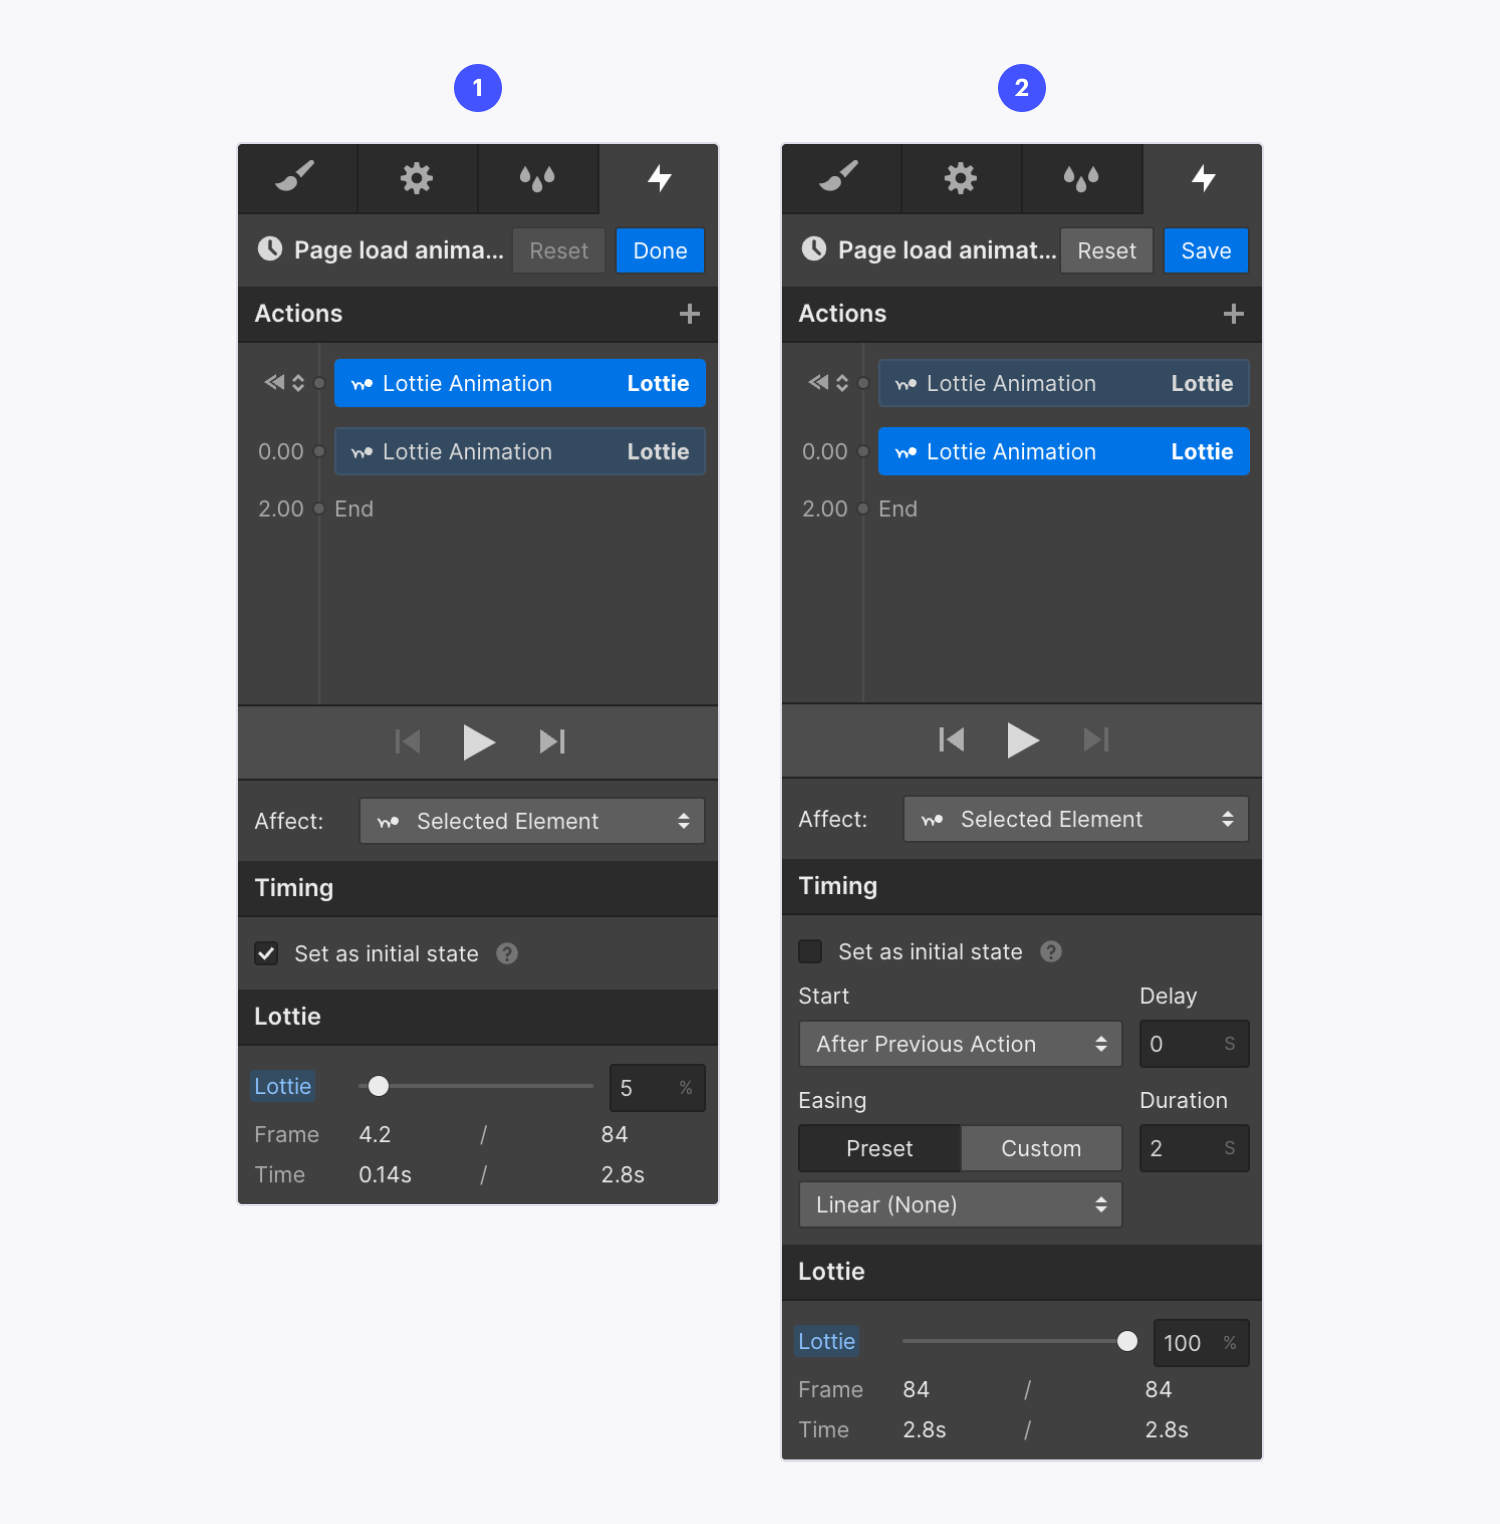
You can use the Lottie action interaction for more control over how your animation plays. Then, you can set custom start and end frames, apply easing effects, and set a custom duration.
To adjust the start or end frames of your animation:
- Select your Lottie animation element on the canvas
- Go to Interactions panel
- Click the “plus” icon next to Page trigger
- Choose “Page load”
- Click “Select an action” next to Action in the When page starts loading section
- Choose “Start an animation” under Custom animation
- Click the “plus” icon next to Timed animations
- Name your animation (e.g., “Page load animation”)
- Click the “plus” next to Actions
- Choose “Lottie” under Integrations
- Adjust the Lottie frame under the Lottie section if you want to have the animation start at a different frame
- Check the “Set as initial state” checkbox under Timing
- Click the “plus” next to Actions
- Choose “Lottie” under Integrations
- Set the Lottie frame under the Lottie section to have the animation stop at a certain frame (e.g., if you want the animation to play all the way to the end frame, set it as 100%)
- Click Save
You can also adjust the animation’s duration, delay, or easing.


