The parallax effect creates an illusion of depth and perspective. You can achieve it by moving visual elements at different speeds. Creating animations using the parallax effect can serve many purposes, and enables your visitors to engage with your site’s content in various ways, for example showing how something works or highlighting the anatomy of a product. Or it can create a visual effect that keeps your site’s visitors surfing for longer. Webflow’s new Interactions 2.0 makes integrating such animations in your website a snap, without you having to write a single line of code.
In this lesson:
- Create the initial set up
- Define the animation
- Define the scroll animation
- Preview the animation
- Add more animations
- Turn the animation off for devices
Pro tip — Illusion of depth
Simulate a credible 3D space by following depth perception principles. These include the size and position of elements and various shadow distances. Even blur effects can be used to simulate depth of field.
Create the initial setup
Step 1. Add a section
First, let’s create a section that can be scrolled into and out of view. Drag a Section element onto the canvas from the Elements panel found on the left. Place it below the fold and also above the other sections.
Step 2. Set the section
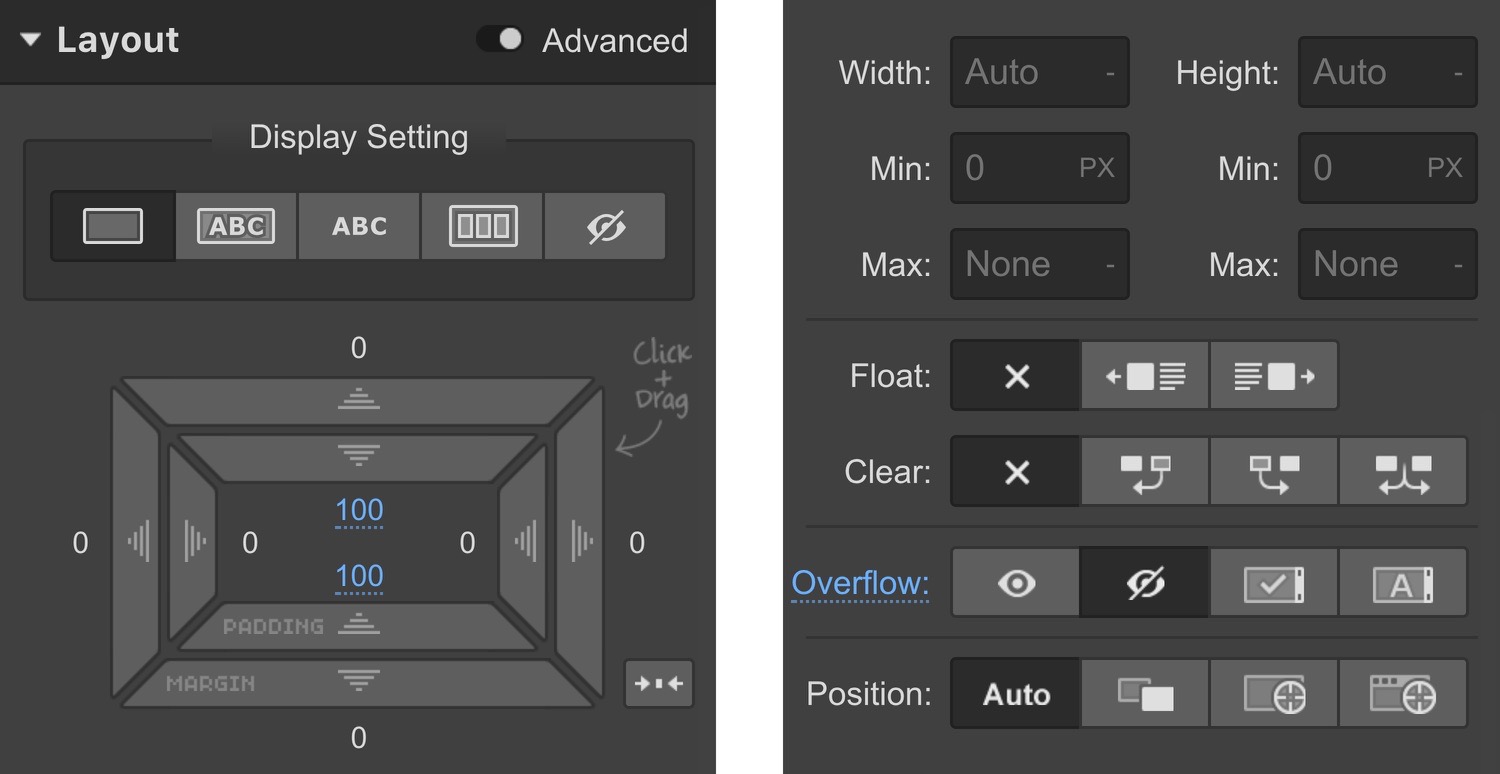
While the section is selected, in the Style panel on the right, add some top and bottom padding. Also, set the overflow to hidden to keep the content within the bounds of the section.
Step 3. Add a container
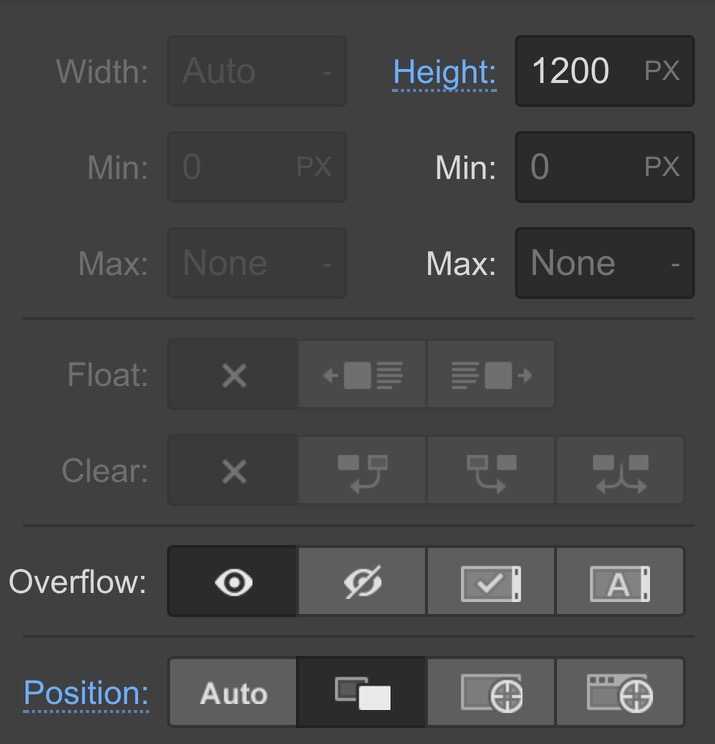
Drag a Container element from the Elements panel and drop it inside the section. Set its height to 1200px and its position to relative. This will enable you to position images absolutely within the container.
Step 4. Bring in images
Drag an image from the Assets panel into the section. Set an appropriate width and repeat the procedure for all images. Since you want to create an illusion of 3D space, make sure you take that into consideration when setting image dimensions.
Good to know
You can set the width of an image in the image settings modal. To open it, either double-click the image or click the cog icon next to the image label. The image Settings are also located in the Element Settings panel on the right of the Designer. You can access them by selecting the image and pressing D on your keyboard.
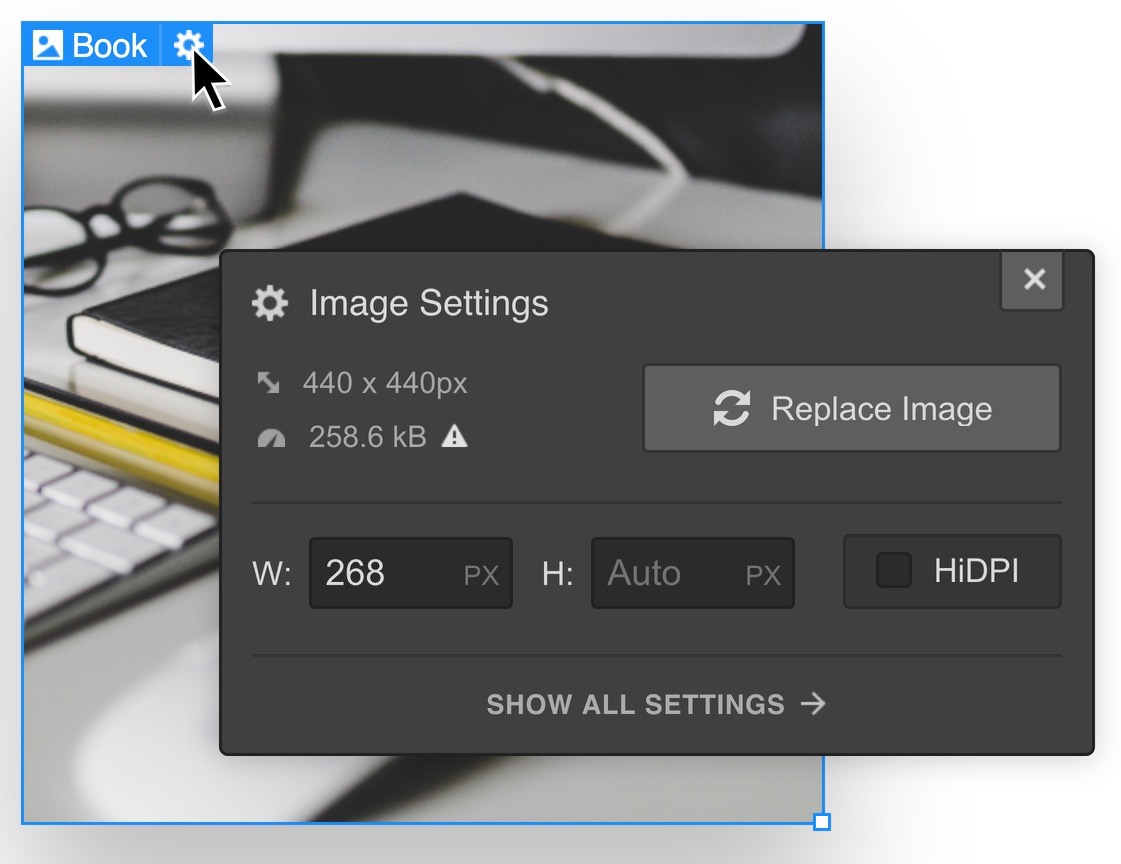
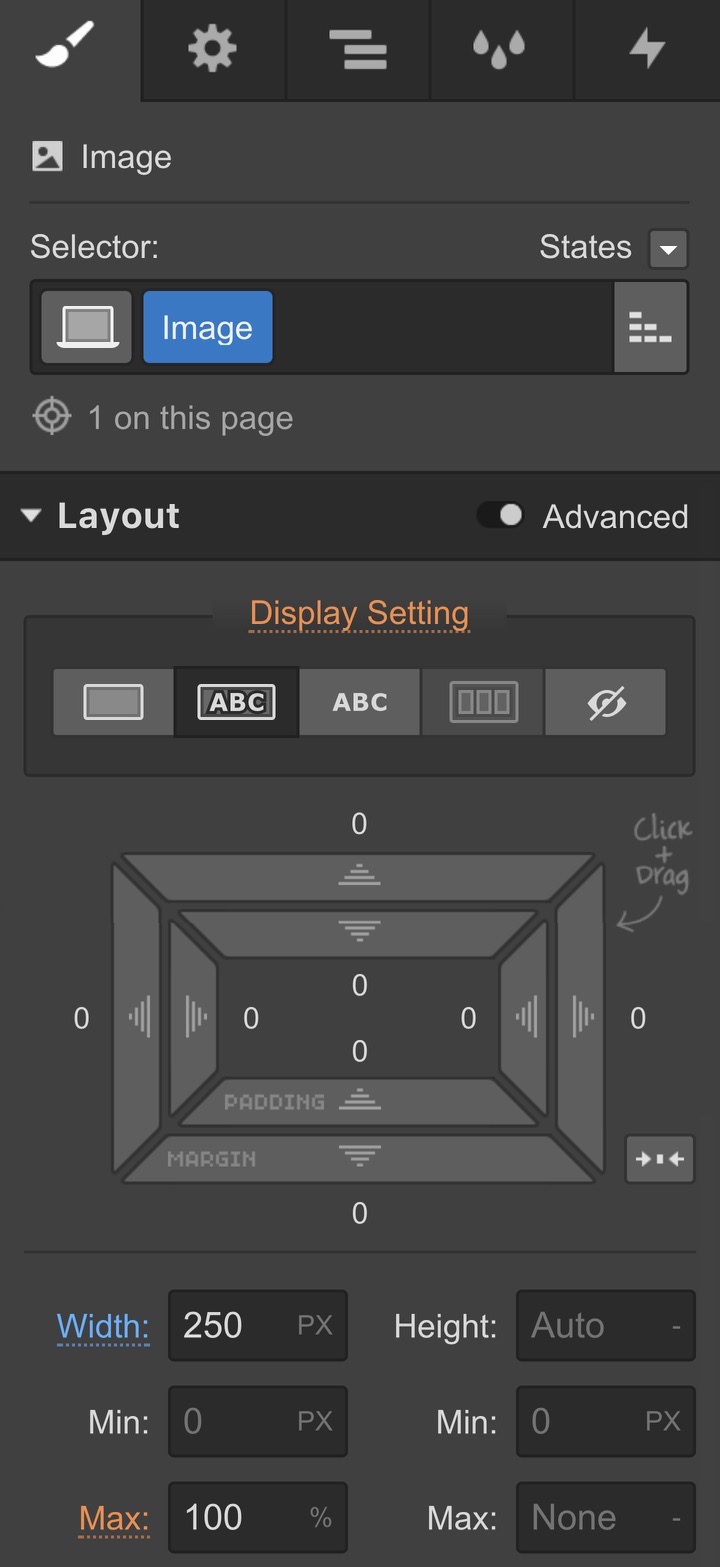
Setting the image size in the image settings will apply the values to that image on all device breakpoints. To set different dimensions for an image on different devices, set the width through the Style Panel.
Step 5. Style the images
Add a drop shadow to each image. Make sure all images have the same shadow angle. Change the color and opacity of the shadow. Set its distance from the image boundaries. Add some blur and set the size or spread of the shadow relative to the image boundaries as well.
Step 6. Position the images
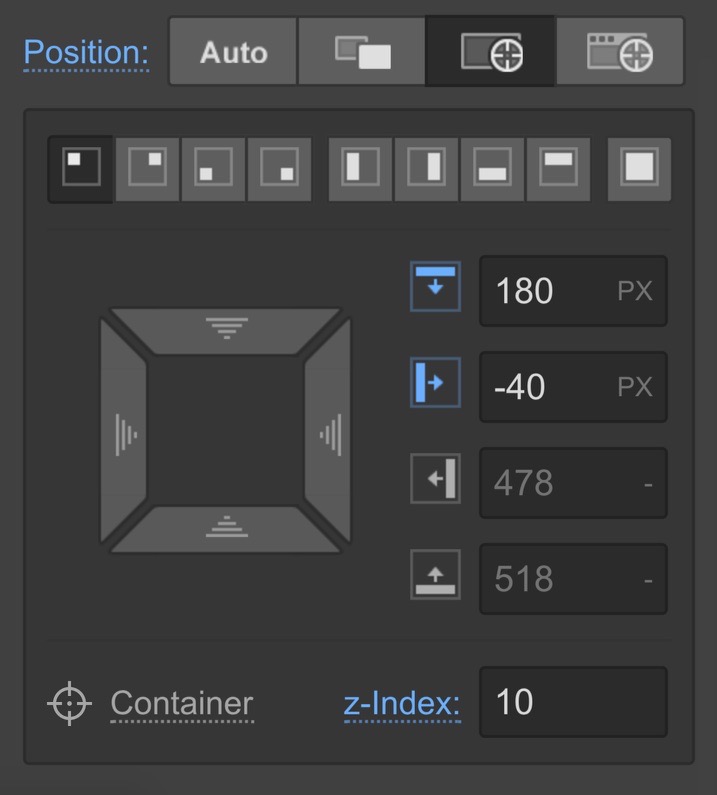
The next task is to set the position of each image to absolute. Then position each image by changing any of the position values using the UI, or by manually typing them in each input. Specify a z-index for images. Set a higher z-index for those images that you want to appear closer and also overlap any images that appear in the background.
Define the animation
Understanding the animation helps you identify the trigger and action that you need to define in order to achieve the aim you have in mind.
In this animation, you want to animate the images when the section (an element) scrolls through the viewport. So, the trigger is an element trigger of while scrolling in view. And the action will be an on scroll animation.
Step 7. Set the trigger
Now that you’ve identified the elements of your interaction, you can start creating it. Select the section that contains the images you created. Open the Interactions panel and create an element trigger of while scrolling in view.
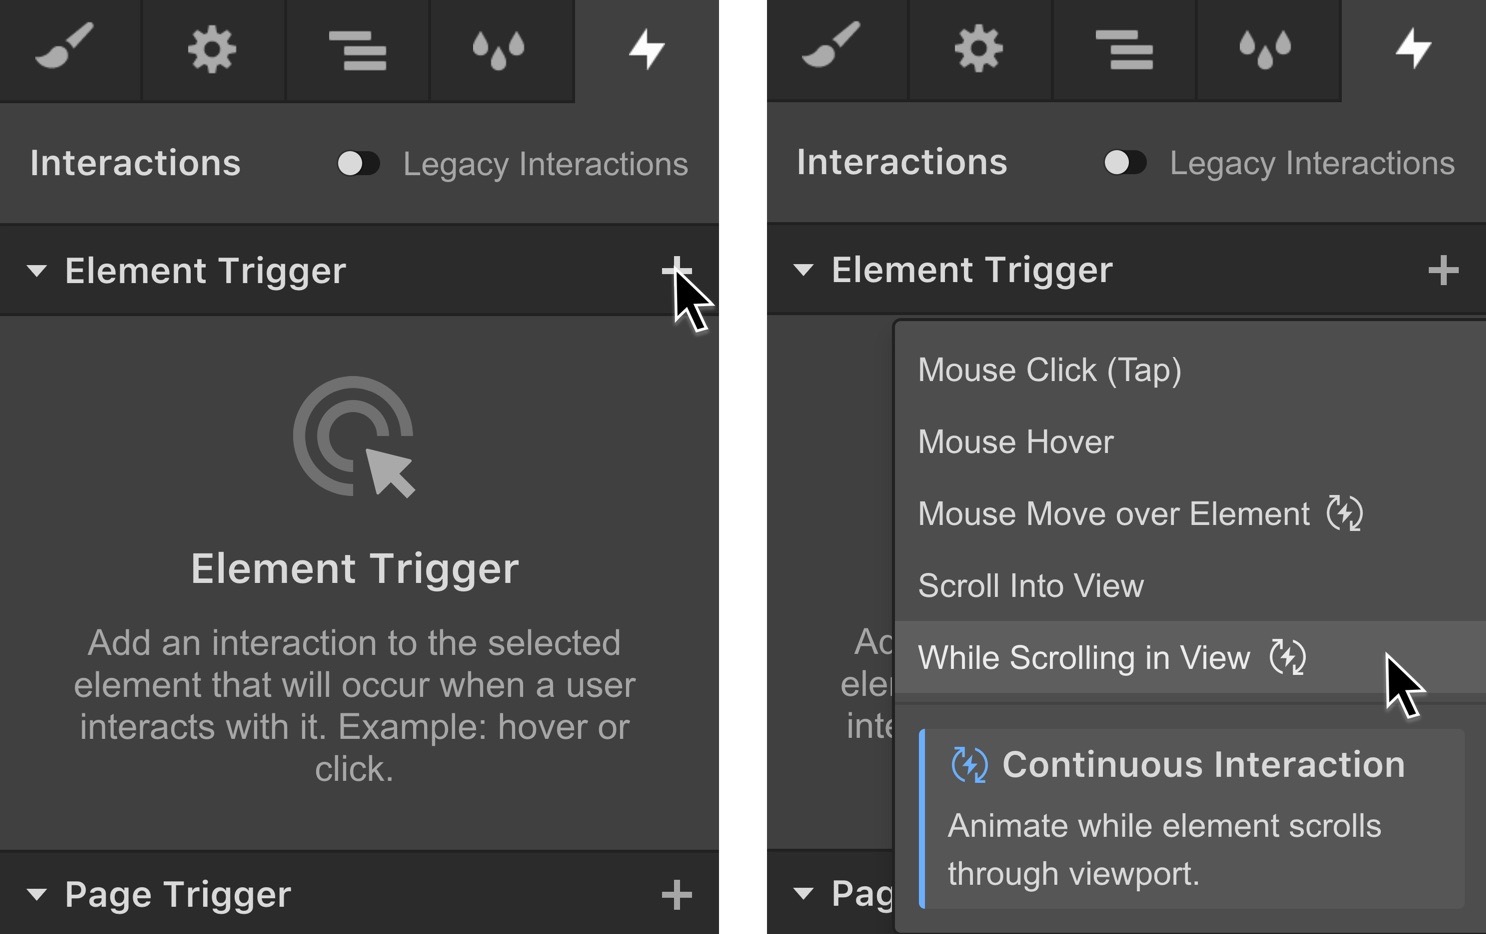
Step 8. Configure the trigger
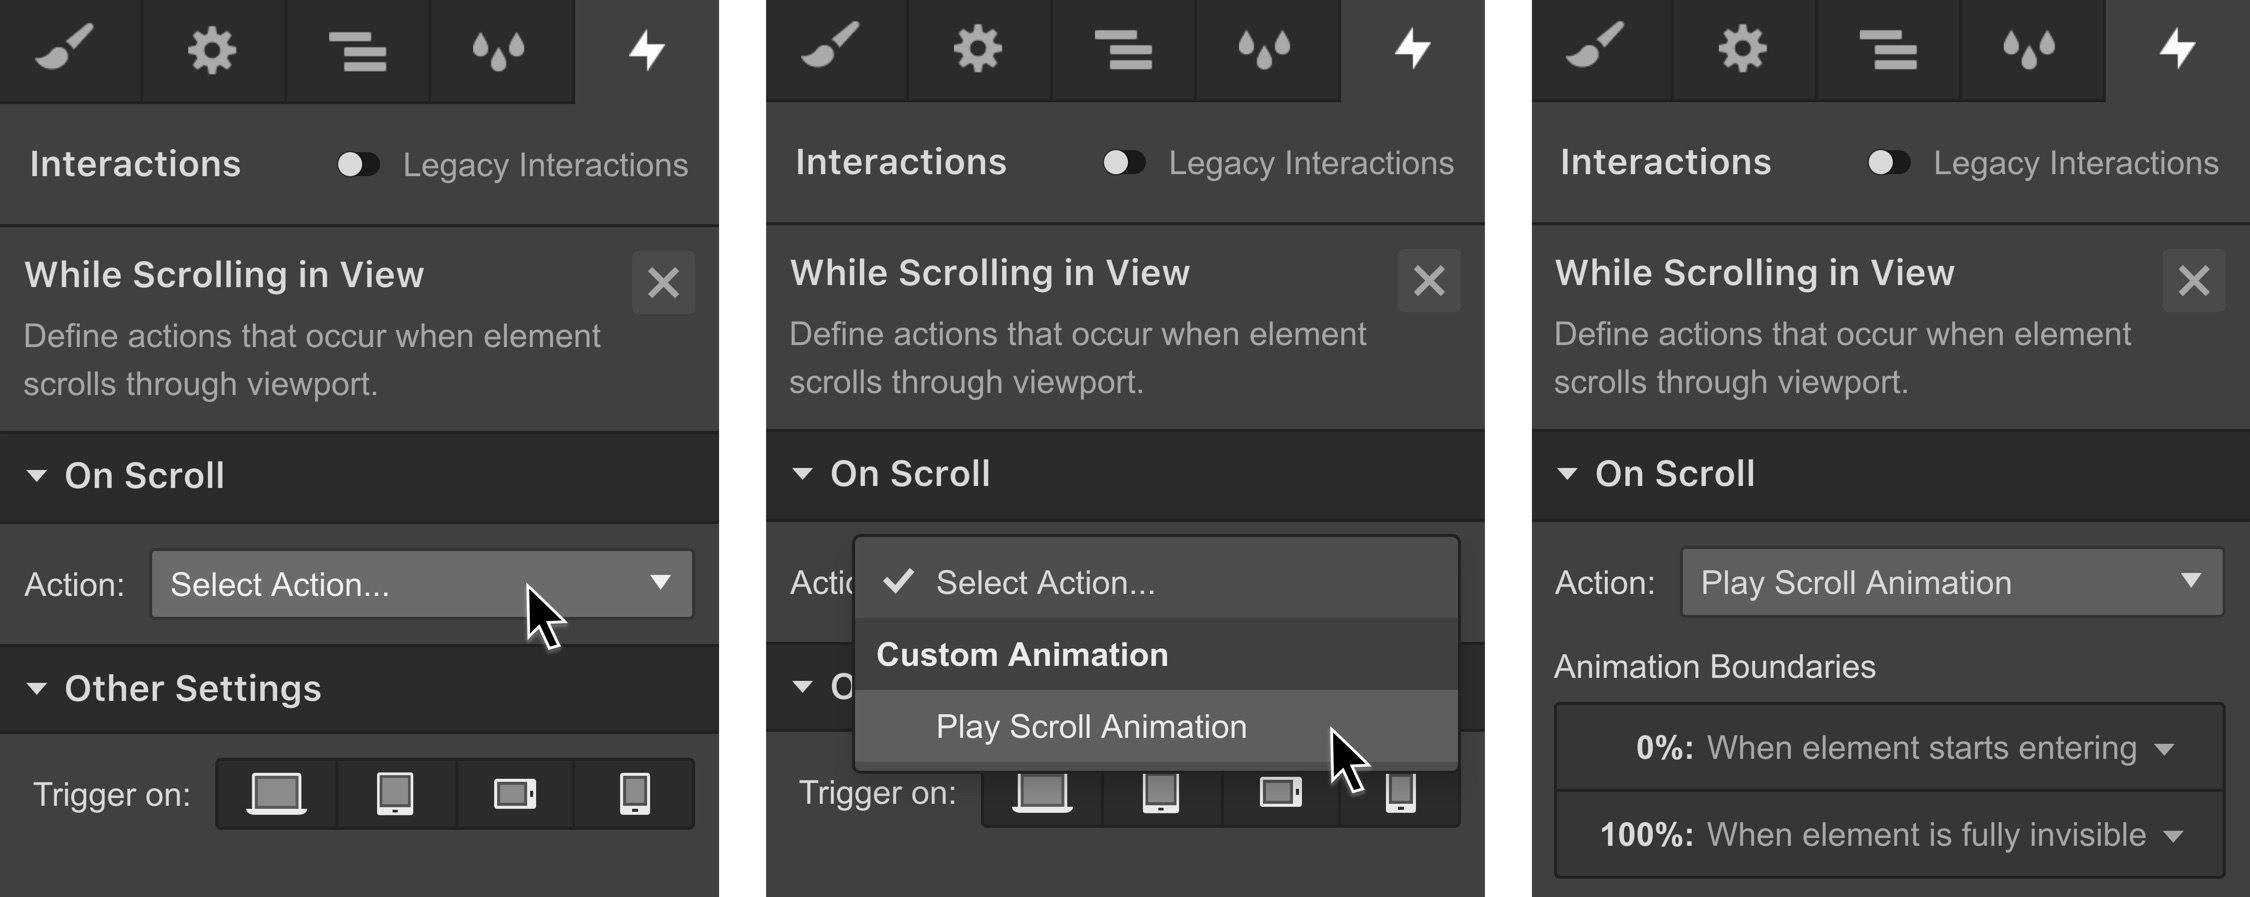
Choose to play scroll animation. Change the animation boundaries if you’d like. This enables you to set when the animation starts and ends. By default, the animation begins when the section starts entering the viewport, and it ends when it leaves the viewport. Keep the default for this tutorial.
Define the scroll animation
Defining your aim can help you identify the actions that you need to set. The aim at this point is to move the images at various speeds. Those in the front should appear to be moving faster than those in the back as you scroll through the section. So, you’ll be creating a scroll action of move for each image. Then, set the position of each image on the y-axis at the beginning and end of the animation.
Step 9. Create the scroll animation
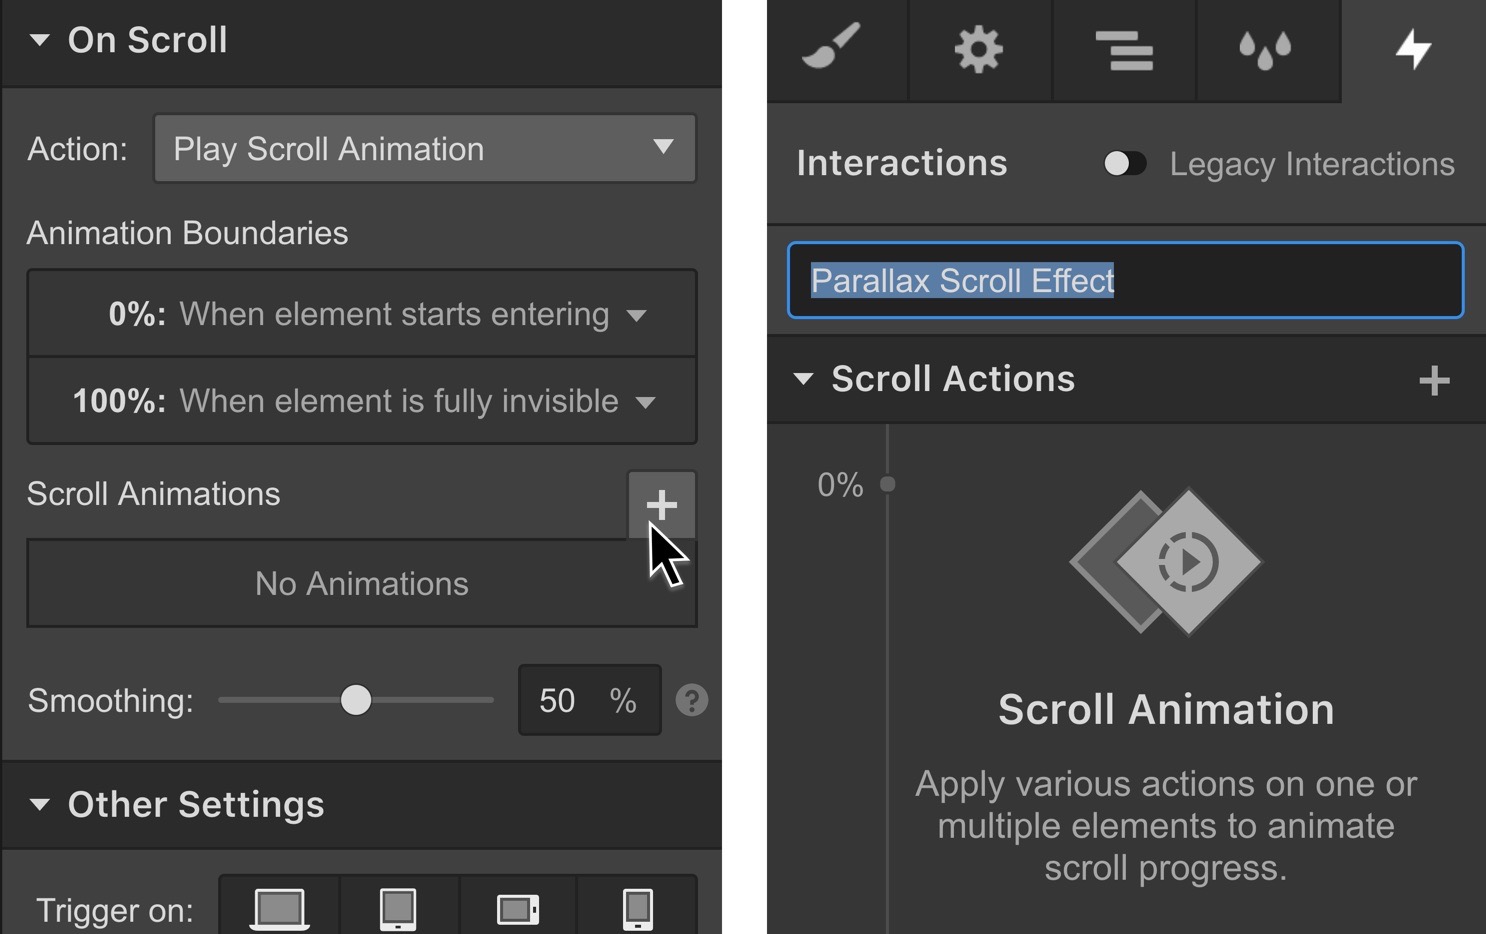
Before creating the animation, let’s talk about smoothing. Smoothing, or damping, softens and smooths out the approaching velocity towards the correct position on the animation timeline. You can adjust the value of smoothing under scroll animations. For this tutorial, you can leave it at 50%.
Now, create a new scroll action and then rename it to "Parallax scroll effect".
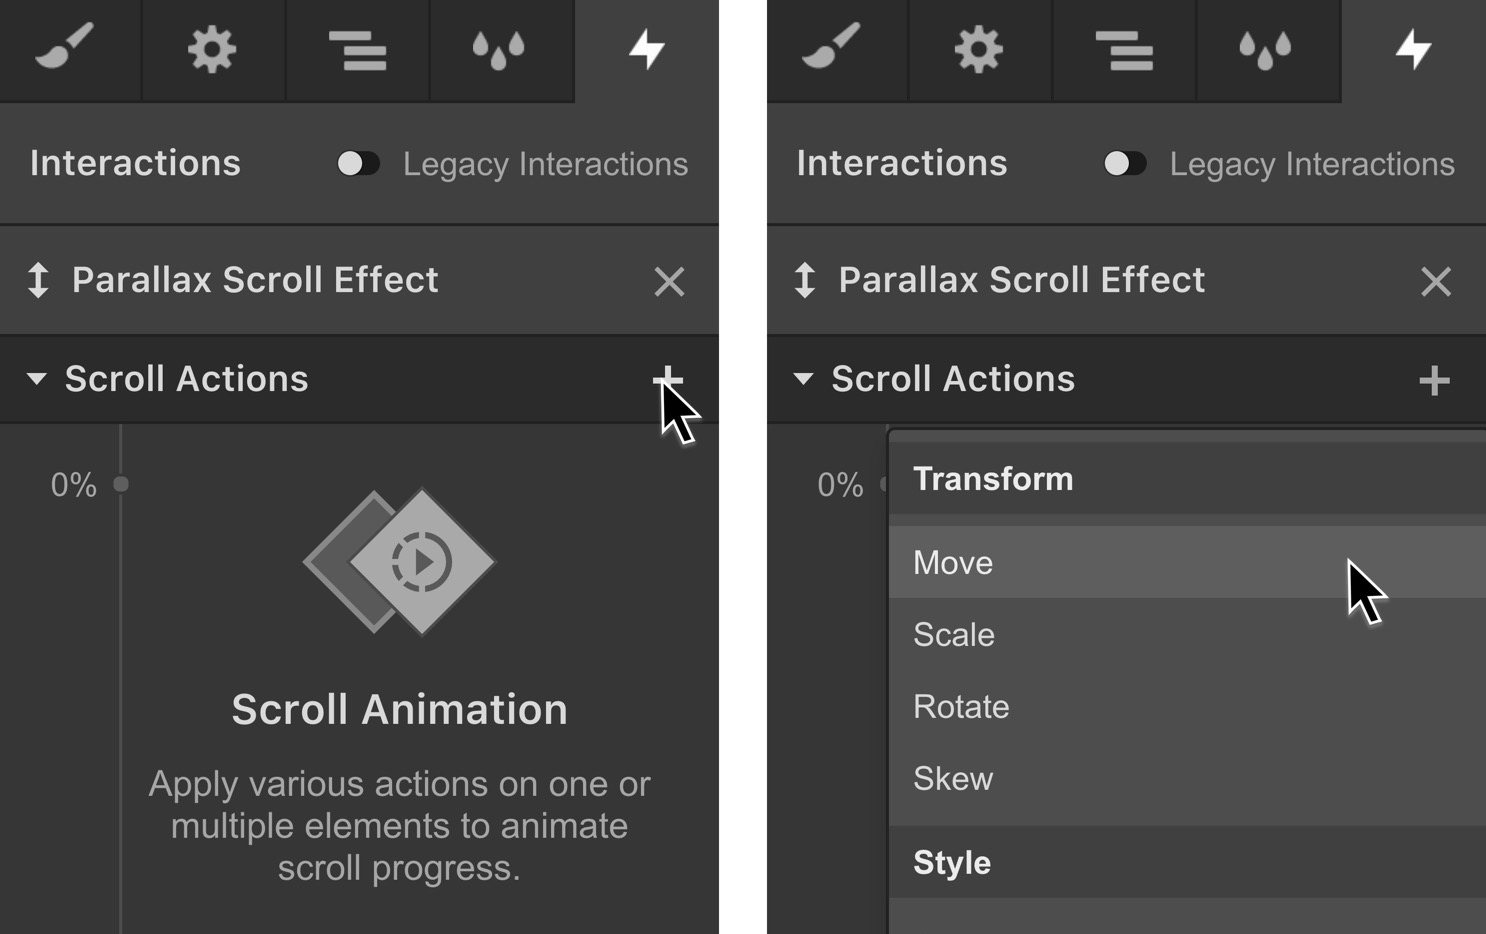
Step 10. Perform a move action
Select the image that has the highest z-index and appears to be the closest to your viewpoint. Add a scroll action of move to alter how the image moves during the animation.
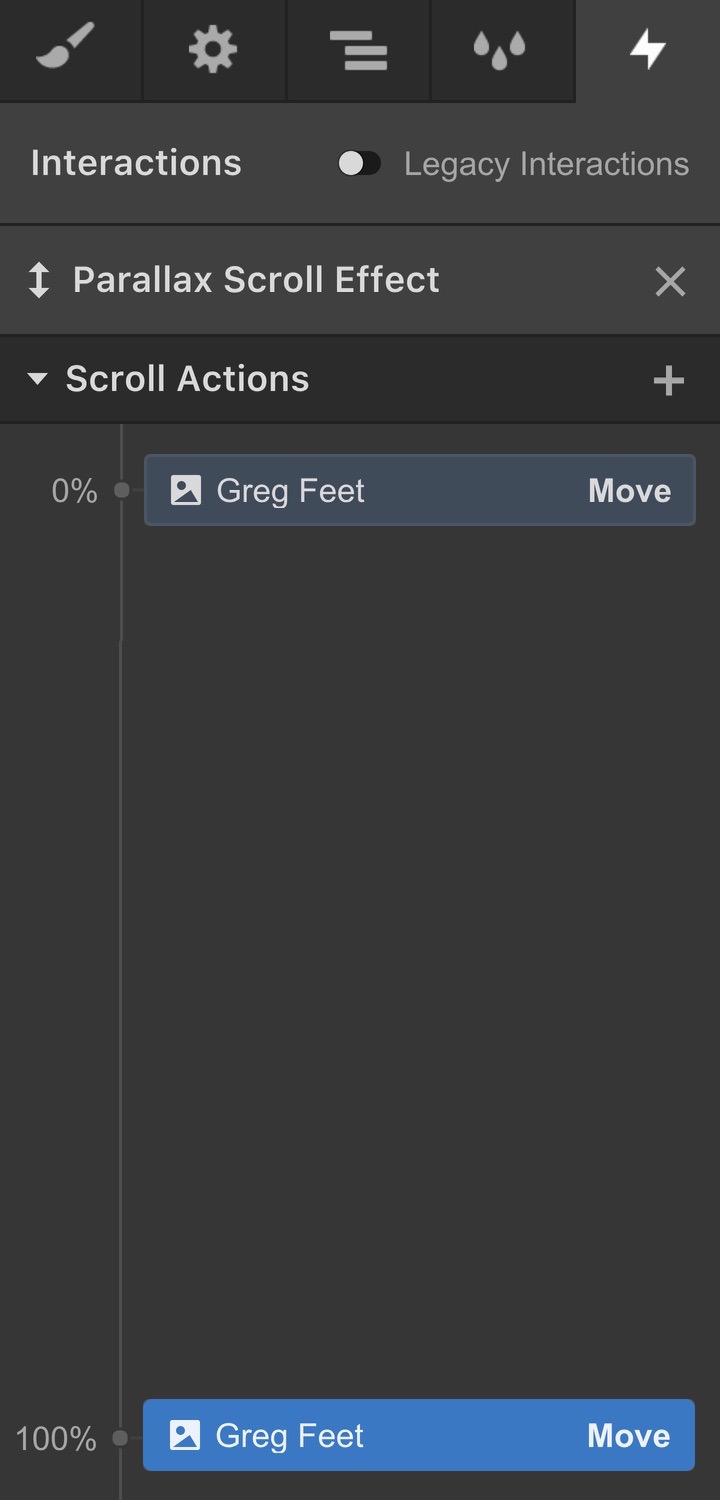
Two keyframes or instances of the image are added to the animation timeline. One is set at 0% – the beginning of the animation; and one at 100% – the end of the animation.
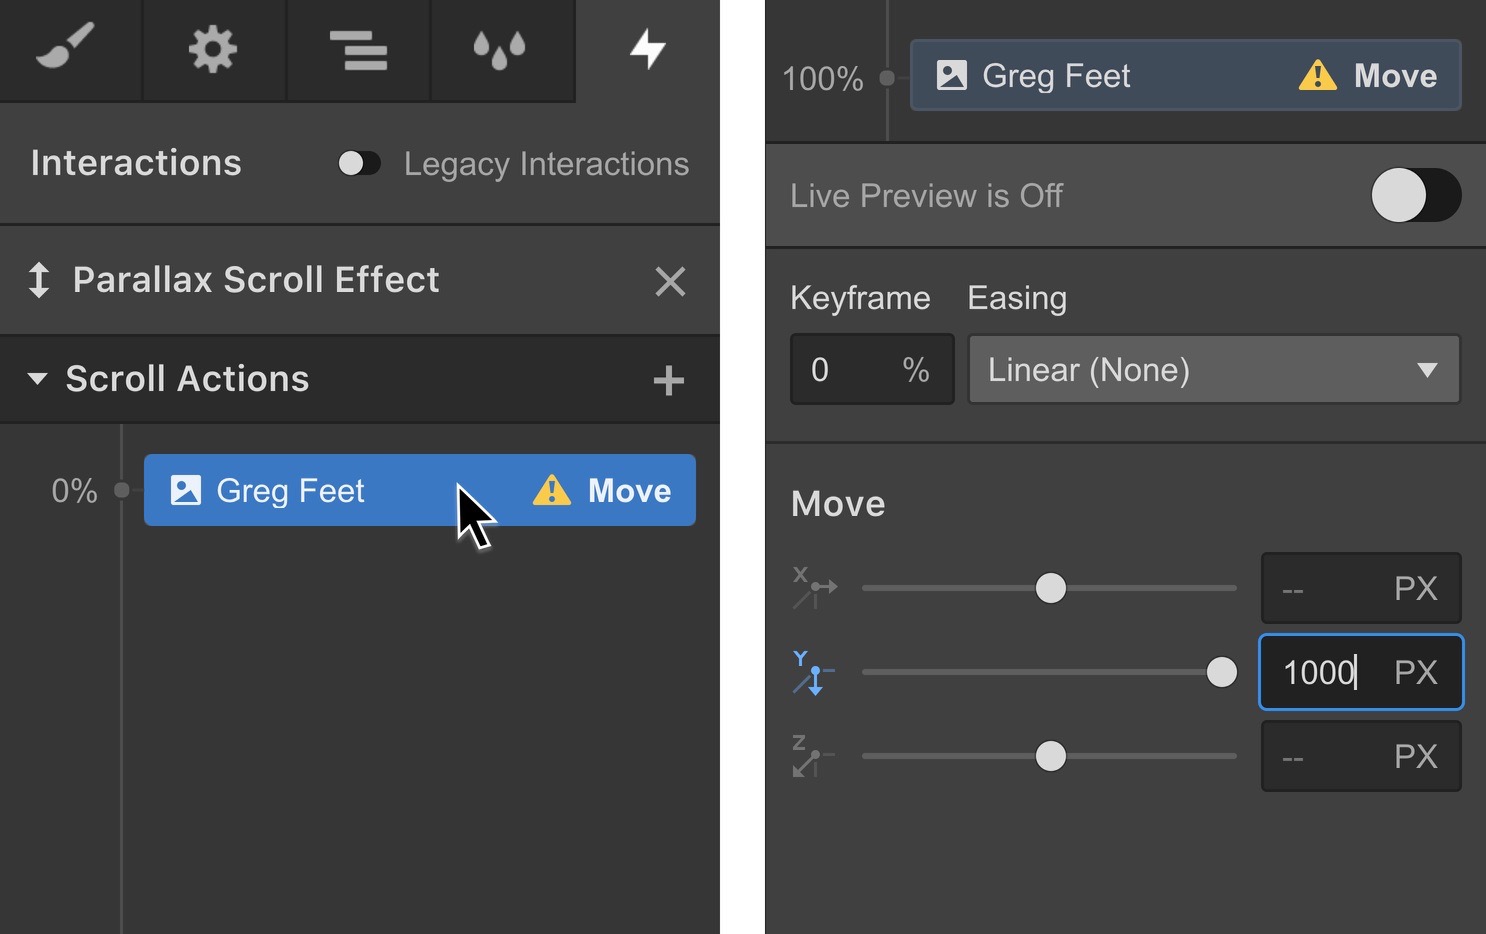
Step 11. Set an initial position
Select the first keyframe at 0%. In the move transform settings, move the image down by setting its position on the Y-axis to 1000px. This will be the position of the image as the section first scrolls into view.
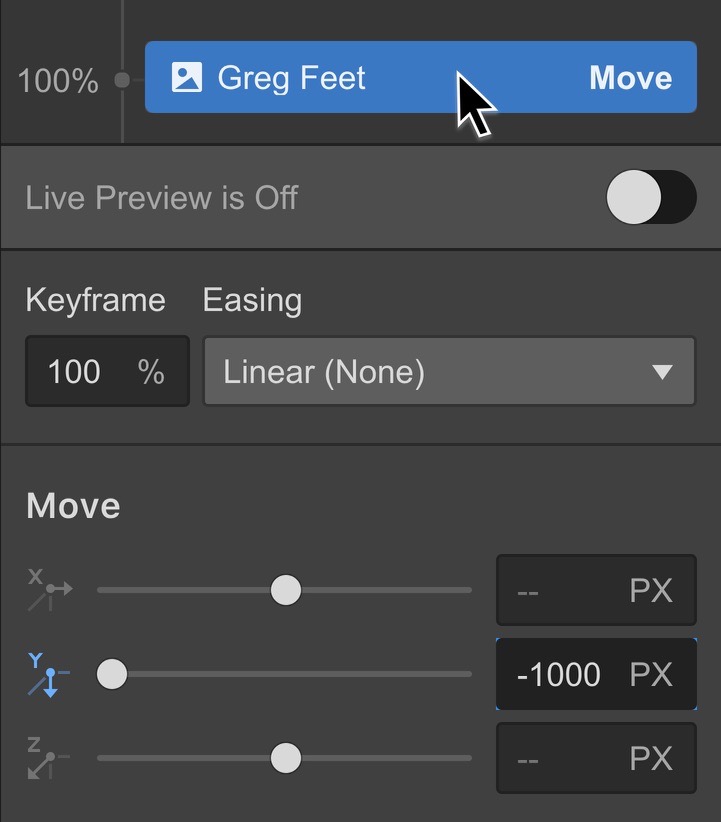
Step 12. Establish a final position
Select the second keyframe in the animation timeline, and move the image up by setting its position on the y-axis to -1000px. This will be the position of the image as the section scrolls out of view.
Step 13. Set a second action
Select the image that has the lowest z-index and appears to be positioned way in the back of the section. Add a scroll action of move. Two new keyframes are added to the animation timeline for this new image, one at 0% and another at 100%.
Define the initial position
Select the keyframe at 0% for this new image. In the move transform settings, move the image up by setting its position on the Y-axis to -352px. This image will start moving from this position as the section scrolls into view.
Set the final position
Select the keyframe at 100% for the same image, and set the position on the Y-axis to 352px. This image will travel down to this position as you scroll down the page. If you’ve changed the easing setting for the previous actions, make sure you set the same easing on all actions.
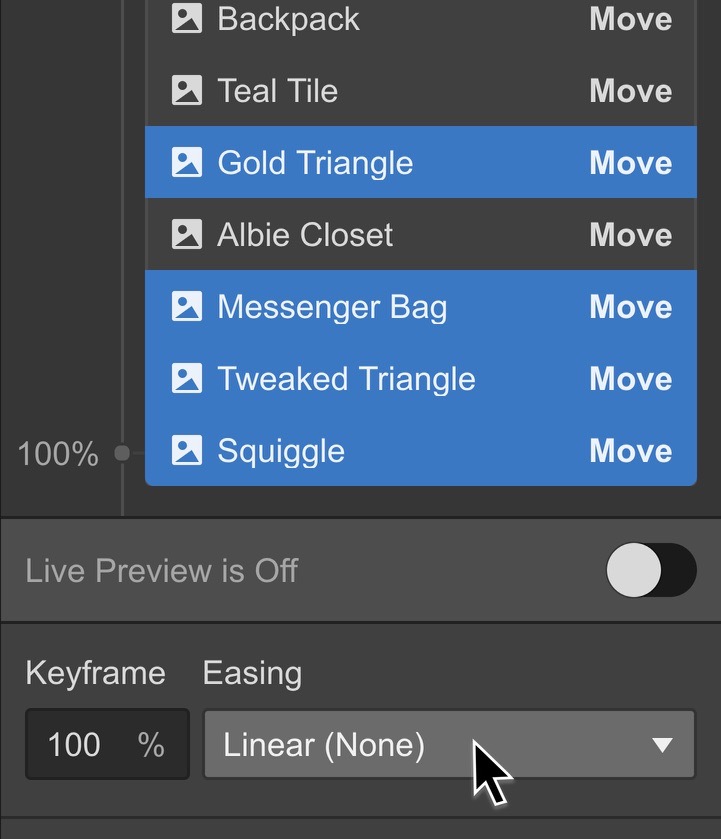
Step 14. Create a third animation
Select another image in the foreground. Add a scroll action of move. For the first keyframe, move it down. Set a Value of 300px. For the second keyframe, move the image up. Now set a value like -500px. This will make the image travel a distance of 800px, which is slower than the closest image and faster than the farthest one.
Preview the animation
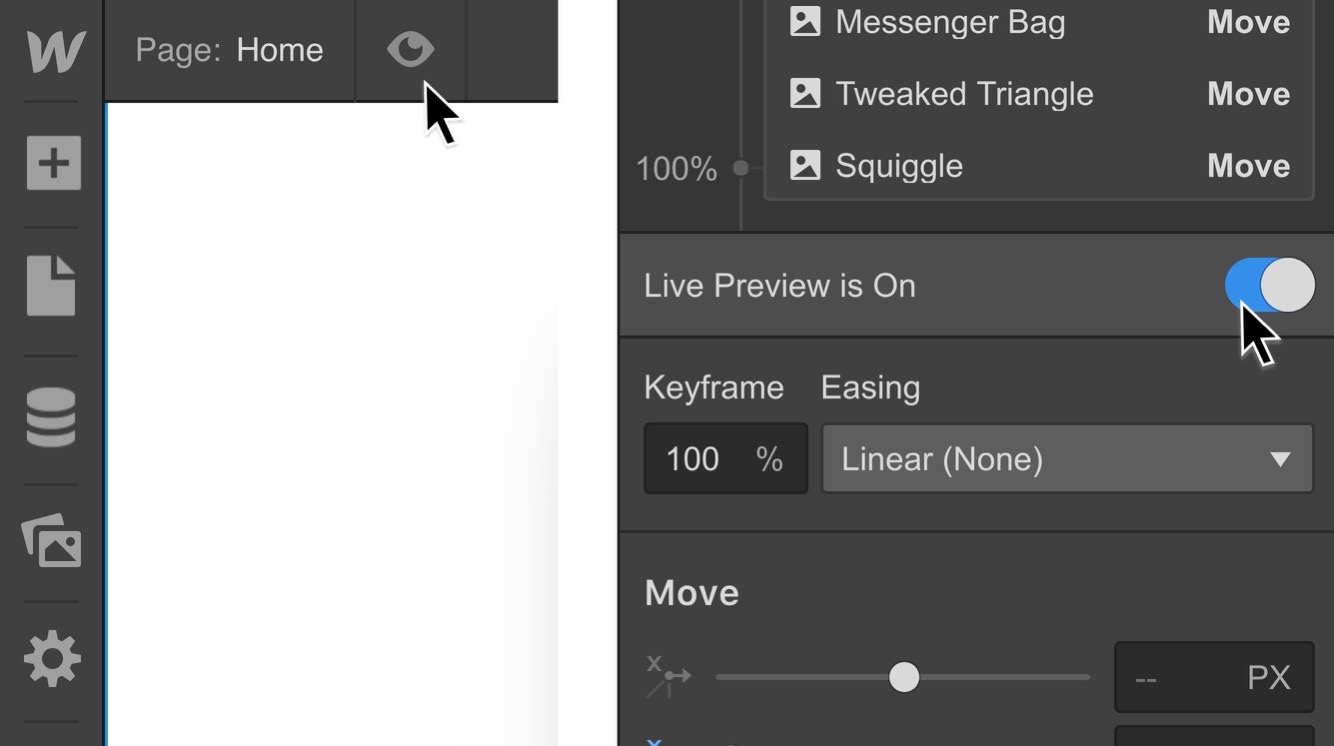
Preview the animation in preview mode of the Designer or live on the canvas by toggling live preview on. Now the parallax effect is more pronounced, and you’ve created what appears like another level of depth in this animation. Make adjustments to the positions or easing to achieve the desired result.
Add more animations
Continue adding scroll actions to each of the images you want to animate during this scroll animation sequence. Make sure you follow this logical pattern to create a good parallax scrolling animation: elements in the front (those with higher z-index) appear to be moving at a faster rate than those in the back (those with lower z-index).
Turn the animation off for devices
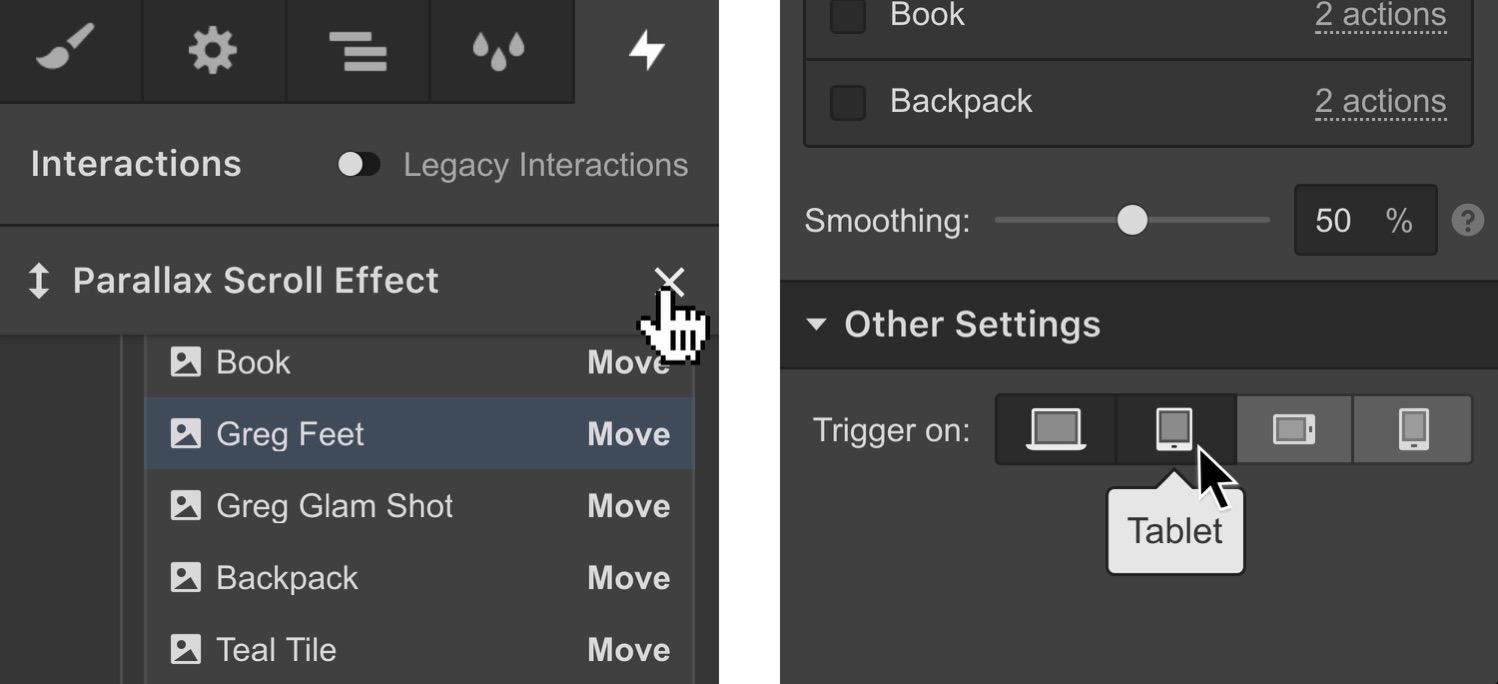
You can choose to turn off this animation on mobile devices. Close the animation timeline by clicking on the X next to "Parallax scroll effect". Then under other settings, toggle off the devices that you don’t want this interaction to be triggered.
Good to know — Speed of Motion
When you’re setting the position of the images on the y-axis, you’re also setting the speed of motion. That’s because as you scroll through the section, the first image travels from y-position of 1000px to y-position of -1000px – a distance of 2000px. The second image travels a shorter distance of 704px as it moves from a y-position of -352px to a y-position of 352px. So it appears there are three planes or levels of depth in that section:
- the first level — in which the image appears closer and also to be moving faster
- the second level — where almost all the other images appear to move at a normal rate
- the third level — in which the image appears farther back and to be moving at a much slower rate


