Site search lets you add search to your site, so your visitors can find the information they’re looking for, and you can control the look and feel of that experience. You can also easily exclude the content of specific elements, pages, and even entire Collections, all with a tick of a checkbox.
Search is especially important for large, content-driven sites, such as:
- Knowledge bases and help centers
- Blogs or curation sites
- News publications and media sites
Site search is available on all sites with CMS Hosting or above. On CMS and Standard Ecommerce Hosting, manual reindexing is available once every 24 hours. On higher hosting tiers, manual reindexing is available once every hour.
Content within custom code is not indexed by site search. If you need custom code content to be indexed, please use a third-party search tool.
In this lesson
- Adding and styling your search component
- Styling your Search Results page
- Indexing, and controlling what is “searchable”
- Frequently asked questions
Adding and styling your search component
You’ll find the search component in the Add panel, on the left side of the Designer.
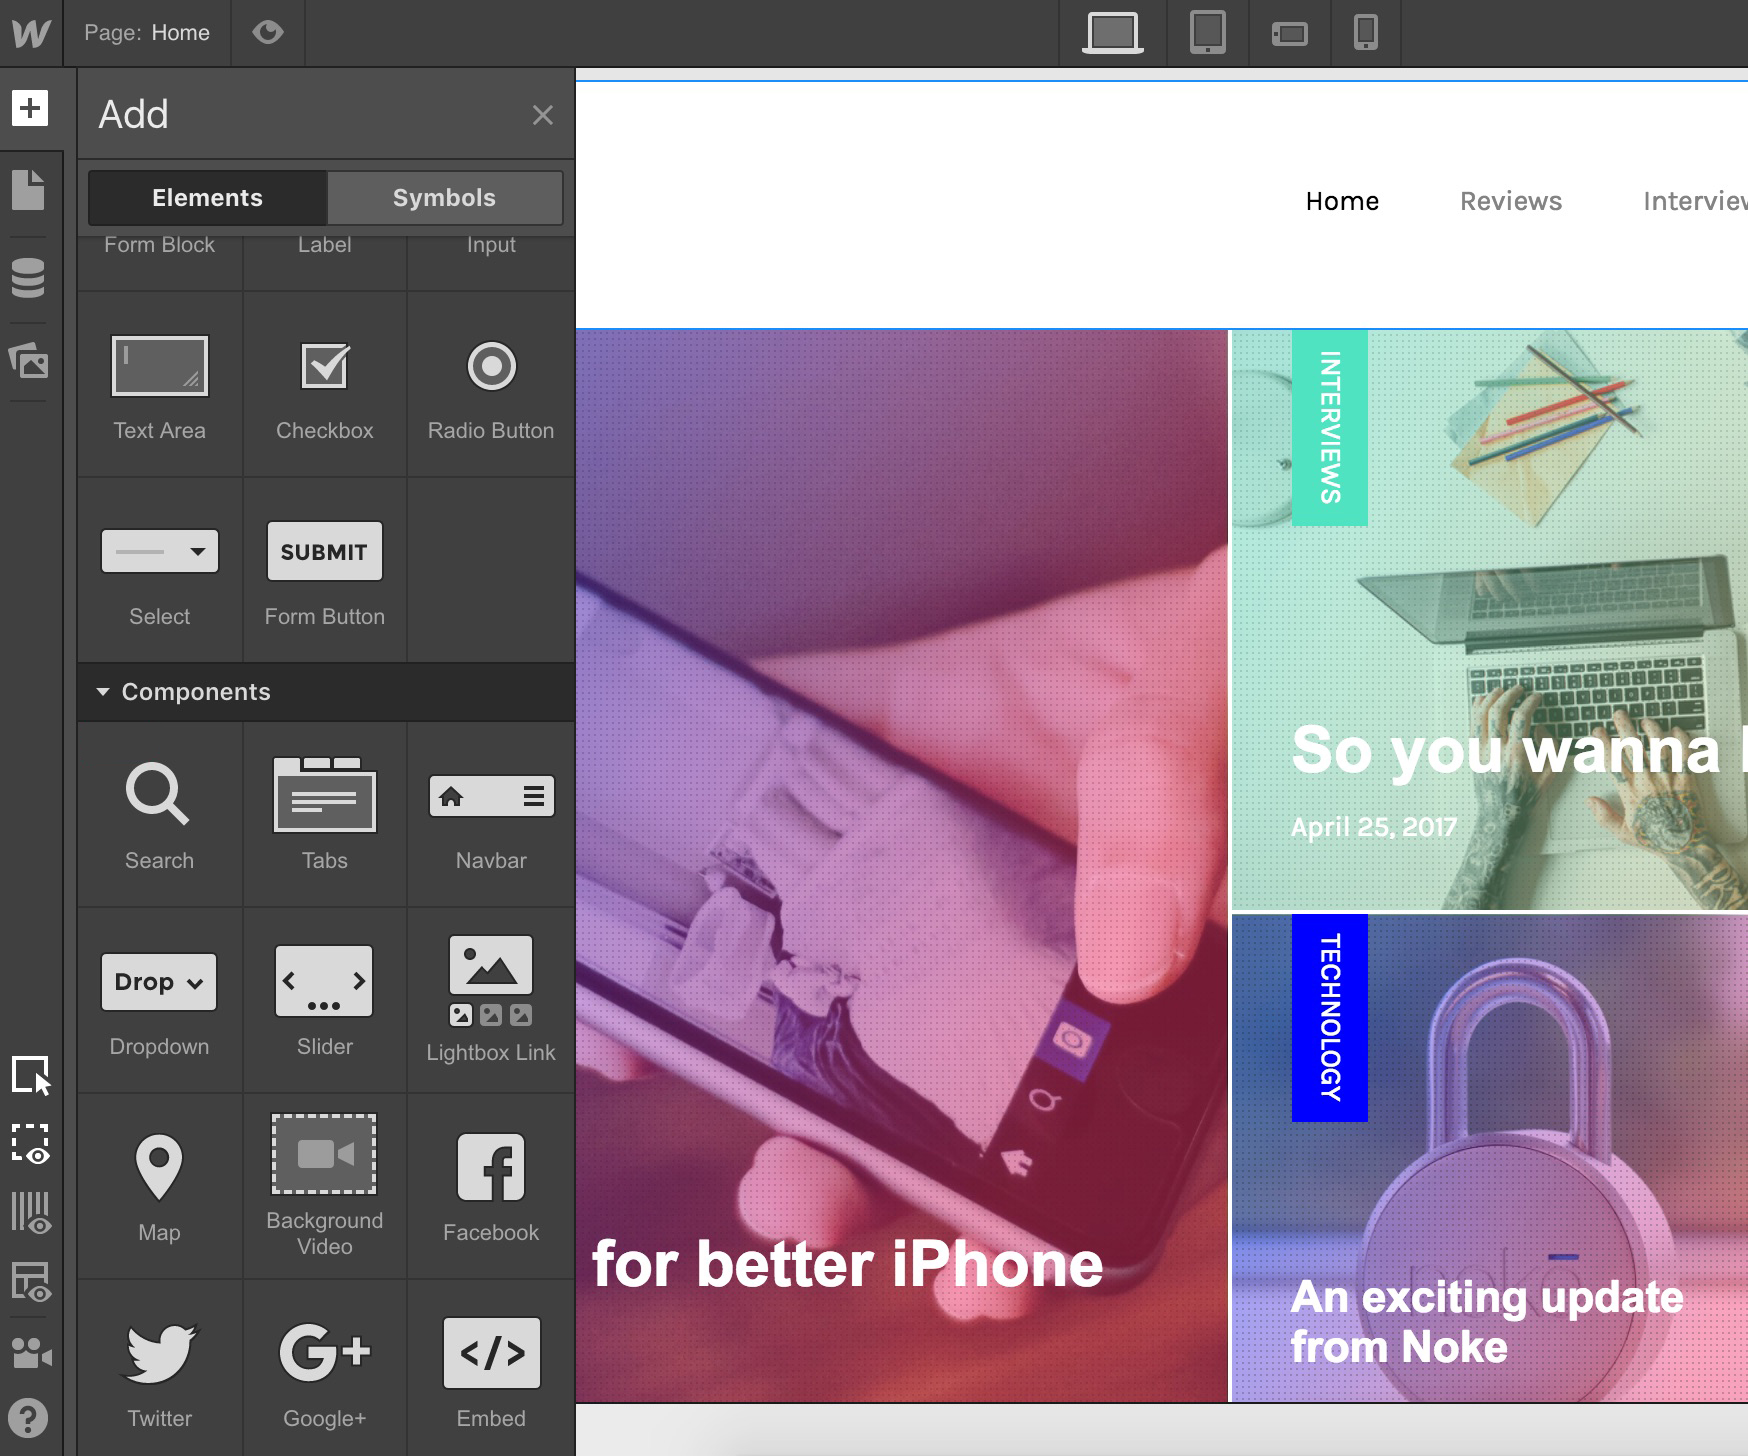
You’ll notice the search component has three pieces:
- Search (wrapper): the parent element that contains the search form and submit button
- Search input: where your users type their search
- Submit button (optional): a button to submit the search — which you can hide if you’d like a simple “Enter” to submit the search

Once you add the search component to your site, you can style it in the same way you style any other element on a Webflow site.

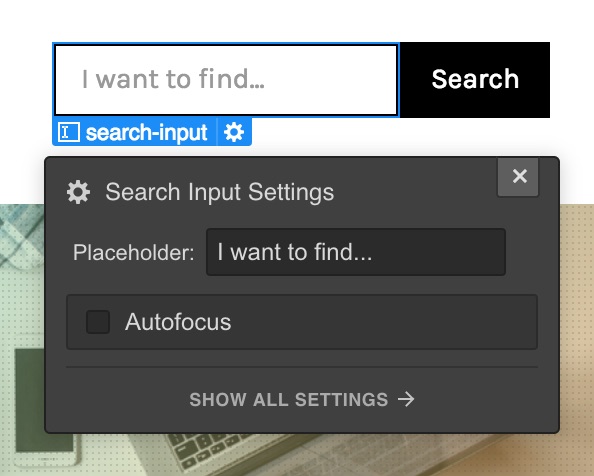
You can also customize the placeholder text, and set the search bar to autofocus, which automatically places visitors’ cursors in the search field on page load.
Styling your Search results page
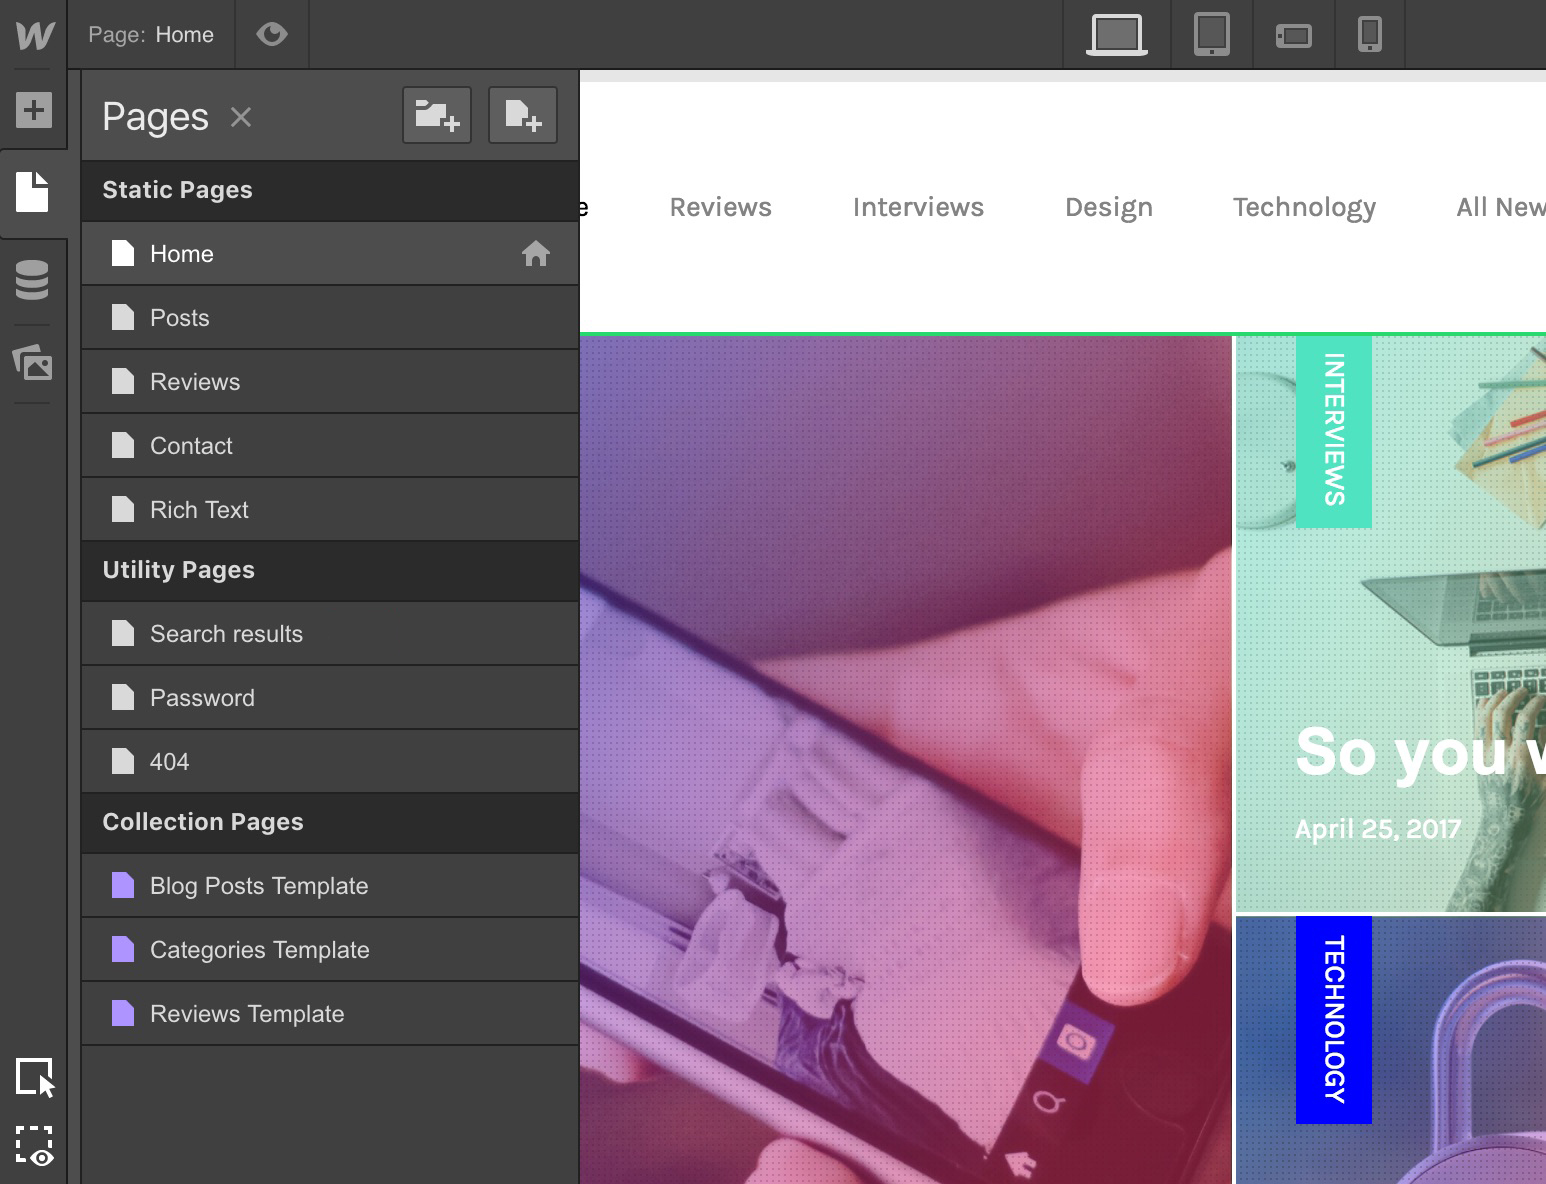
Once you add the search component to your site, you’ll see the Search results page appear in your Pages tab, under the Utility pages section.
Structure of the Search results page
When you first open your Search results page, you’ll notice there is some basic structure already in place. A container element holds everything in place, and within that, there is an optional search component (for people to try a new search if they don’t see what they’re looking for) along with a list of results, which works a lot like Collection Lists when it comes to styling.
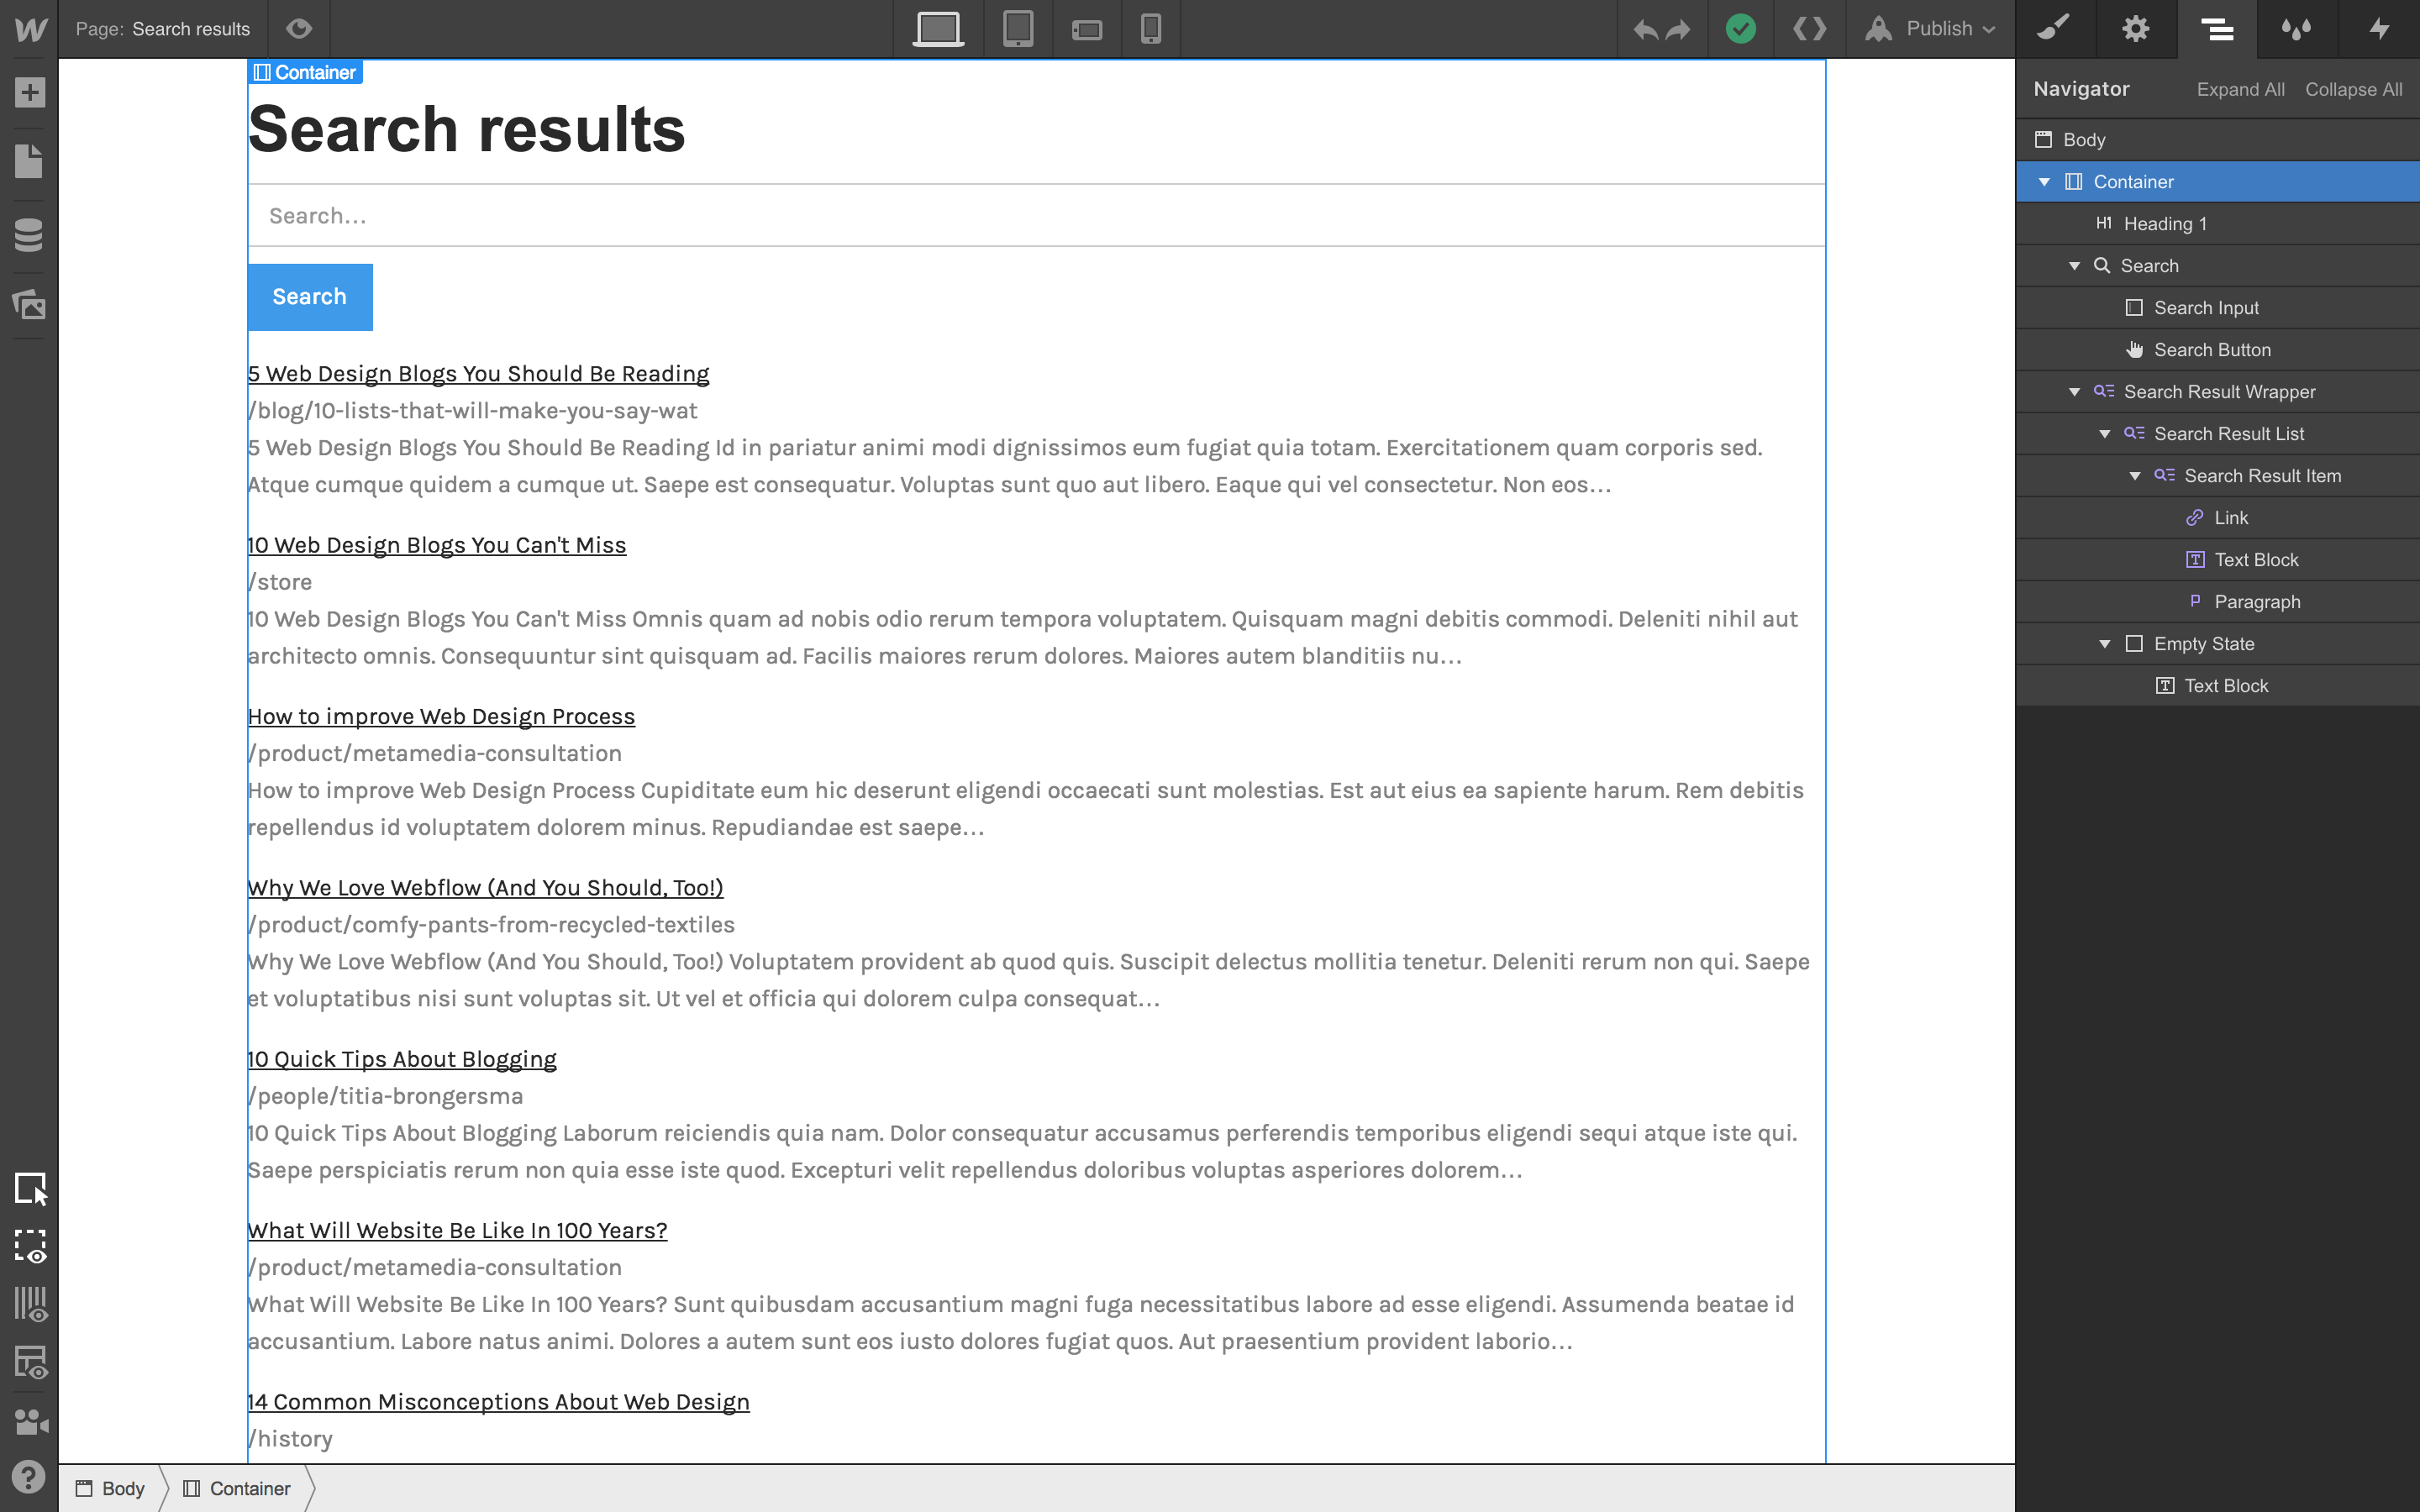
You can change the structure of this page however you’d like, along with the styles, which we’ll get into below.
Styling search results
Styling search results works a lot like styling a Collection list, with styles applied to one result item applying to all other result items in that list. However, the search results come with a basic starting structure, and have a few other new controls.
Need to know
Unhosted sites and sites with Basic hosting will show sample search results on your published site - which you can show to clients to give them a sense of how their search experience will look. To see real search results, you’ll need to add CMS or Business hosting to the site.
Search results structure
To begin with, your search results have a basic structure of elements, which you can rearrange, restructure, or remove as you see fit:
- Search title (link): The title for that page, pulled from whatever you’ve set as the Search result title in the Search section of that page’s Page Settings. This title acts as a link to that page by default.
- Page URL (text block): The slug of that page.
- Snippet (paragraph): The context from the page where the searched term appears. You can control the length of this snippet in the Search Results Settings. Alternatively, you can choose to connect this paragraph to a custom description, which you can set in your page settings.
Site search settings
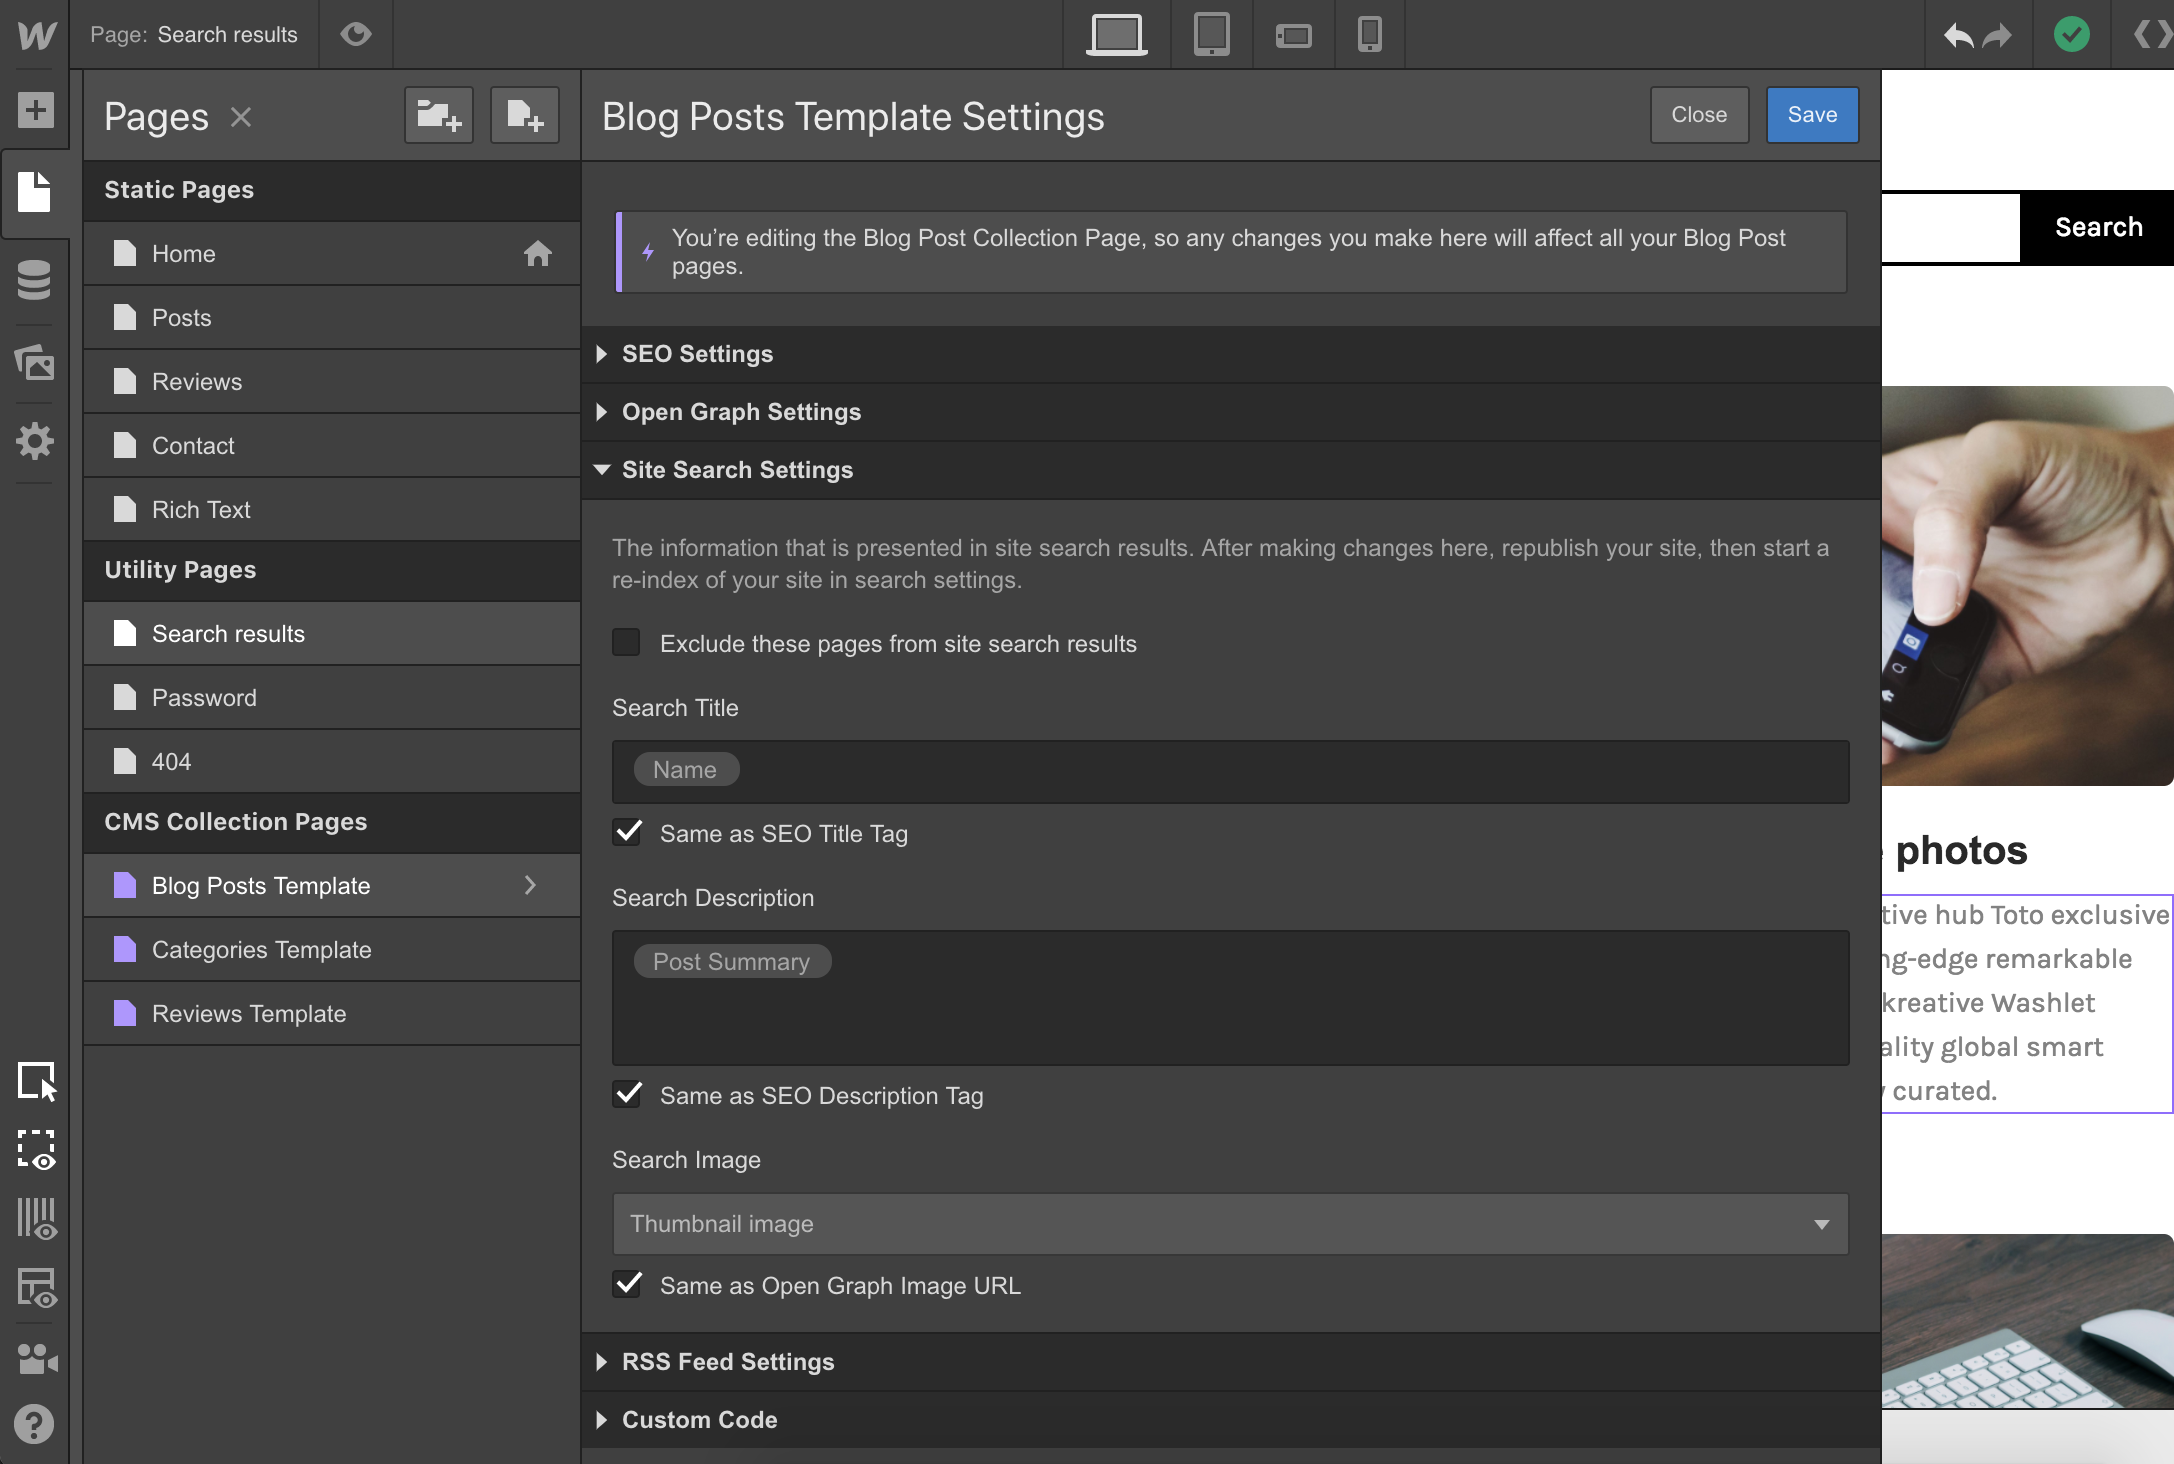
You can control what content displays for the search title in the Page Settings for all of your site’s static pages and Collection Pages. For Collection Pages, this content can be pulled from any field, similar to how you’d configure SEO and Open Graph settings.
Similarly, you can set a custom search description and a search image for each of your pages, or pull in that content from the SEO description and the OG image.
Displaying content “type”
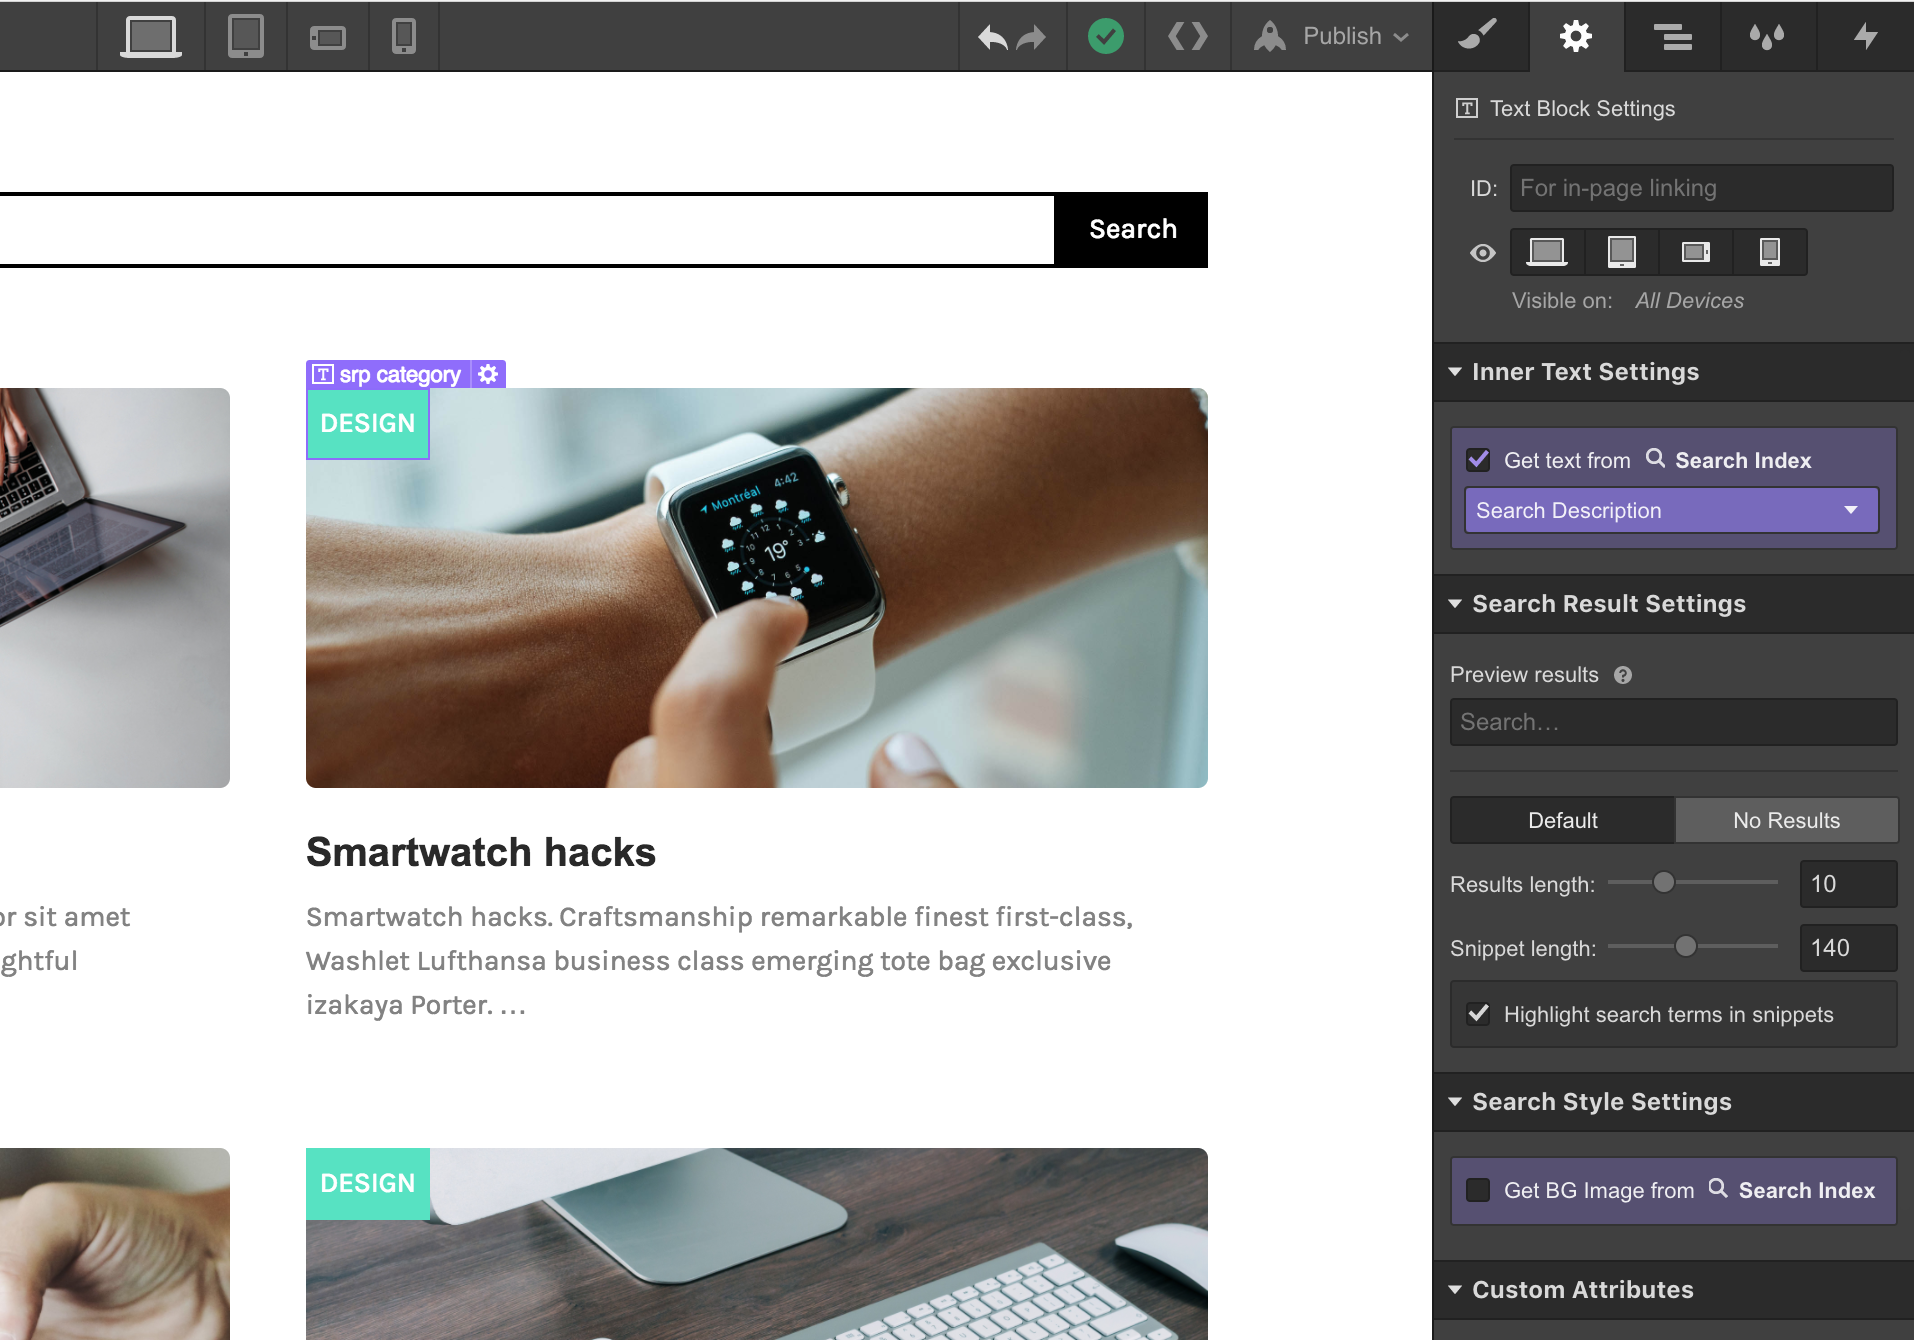
You can use the search description field to add additional information to your search results. For example, say you want to show visitors what type of content a specific search result by displaying the blog post category alongside the result.
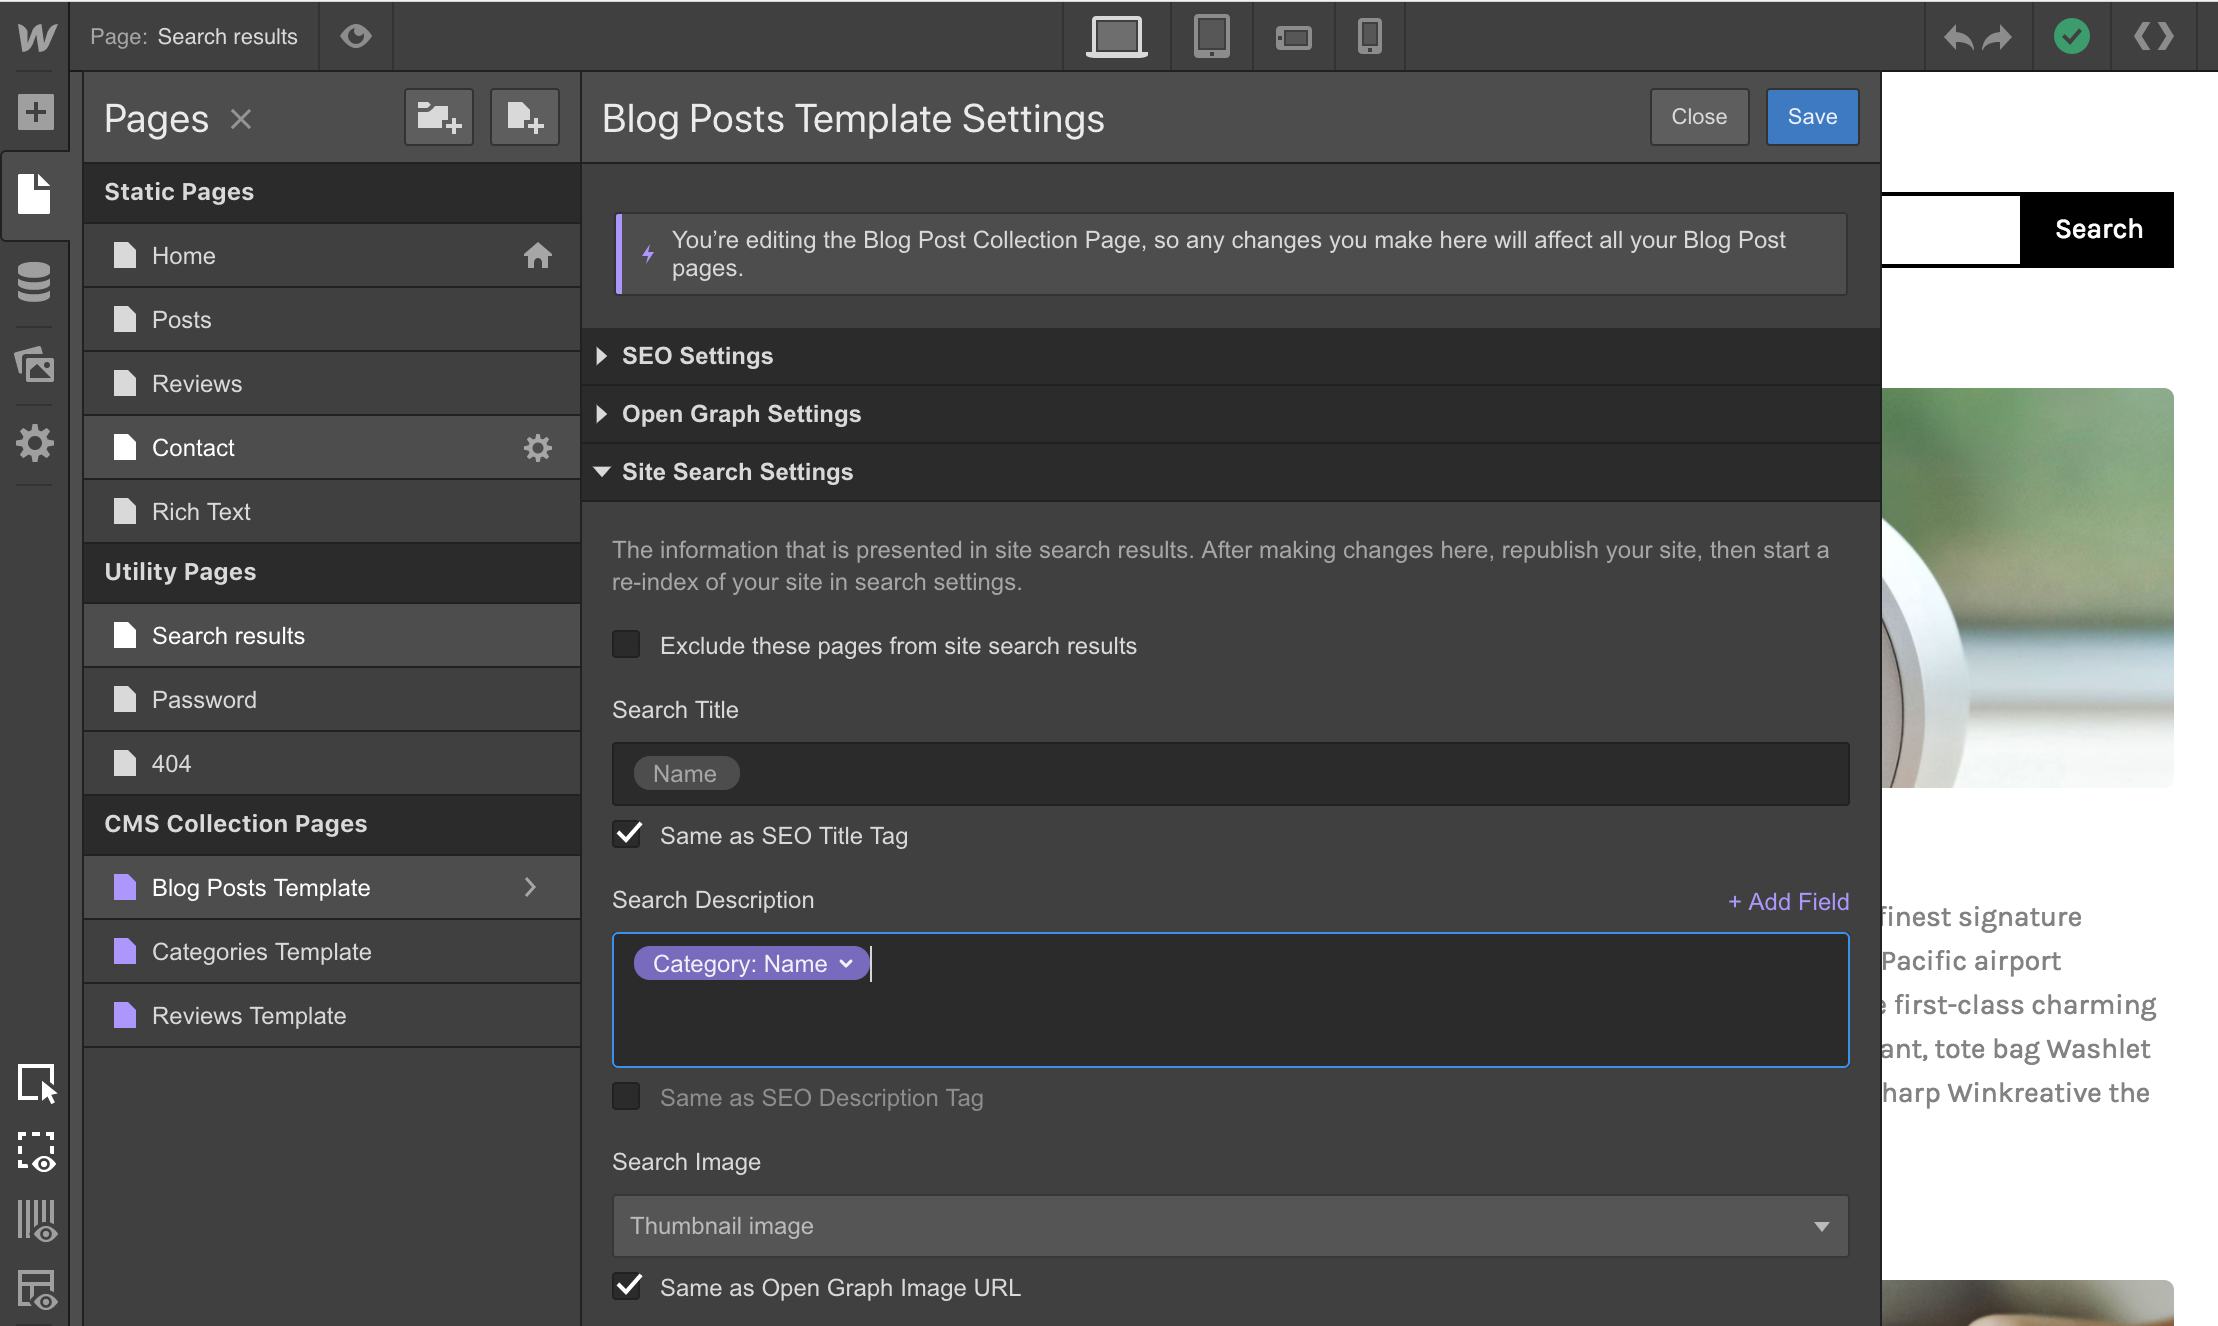
Simply add your category name to the search description field, then connect a text field in your search results layout to the search description field, then style as you wish.
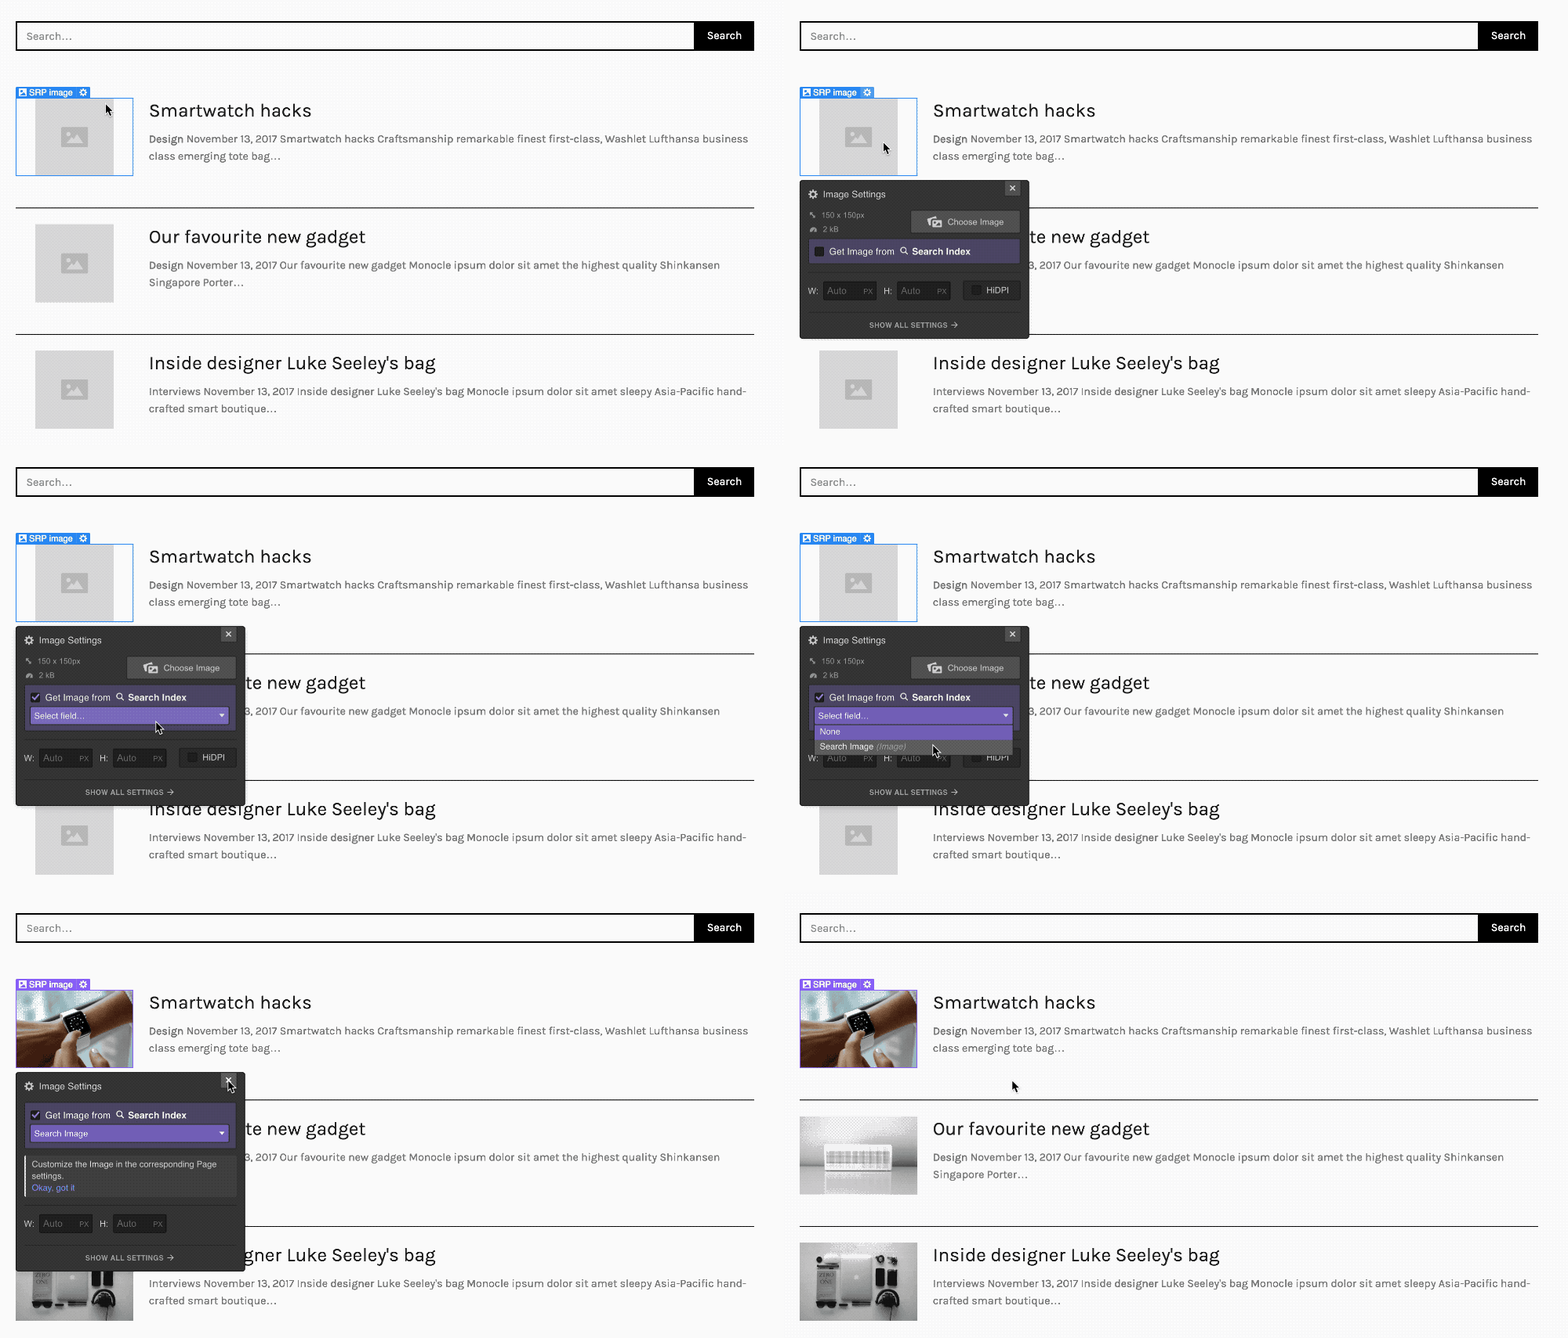
Adding a search results thumbnail
You can also set a search image under your Page Settings, just as you’d set an OG image. Once you’ve added a search image, you can add this image to your search results by connecting an image element to that search image field. You can also set the search image as the source for a background image on a div.
Styling the snippet
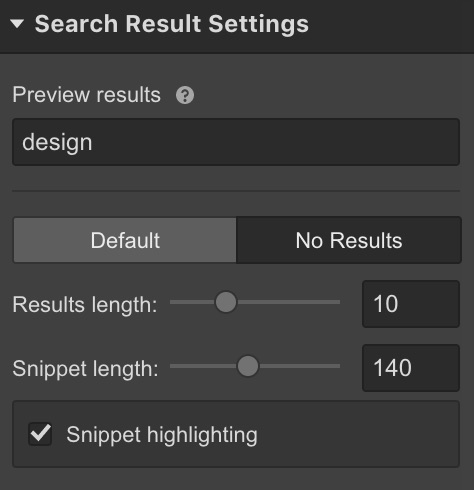
In addition to styling the text of the snippet like you’d style any other text, you can control the snippet length (number of characters) and turn highlighting (which will bold appearances of the search term within the snippet) on and off.
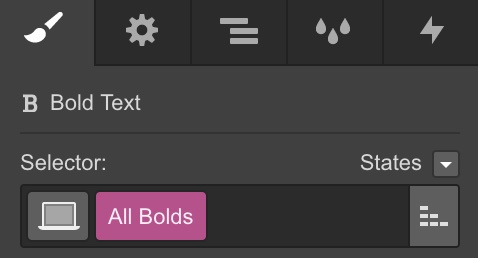
To style the highlighting within your snippet, style the base tag for “All Bolds” in a rich text element on a style guide page, and this styling will apply for your highlighted terms on your search results page.
Styling your “empty” (or “no results”) state
Just as forms have error and submission states that you can style, your Search Results page has a “no results” state that you can customize to soften the impact when users search for something that isn’t available on your site. (For example, you may want to add an illustration here, along with a link back to your homepage that helps them reorient themselves).
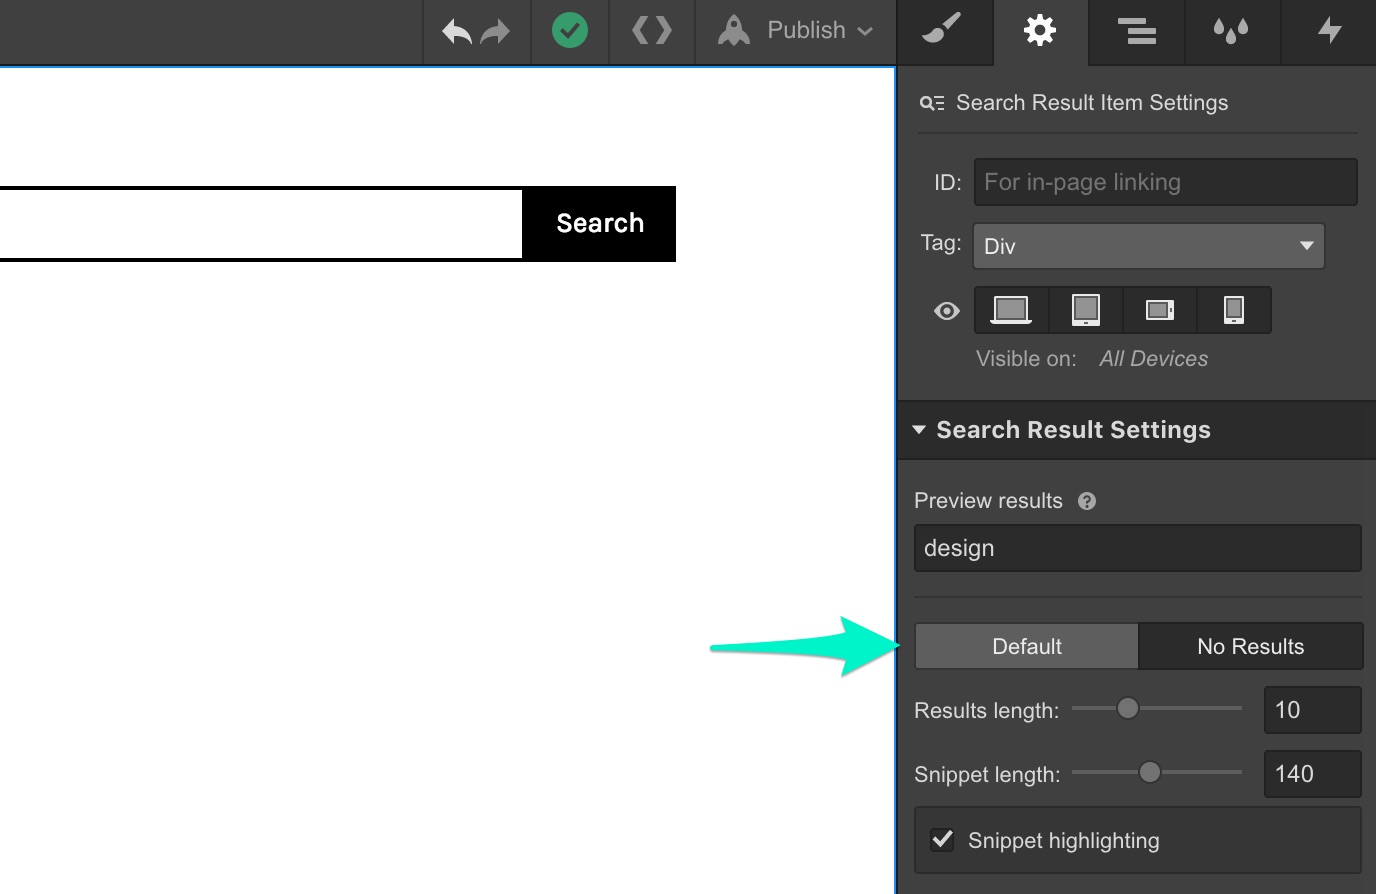
To customize the design of the “no results” state, toggle to the “no results” mode in your Search Results Settings section. From here you can customize the design in any way you’d like.
Snippet styling
In addition to styling the text of the snippet like you’d style any other text, you can control the snippet length (number of characters) and turn highlighting (which will bold appearances of the search term within the snippet) on and off.

To style the highlighting within your snippet, style the base tag for “All Bolds” in a rich text element on a style guide page, and this styling will apply for your highlighted terms on your search results page.

Setting result count
Finally, you can choose how many results you’d like to display on your search results, up to 60.
Support for pagination across multiple search results pages is not yet available.
Previewing search results
As you style your search results, you can change the displayed results by changing the search term in the “Preview results” field of the Search Result Settings section. This will help you get a clearer picture of how your search results will appear for different queries.
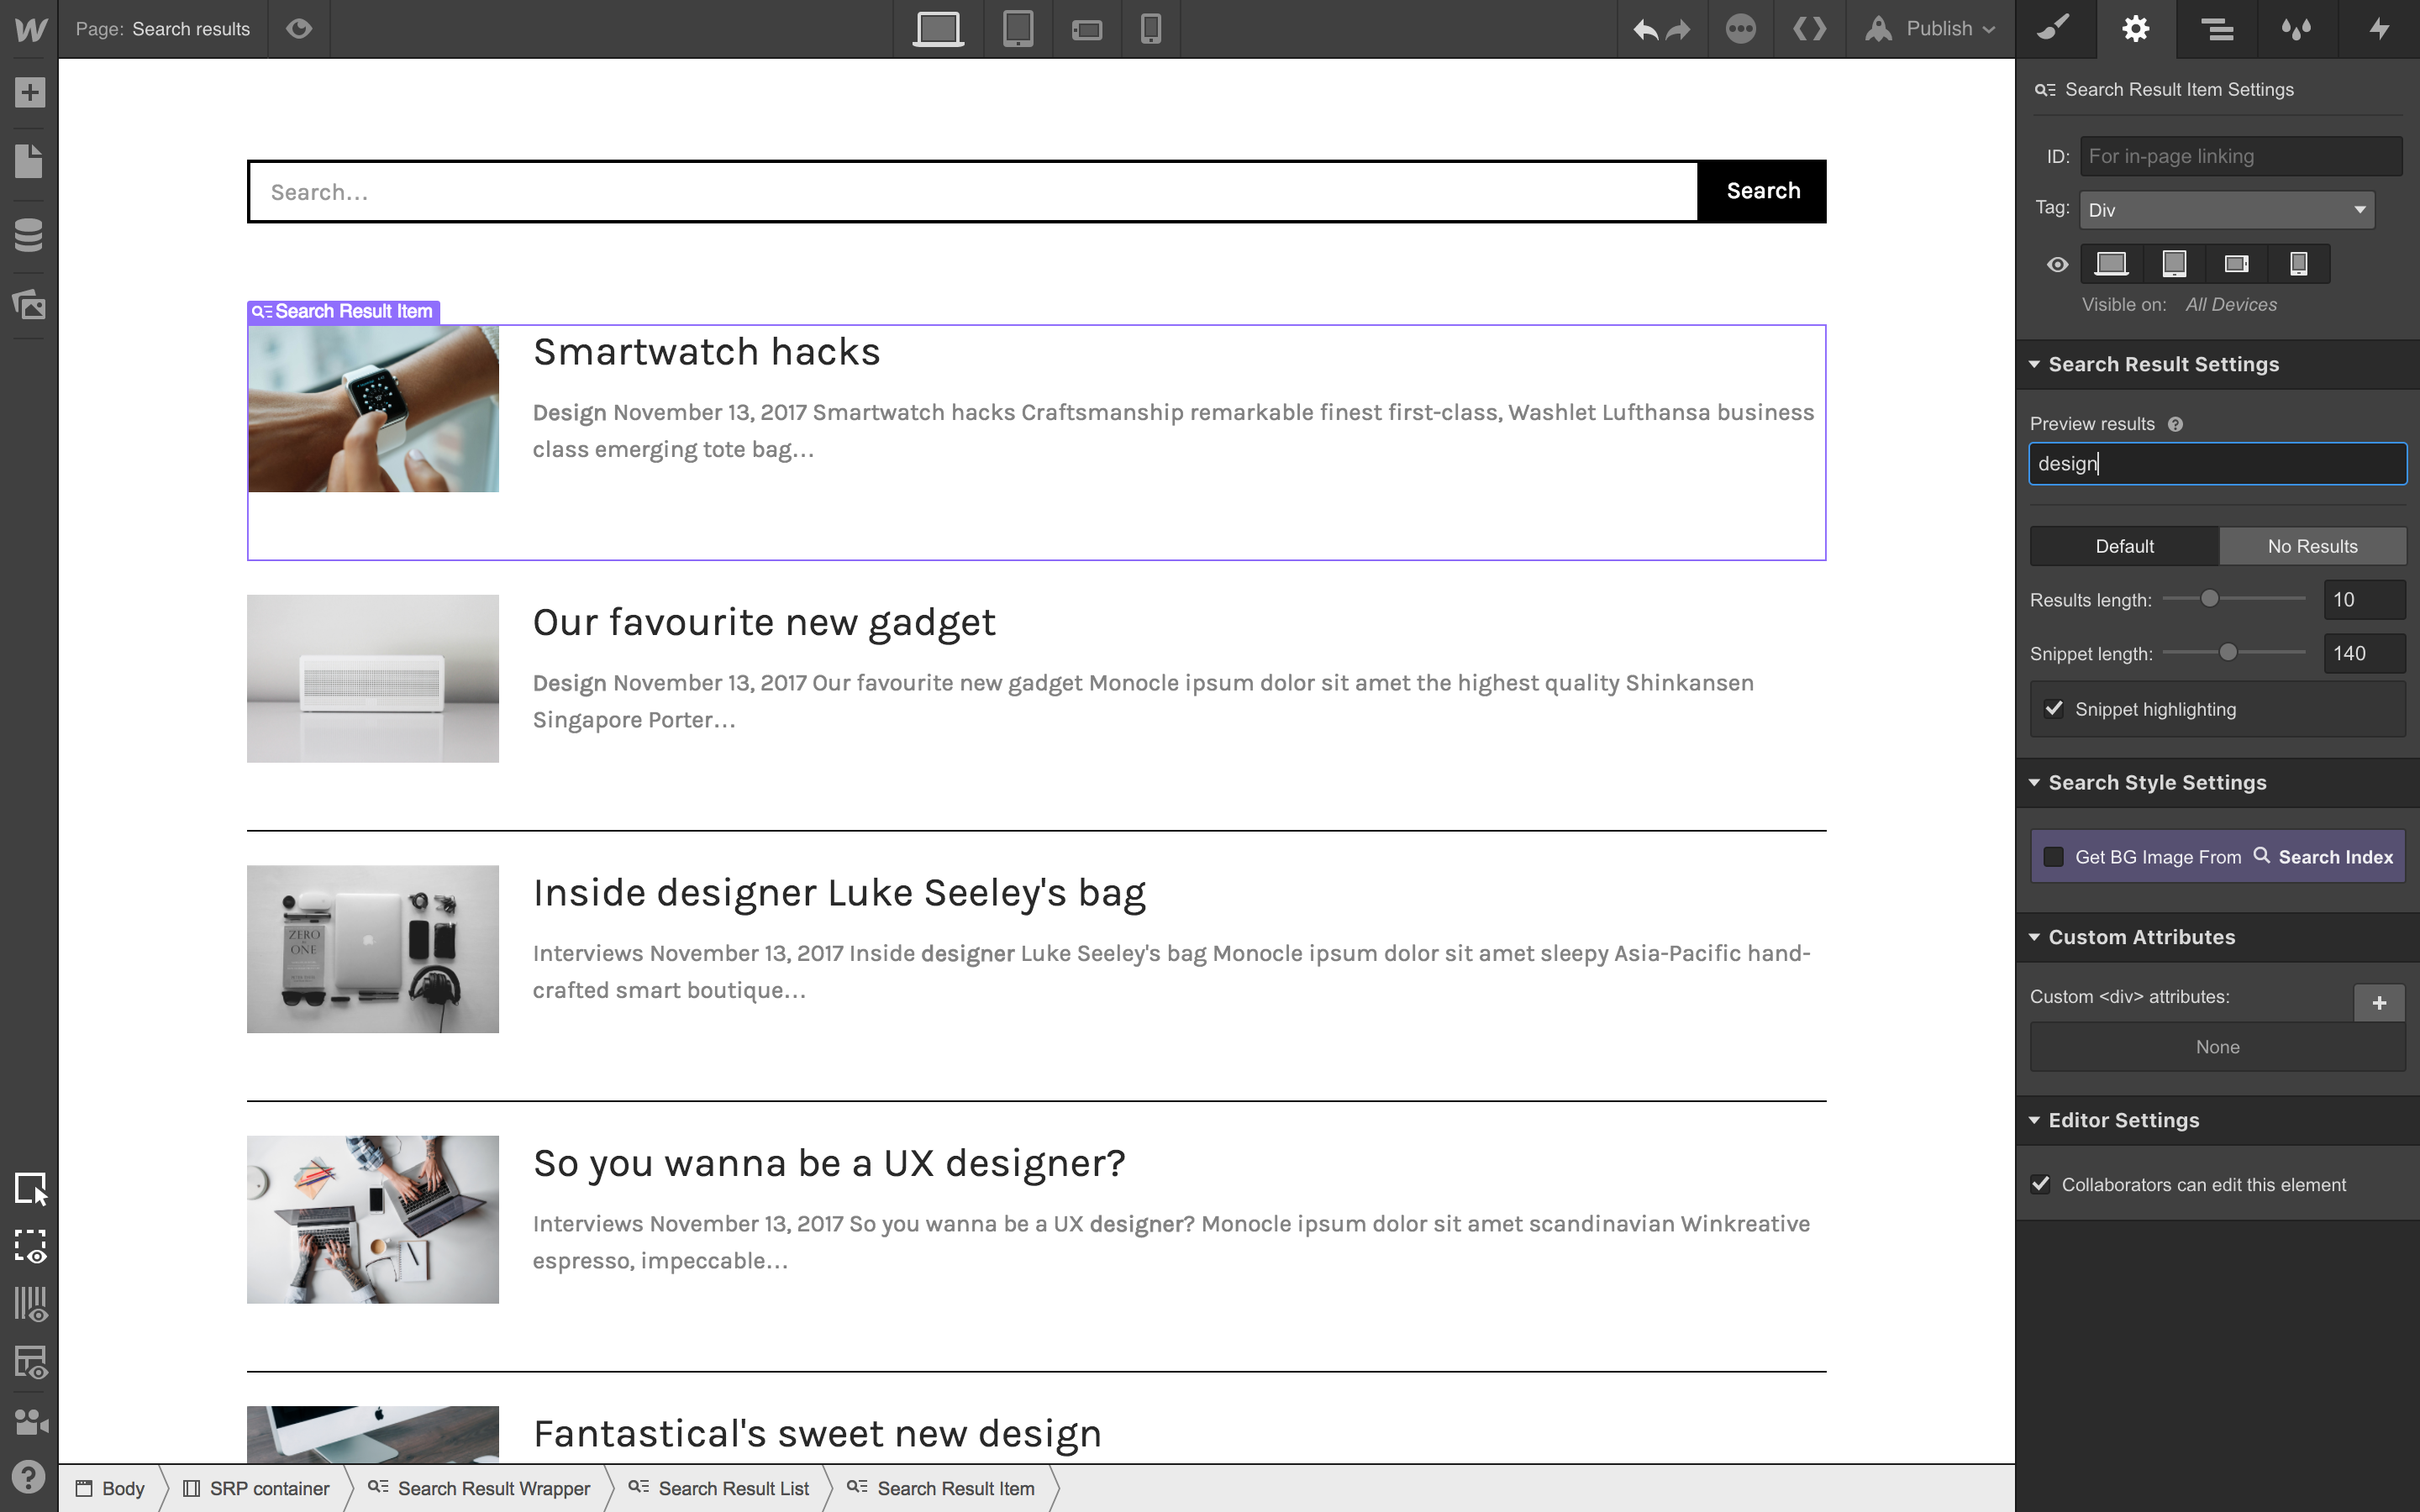
Until you add CMS or Business hosting and publish your site, you will see sample results — not real results from your site. To preview and style real search results, publish your site to create a search index. Learn more in the indexing section below.
Indexing, and controlling what is “searchable”
An index is the content and pages in your search engine, which controls what content people can search across when they submit a search on your site. For example, if you don’t want a specific page to be discoverable through search, you can remove it from your index (more on how to do this below).
At the moment, sites are limited to one search engine. You can have a search bar on as many pages as you’d like, but they will all search across the same content.
Creating an index
Once you've added CMS or Business hosting, your search index is created after you publish your site for the first time.
You can design your search results before your index is created (or before you add hosting) by working with our sample results.
Updating your index
There are two ways to update your index so the content in search results matches the latest updates to your site content:
- Manual reindexing
- Automatic reindexing
On CMS hosting, manual reindexing is available once every 24 hours. On Business hosting, manual reindexing is available once every hour. On CMS hosting, automatic reindexing takes place 72 hours after full-site publish, and on Business hosting automatic reindexing takes place 12 hours after full-site publish. (Single item publishing CMS items does not trigger automatic reindexing, and a full-site publish is required.)
Manual reindexing
Manual reindexing allows you to deliberately refresh the content in your search engine. This is best for when you’ve pushed important updates to your content, or made extensive changes to the content of your search engine (see “Refining your search index” below).
To manually reindex your site, open the Settings panel on the left side of the Designer and in the Search section, click “Index now.” Indexing can take up to 24 hours on large sites.
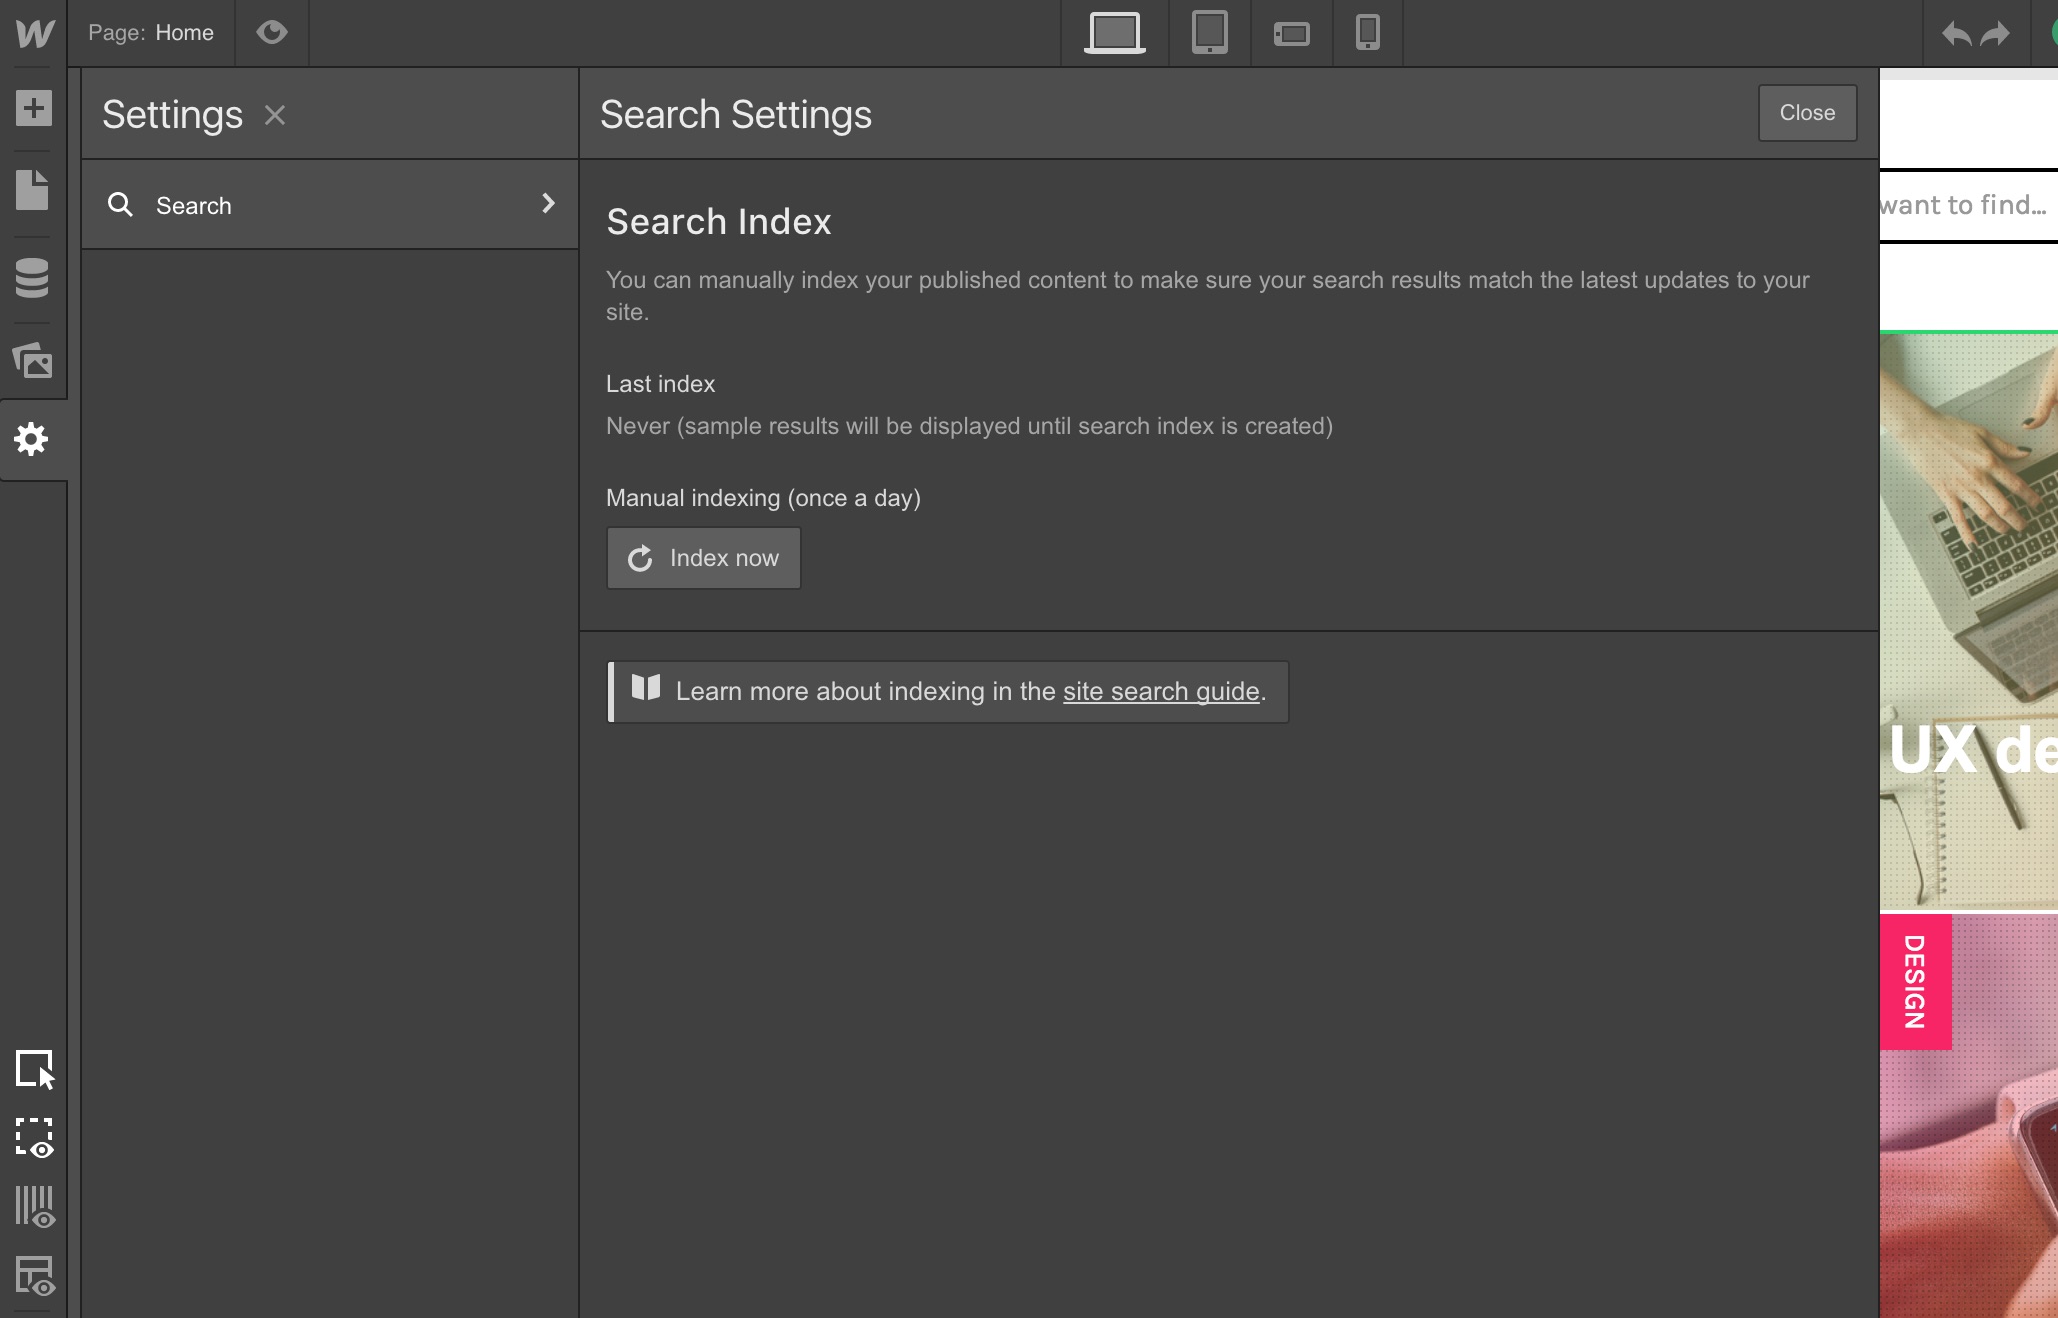
To check on the status of your index, go back to the search section of your Settings panel. (If you make a major content change and need your site reindexed immediately, please contact support, who can reindex for you as a one-time courtesy.)
Manual reindexing is available once every 24 hours on CMS hosting, and once every hour on Business hosting.
Automatic reindexing
On an ongoing basis, we’ll update your search index to keep the content in your search engine up to date with the latest changes to your site. On CMS hosting, automatic reindexing takes place 72 hours after a full-site publish, and on Business hosting automatic reindexing takes place 12 hours after a full-site publish. The full-site publish can be done through the Designer, Dashboard, or via the API. (Single item publishing CMS items does not trigger automatic reindexing, and a full-site publish is required.)
Refining your search index
By default, everything on your site (excluding Symbols, Collection Lists, Utility Pages, and password-protected content) is indexed when you add search, and so users can discover this content when they search for something. In most cases, you’ll want to refine your index to exercise more control over what users can discover through search — and hide content you don’t want to be discovered.
Excluding content from site search does not affect how Google and other search engines index your site. You can ask search engines not to index particular pages in your Site Settings.
Excluding static pages
A common example of when you’d want to refine your index is if you have a specific page you don’t want to let users find in search — for example, an internal style guide that you’d like to keep private, or even your homepage, which only acts as an entry point to your site. In these instances, you’d want to exclude these static pages from search altogether.
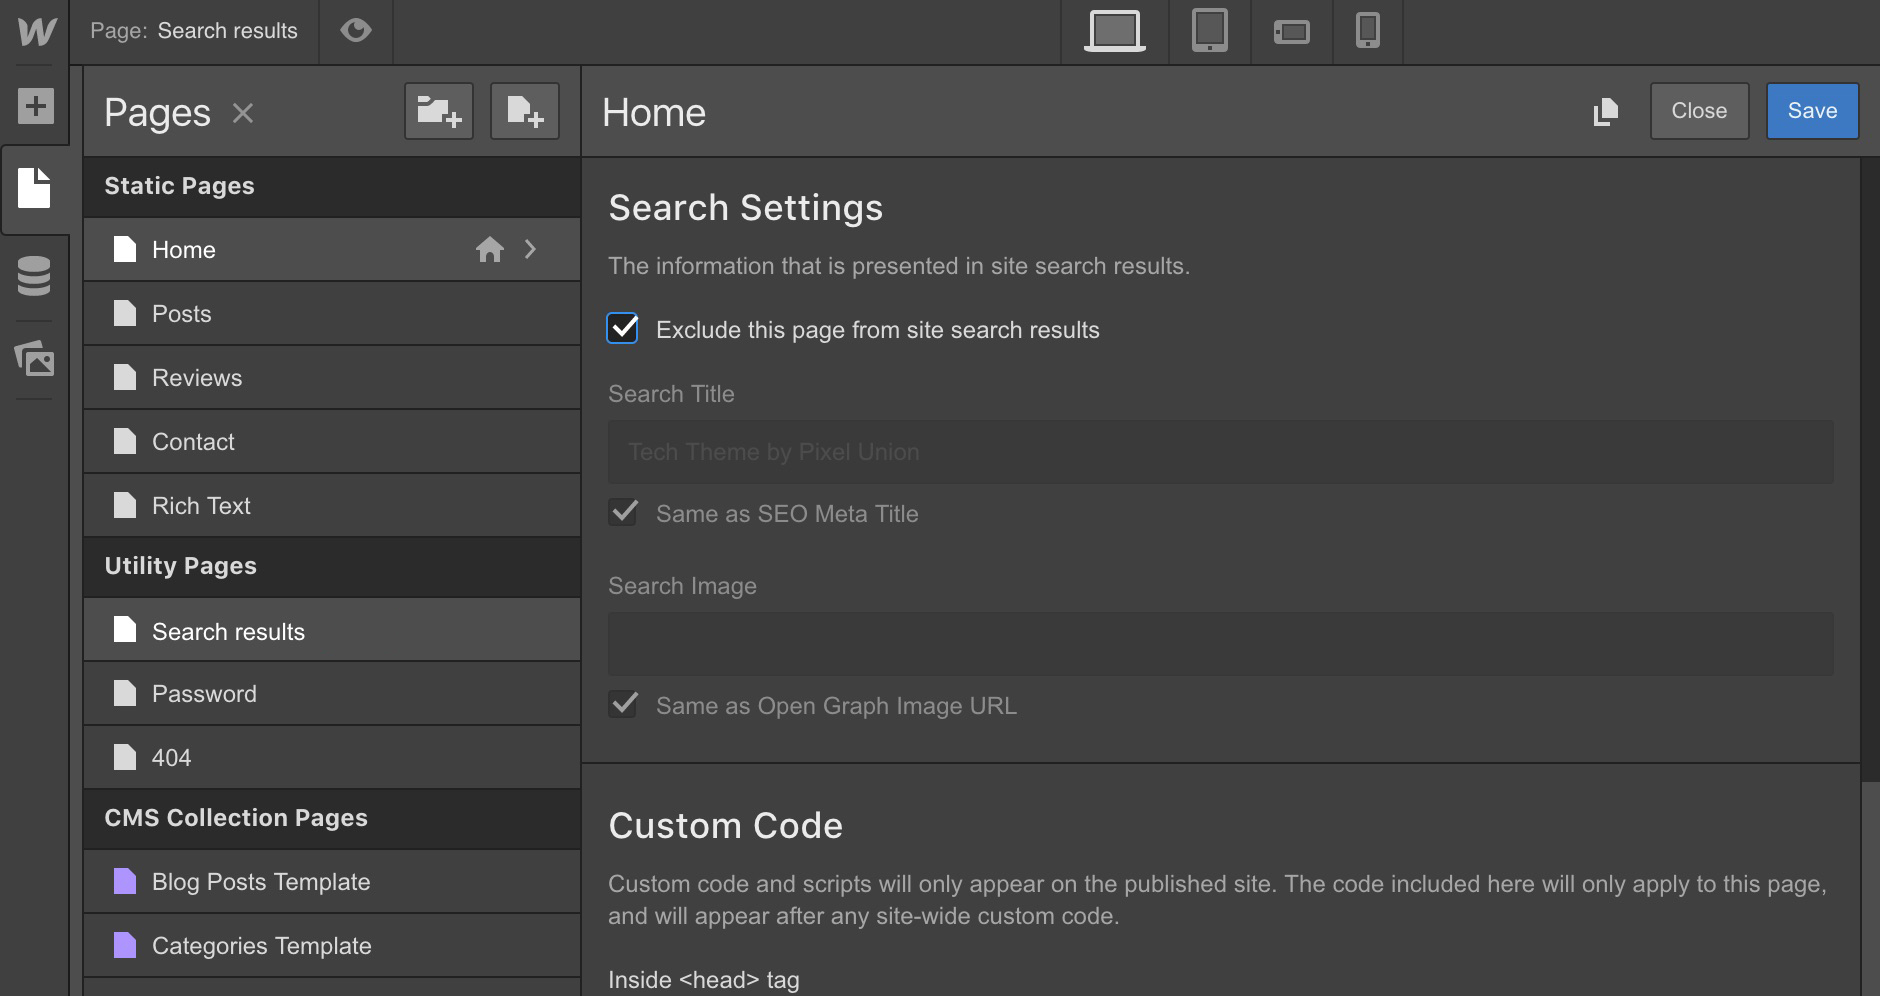
To exclude static pages, head to the Page Settings and scroll down to the new Search Settings section, which lives below your Open Graph settings. At the top of this section you’ll see a checkbox to “Exclude this page from site search results.” Once checked, a reindex will remove this page from your index.
Password protected pages and Utility pages are excluded from search by default.
Excluding Collection pages
Similarly, you might want to exclude specific Collections from search if they are not central to your site’s content, such as tags, categories, or other information that doesn’t have interesting Collection Pages.
To exclude Collection Pages from search, head to the Page Settings for that Collection Page and scroll down to the Search Settings section. Once you check “Exclude these pages from site search results,” these pages will be removed from your search engine the next time your site is indexed.
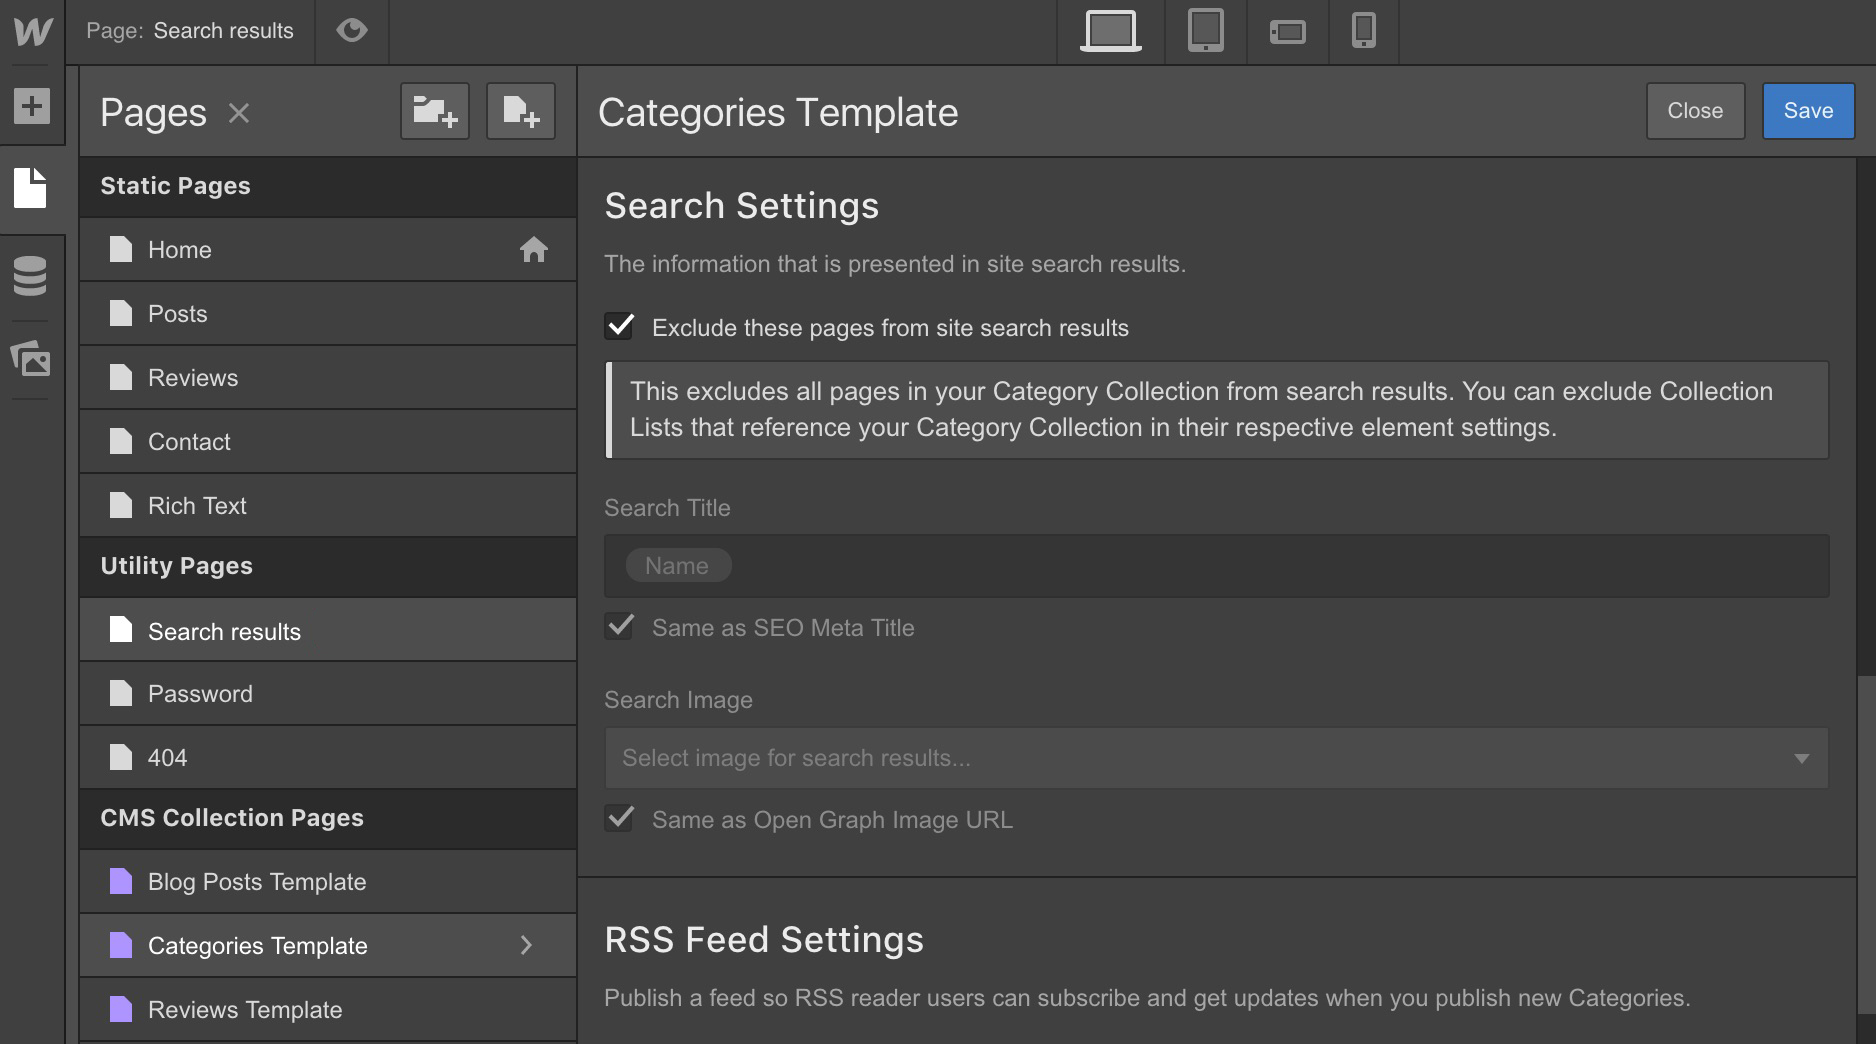
Excluding a Collection page will exclude all the template pages from search results, but any appearances of this Collection’s content in Collection lists on other pages will still be discoverable, as they’ll be indexed from that page’s content. In this case, you may want to apply element level exclusion for those Collection lists (see below).
At present it is not possible to exclude individual Collection items from search.
Excluding elements
It’s a good idea to exclude recurring elements (such as nav bars, footers, sidebars, and forms) from search because they appear across your site and can “muddy up” your search results. (For example, if a person searches for “Blog posts” but the word “Blog posts” is in your navigation, every page on your site would be considered relevant for that search.)
For this reason, Symbols and Collection lists are excluded from search results by default, but you can override this setting on the parent element of the symbol.
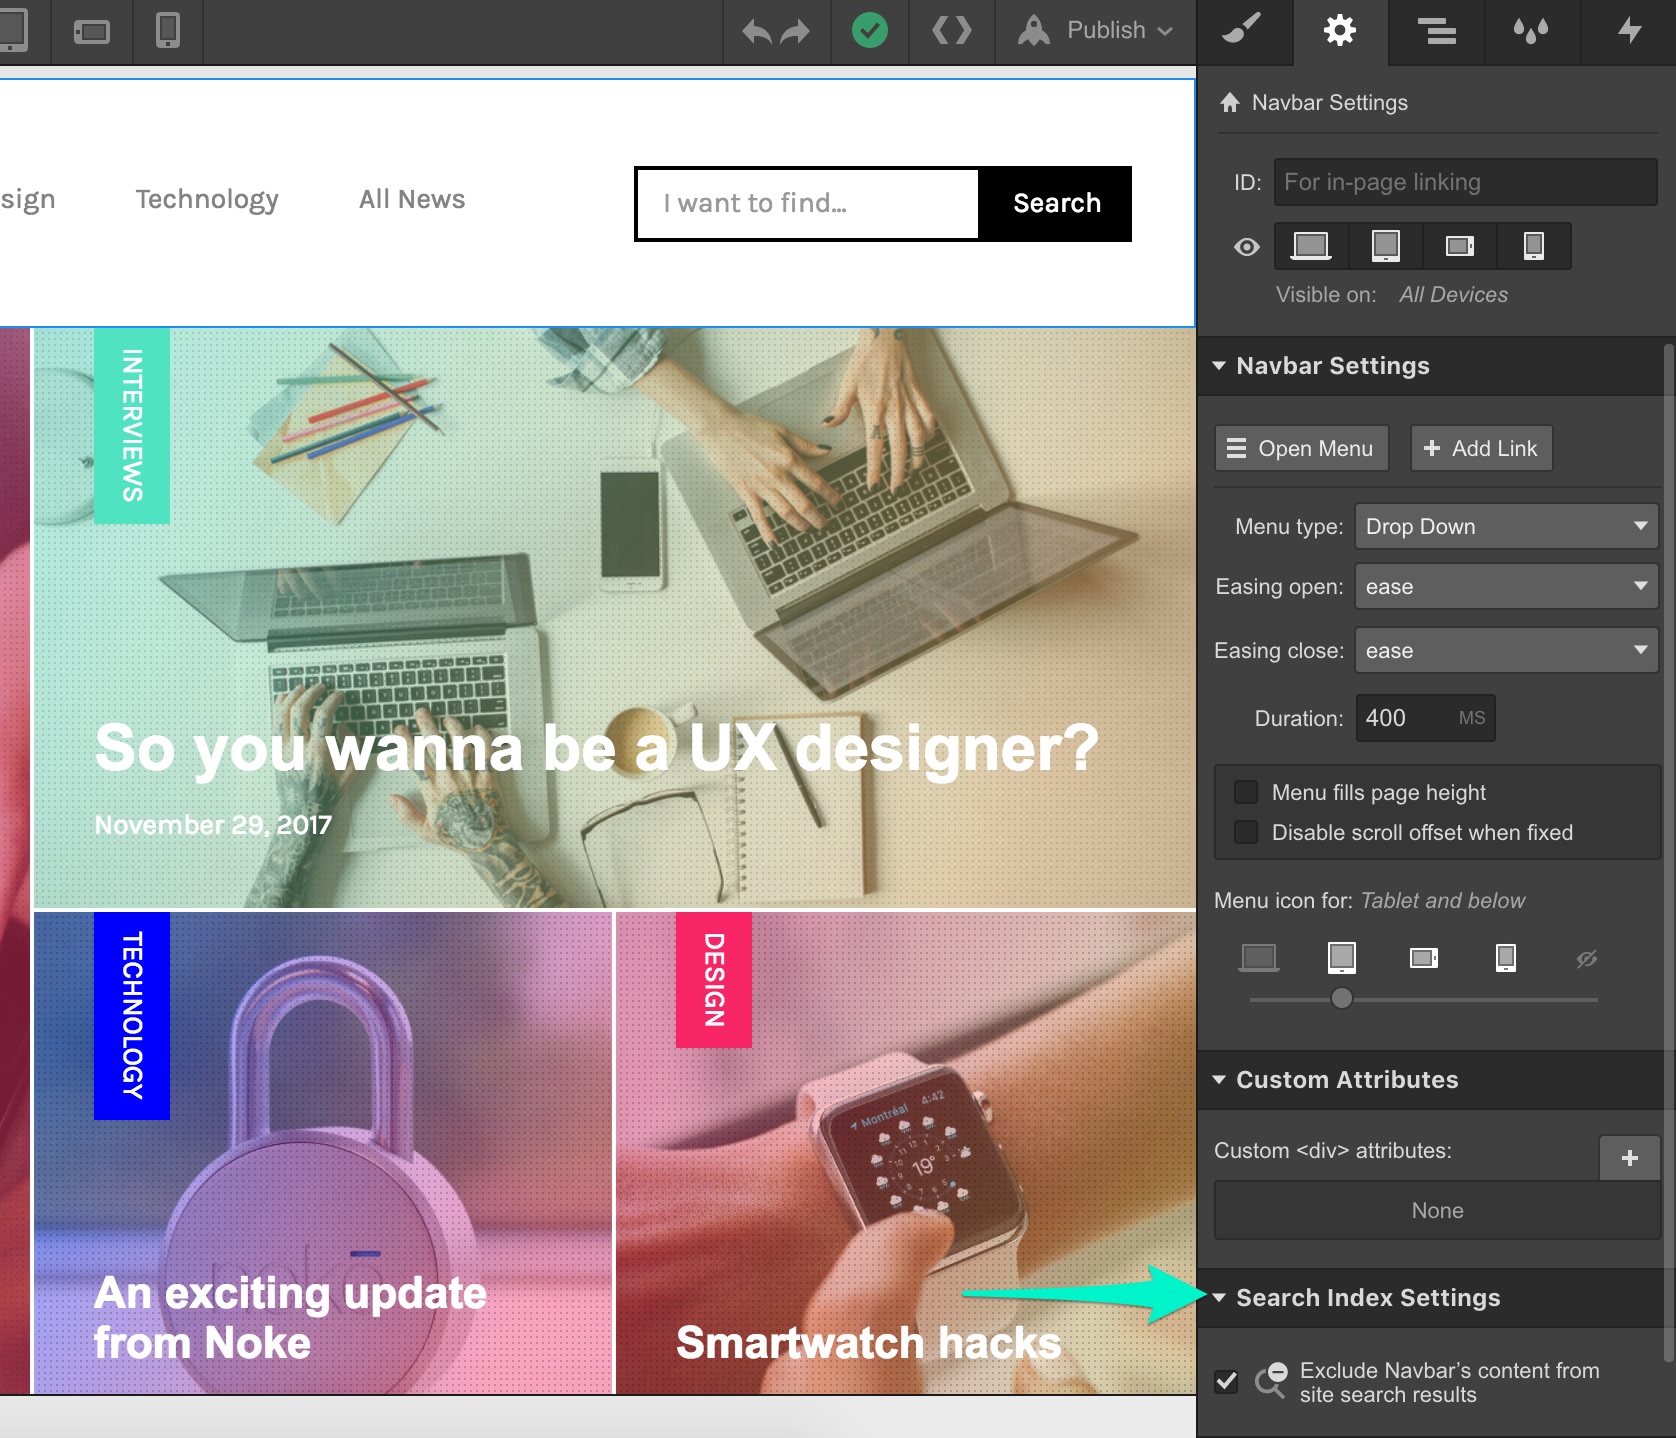
To exclude specific elements, open the element’s settings and under the Search Settings section, click “Exclude content in search results.”
Any exclusion rules set at the parent level will also apply to children elements.
Frequently asked questions
What happens with search if I export my code?
Search will not work on exported sites, as the search engine needs to be hosted with Webflow.
How can I see what users are searching for?
To see what your site visitors are searching for, integrate your Webflow site search with Google Analytics.
Can I have multiple search engines with different content?
At the moment, sites are limited to one search engine. You can have a search bar on as many pages as you’d like, but they will all search across the same content.
Can I search for things in the Editor?
Search does not work in the Editor. To test search, open your site in an incognito link or test results from the Designer in the Search Results settings results preview input.


