Catch your site visitors’ attention by using background gradients and image text fills to take your Heading game up a notch. Really wow them with a scroll that reveals your background image through your text’s characters.

In this lesson, you’ll learn how to add a text fills to any text in your project doing the following:
Gradient text fill
Let’s first add a Heading to our page and set its font to something that’s a heavier weight so we can see our text fill within its characters:
- Open the Add panel
- Drag a Heading onto the page
- Open Style panel > Typography and set the font (e.g., “Inter 700 - Bold”)
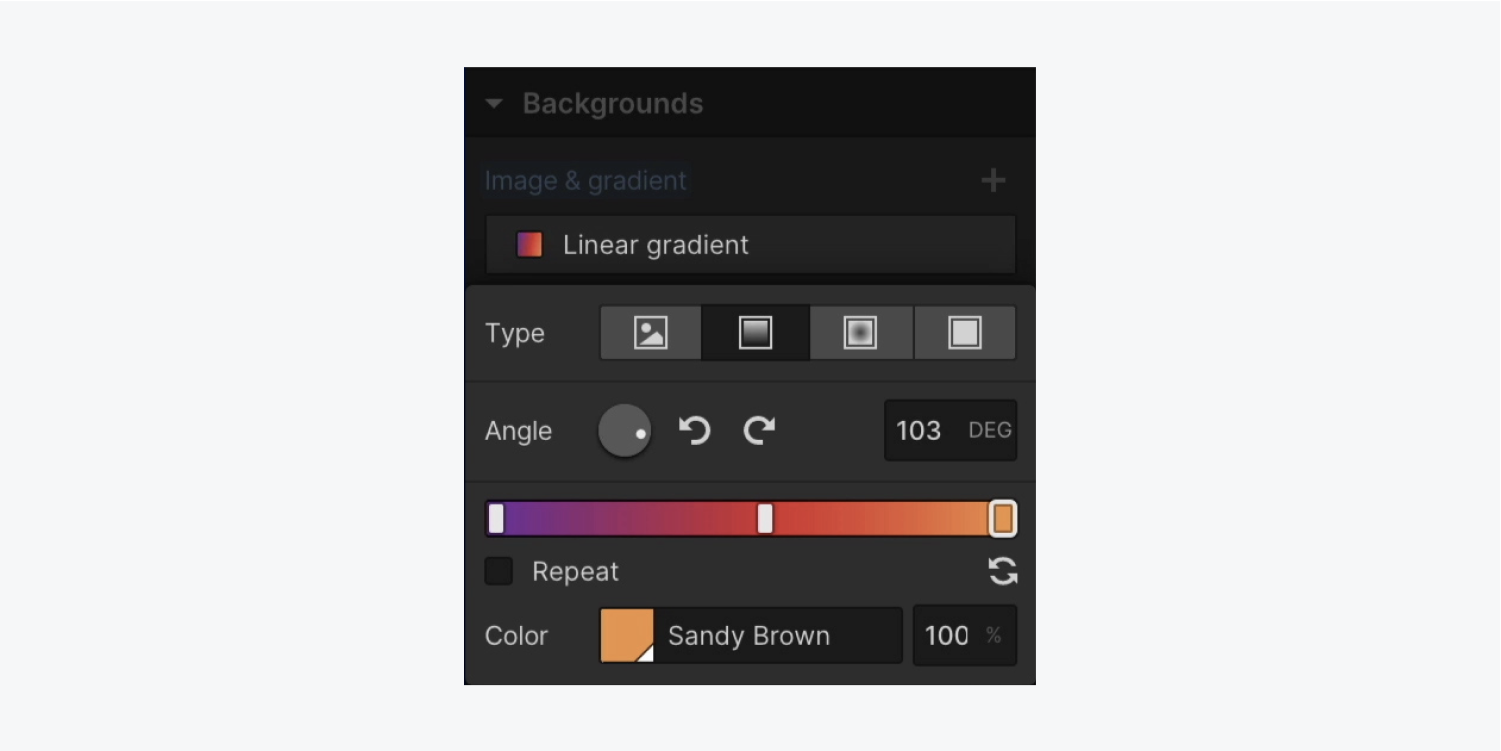
Set a gradient on the Heading:
- Select the Heading
- Open Style panel > Backgrounds
- Click the Image and gradient “plus” icon
- Choose Linear gradient as the Type
- Set as many gradient stops as you’d like and click the color picker to choose a color for each gradient stop
- Adjust the angle of your gradient by clicking and dragging the direction dial dot, pressing the arrows, or typing in your angle degree directly
Read more about background gradients.
Note: Safari interprets (and interpolates) gradients to a transparency as “transparent black”. Therefore, the transparent color will look black for Safari users.
Now for the magic — let’s apply the gradient to just the Heading text:
- Select the Heading
- Open Style panel > Backgrounds
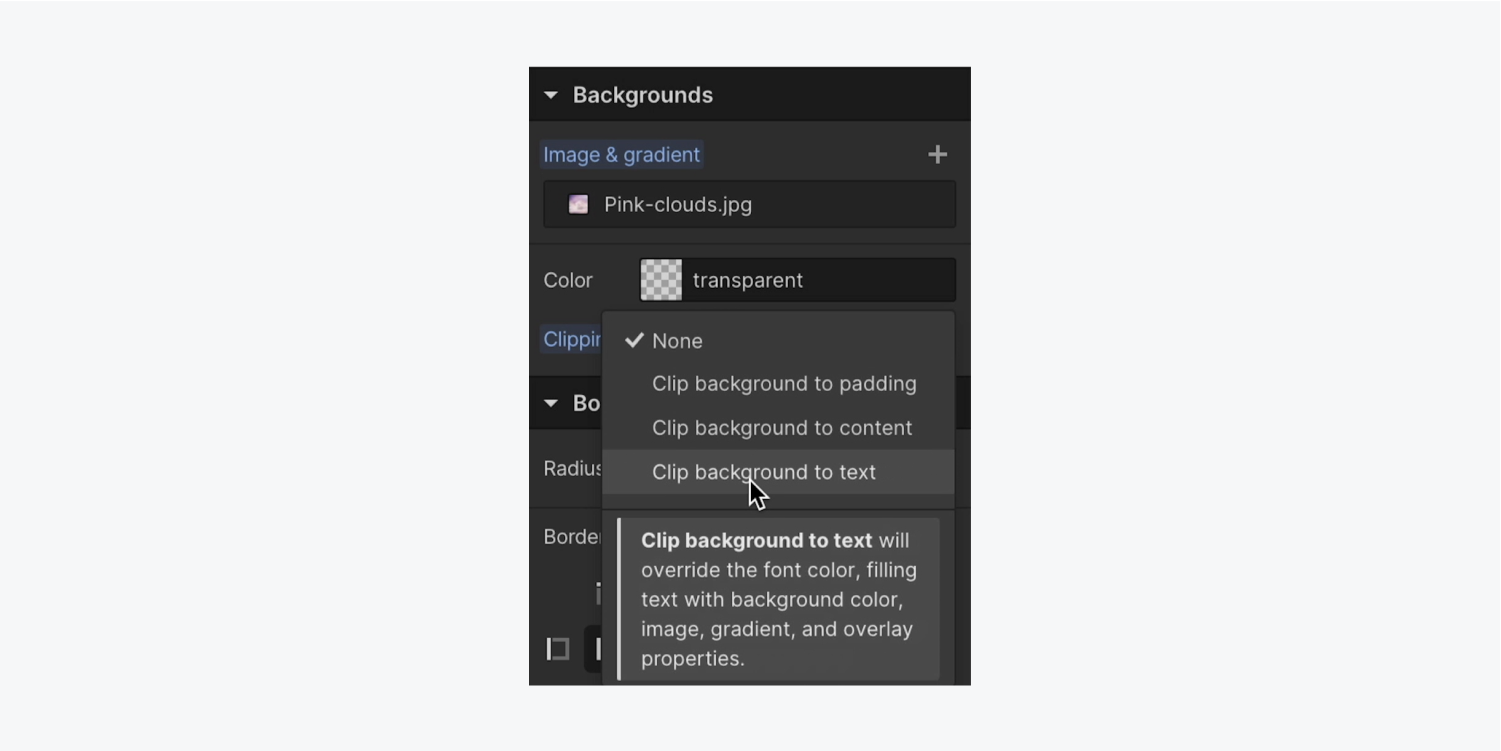
- Choose “Clip background to text” from the Clipping dropdown menu
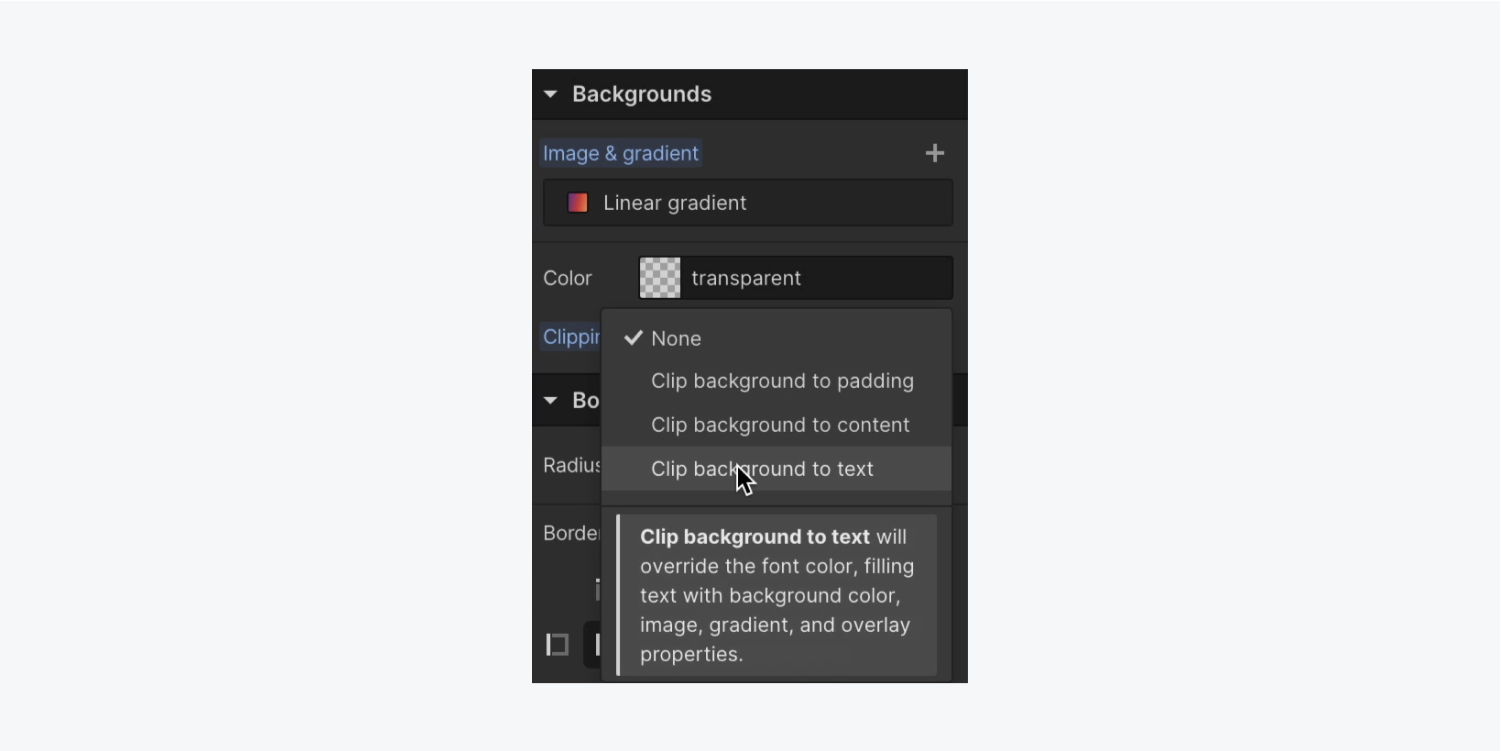
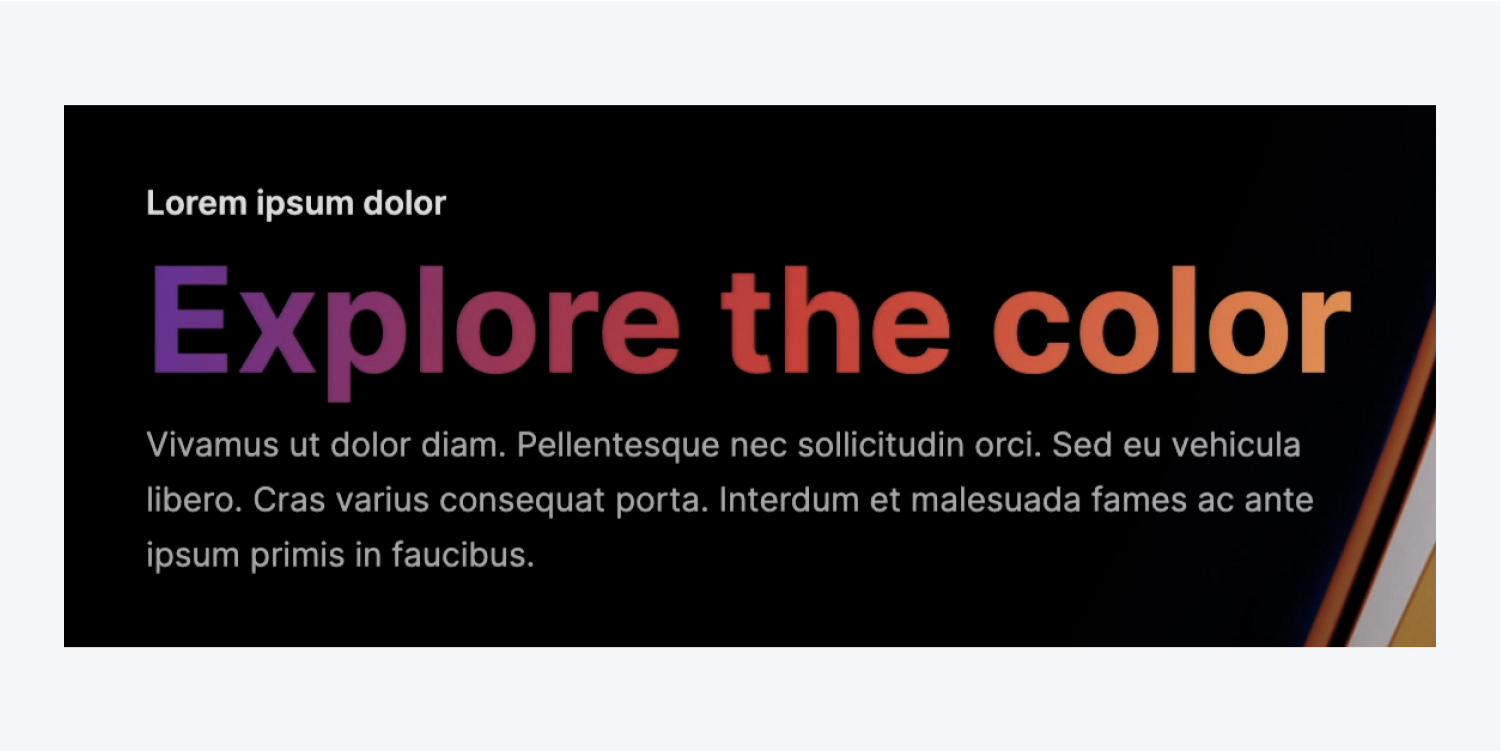
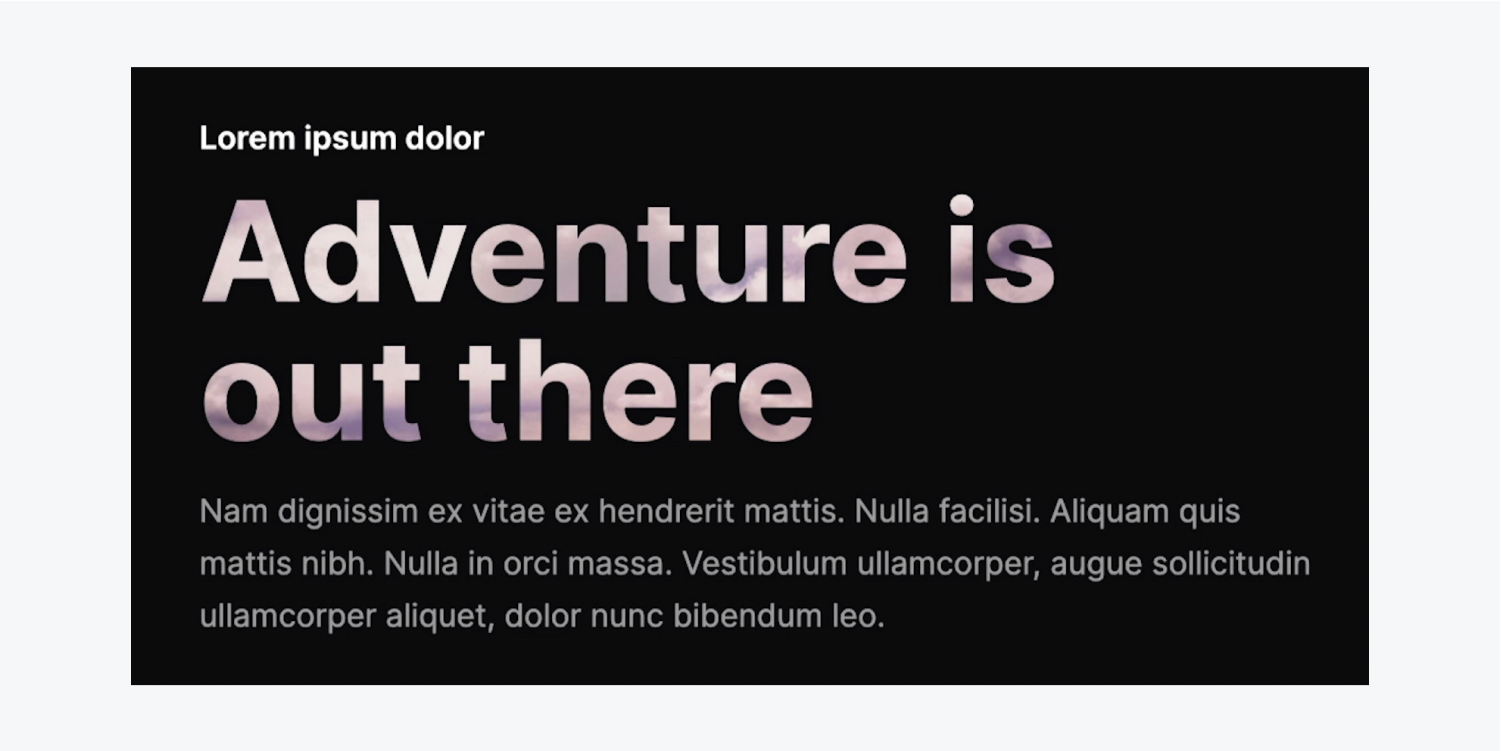
Image text fill
Let’s add another Heading to our page:
- Open the Add panel
- Drag a Heading onto the page
- Open Style panel > Typography and set the font (e.g., “Inter 700 - Bold”)
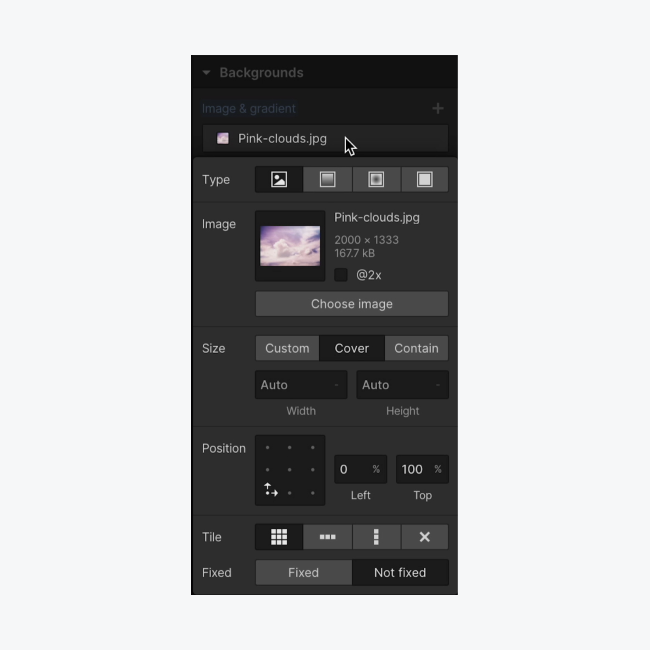
Use a Background image for our text fill:
- Select the Heading
- Open Style panel > Backgrounds
- Click the Image and gradient “plus” icon
- Click “Choose image” to select the image for your text fill
- Set the image to Cover
- Click a dot under Position to adjust how your image is displayed (e.g., select the lower left dot)
Read more about background images.
We’ll do the exact same thing we did before to clip our gradient to the text:
- Select the Heading
- Open Style panel > Backgrounds
- Choose “Clip background to text” from the Clipping dropdown menu
Fixed image text fill
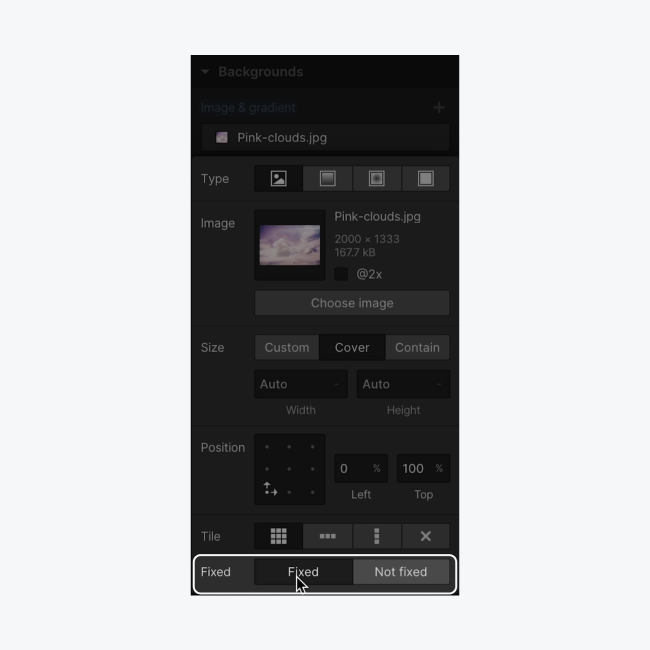
Let’s make our text act like a cutout — a window — into our background image. As your visitor scrolls down the page, the Heading text reveals portions of the background image behind it.
- Select the Heading
- Open Style panel > Backgrounds
- Choose Fixed to ensure the background covers the entire viewport and remains fixed as you scroll
There you have it - wow your visitors with visually stunning text!


