We’ll use the power of Flexbox to easily make a footer stick to the bottom of each page in your project — no matter how much or how little content is above it.
Preview and clone the project featured in this video.
In this lesson, you’ll learn how to create a sticky footer doing the following:
Configure Body (All pages) tag
When you modify the Body (All pages) tag it affects the Body element on all pages within a project. You can set your Body (All pages) tag to Flex to help quickly lay out and align your design. Read more about the Body (All pages) tag.
Let’s select the Body (All pages) tag:
- Choose the “Contact” page from the Pages panel
- Select the Body element in the Navigator
- Click into the Selector field in the Style panel
- Choose the Body (All pages) tag from the dropdown
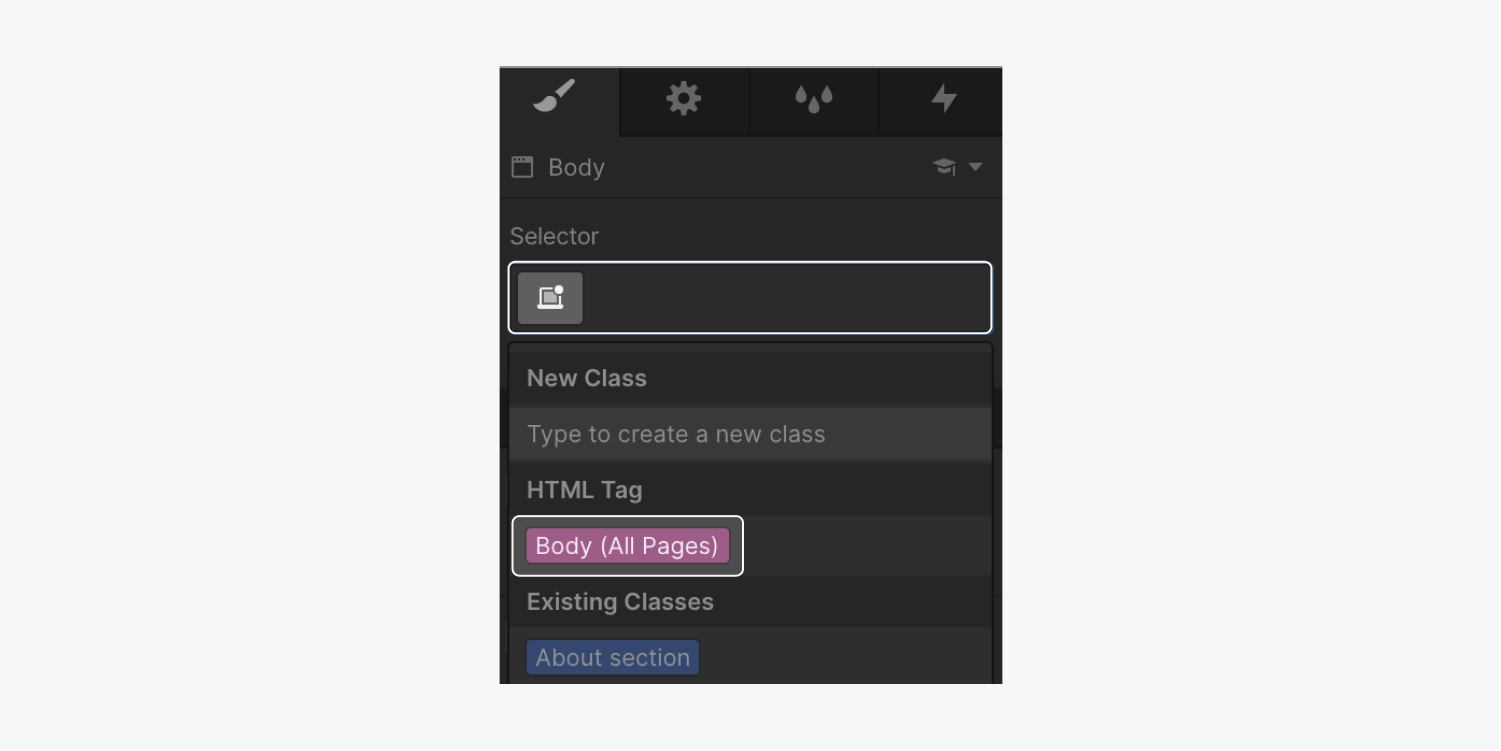
With the Body (All pages) tag selected, you can make items stack vertically inside the Body element:
- Open Style panel > Layout
- Set Display to Flex
- Set Direction to Vertical
Set margin on the footer
Because you set the Body — the footer’s parent element — to Flex, you can set the top margin on the footer element to Auto. This makes the footer push away from the content above, causing the footer to stick to the bottom of the page.
To set the footer margin:
- Select the footer Section (e.g., “Footer”)
- Open Style panel > Spacing
- Set the top margin to Auto
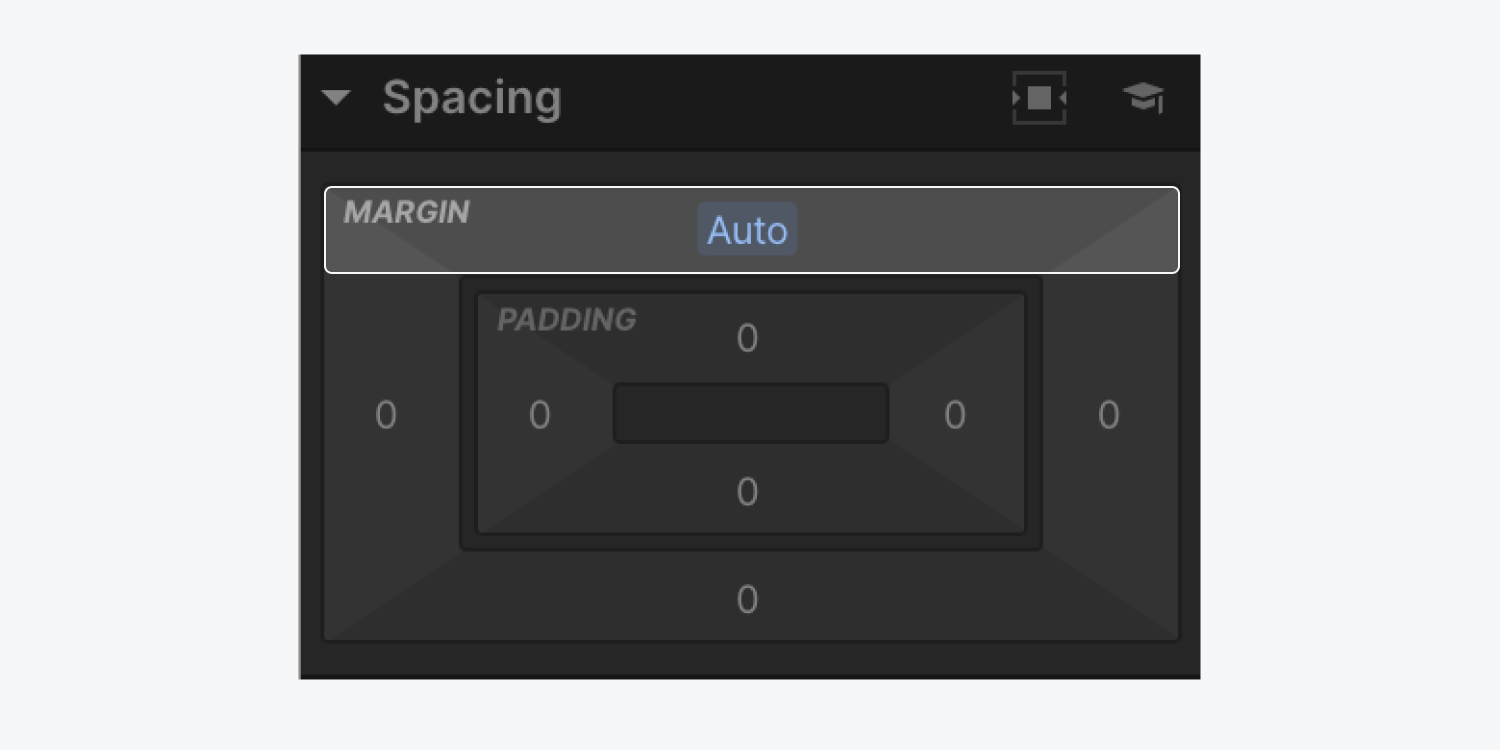
Make the footer a Symbol
Instead of copying and pasting the footer into other pages, you can make a Symbol from it to easily reuse the footer across your project.
Create a Symbol from the footer:
- Select the footer Section
- Right click the footer’s label
- Choose “Create Symbol” from the menu that appears
- Name the Symbol (e.g., “Footer”)
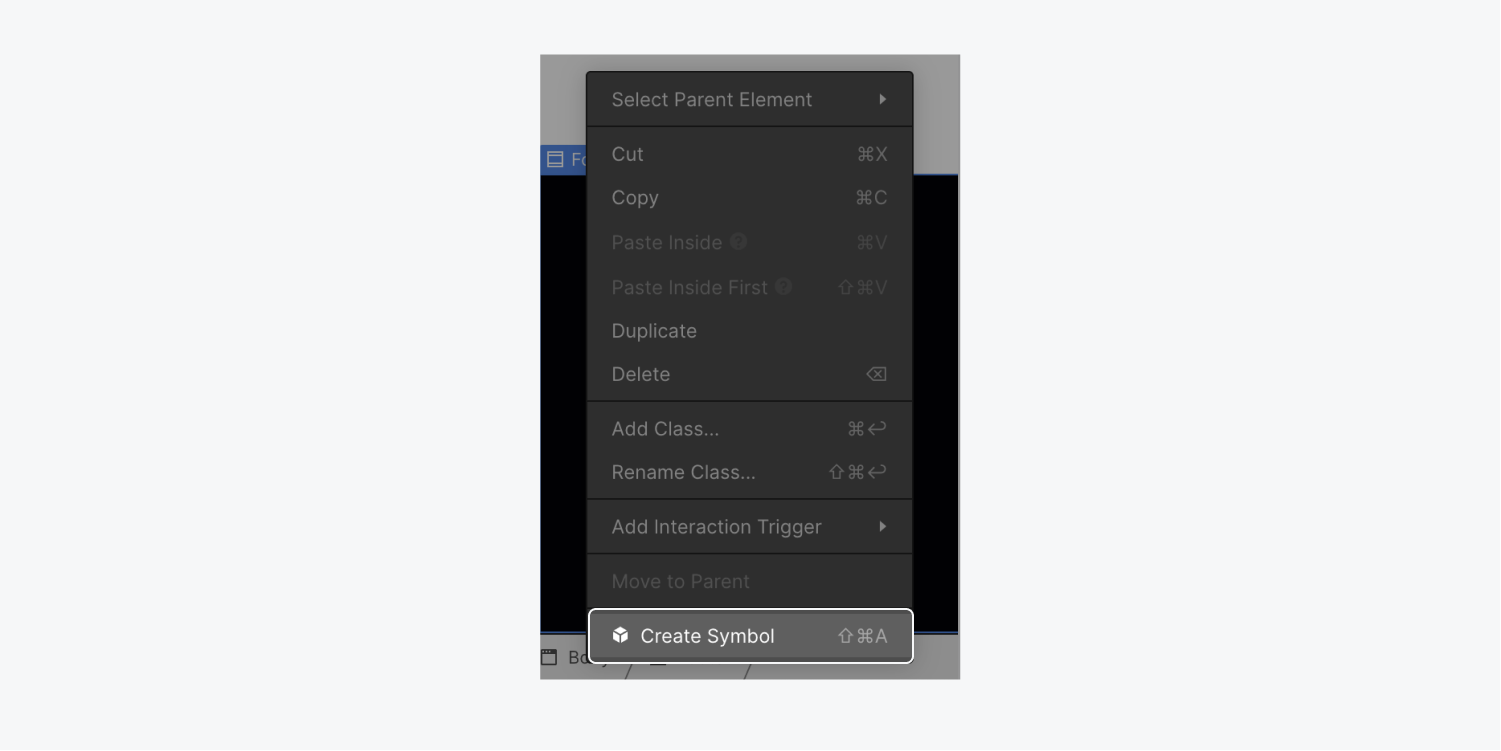
Now that your footer is a Symbol, you can reuse it anywhere in your project.
For instance, if you open another page in your project that contains more content — and subsequently more vertical height — you can add the “Footer” Symbol just like you would add any other element.
Let’s add the “Footer” Symbol to a page that contains more content (e.g., the “Home” page).
Choose the “Footer” Symbol you made:
- Select the “Home” page
- Open the Navigator
- Click the Symbols panel
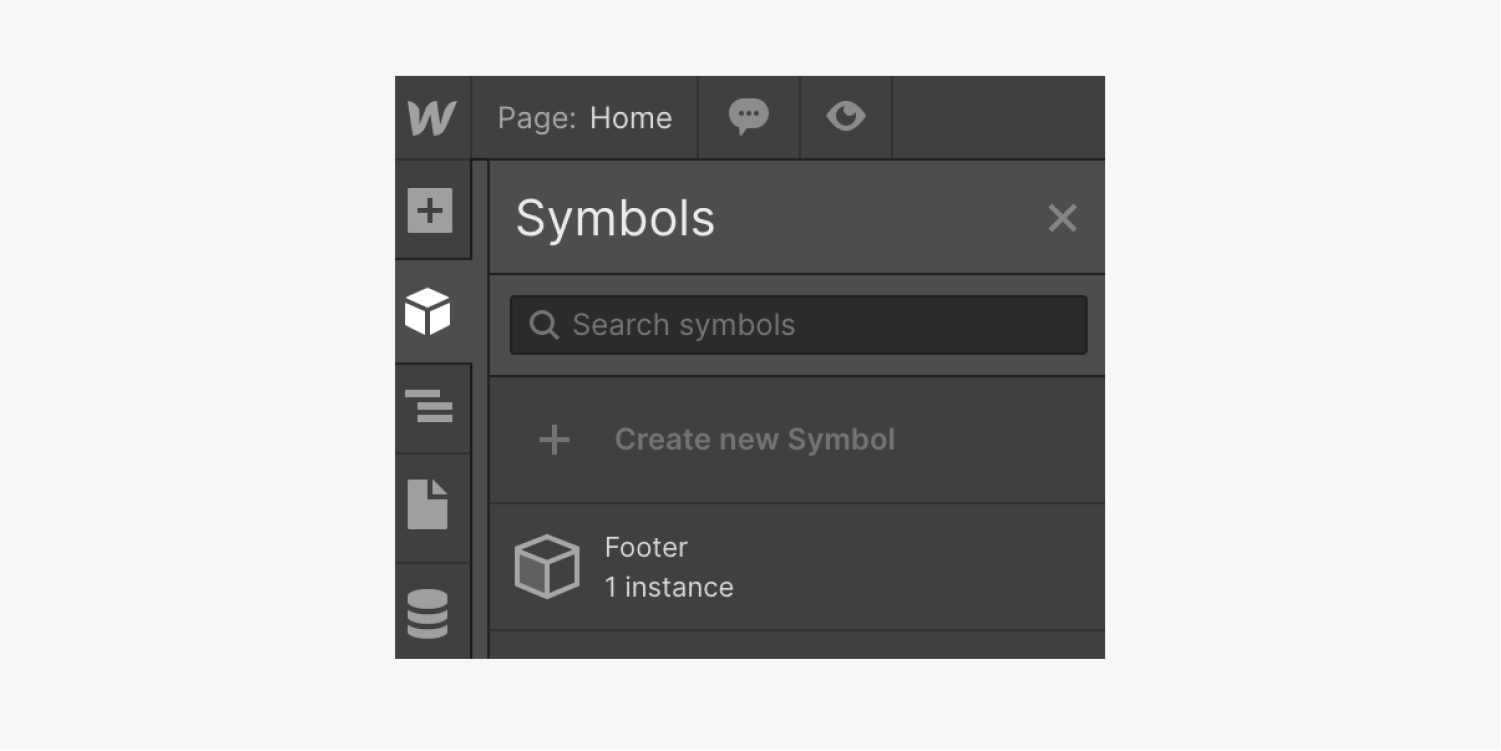
Add the “Footer” Symbol to your page:
- Drag the “Footer” Symbol into the Navigator
- Place the “Footer” Symbol is inside the Body element and under all the other homepage content
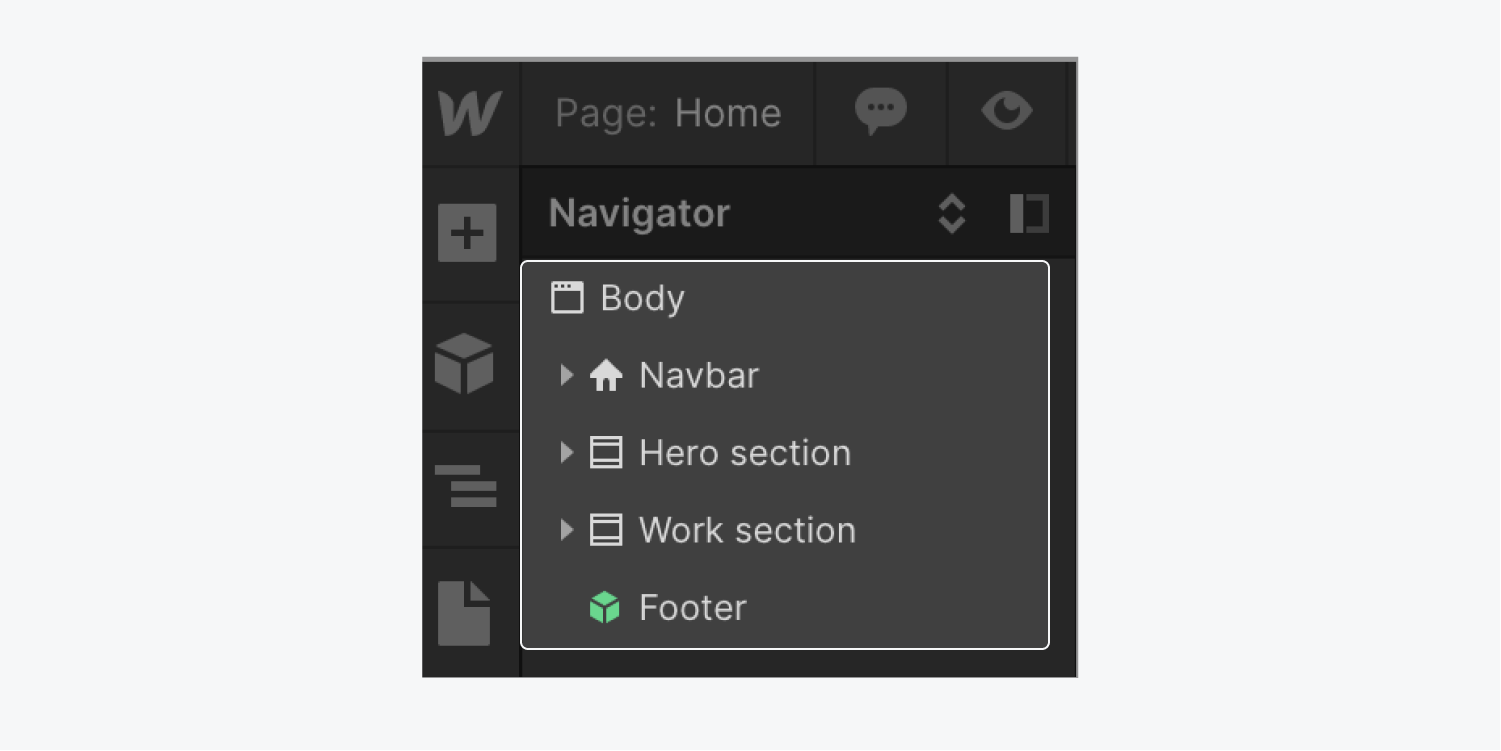
Because the Body is set to Flex and the footer Section has a top margin set to “Auto,” the footer respects the other content on the page, and hasn’t created additional white space above it.
Alternatively, if you were to add the footer to a page whose content wasn’t tall enough to push the footer to the bottom, the white space above the footer would only be created if needed.
Note: A Symbol’s strength is its ability to update changes across all instances of the Symbol. If you make a change to a Symbol on any one page, it automatically updates all instances of that Symbol throughout your project.
Nice work — time to add footers to all the pages!
Remember: You can preview and clone the project featured in this video.


