In this lesson we'll cover:
- How to duplicate (or copy) a site
- How to prepare your site for transfer
- How to transfer a site to another user
- How to transfer a site to a Workspace in your Dashboard
- How to transfer a hosted site with an active site plan
- How to transfer a Made in Webflow site
- How to transfer an Ecommerce store
- How to delete a site from your Dashboard
Note: You can only transfer or delete a site if you are a Site admin. All members can duplicate a site. Learn more about site level roles and permissions.
How to duplicate a site
You may want to duplicate your site for various reasons. You can do that in 2 ways:
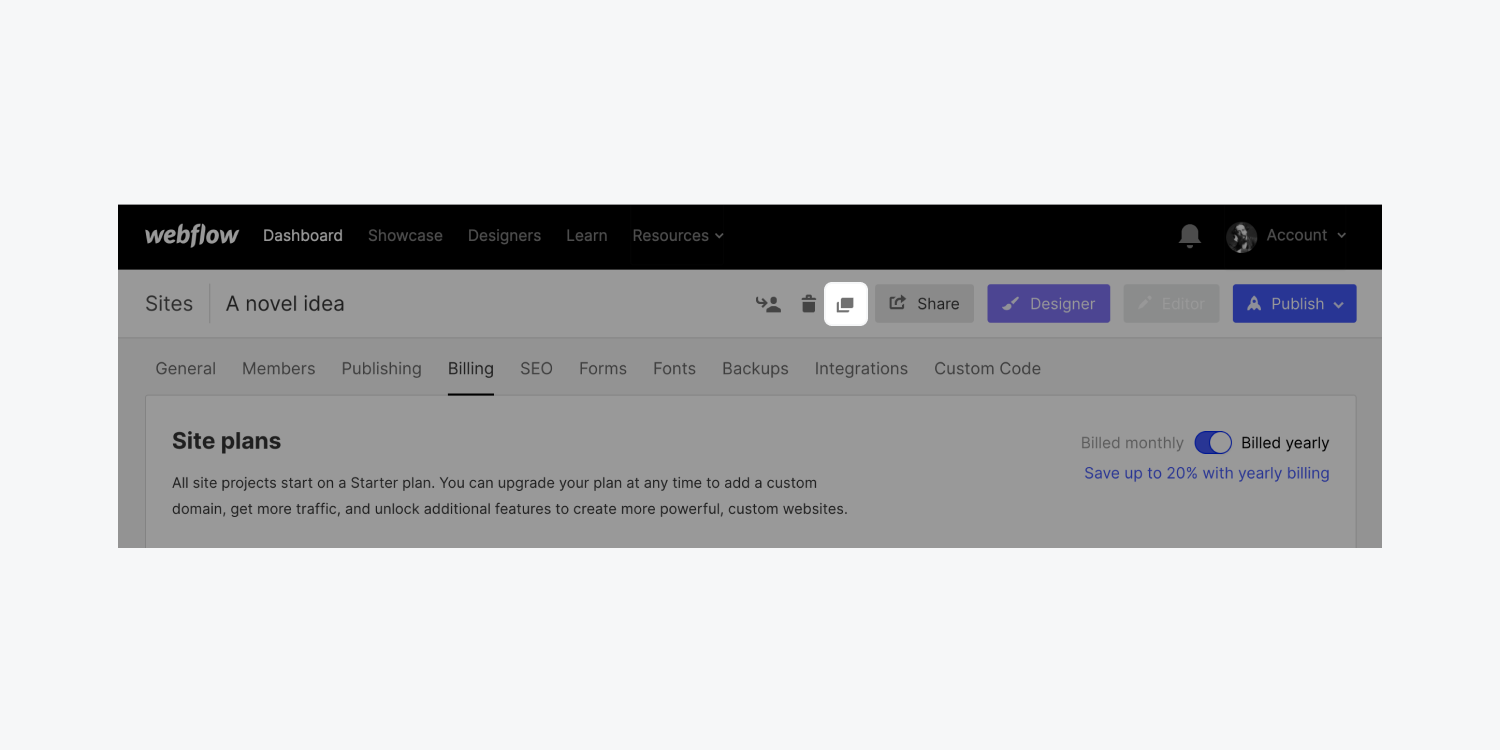
- Open your site’s settings
- Click the “Duplicate site” icon in the top bar
- Confirm and click Duplicate project in the modal
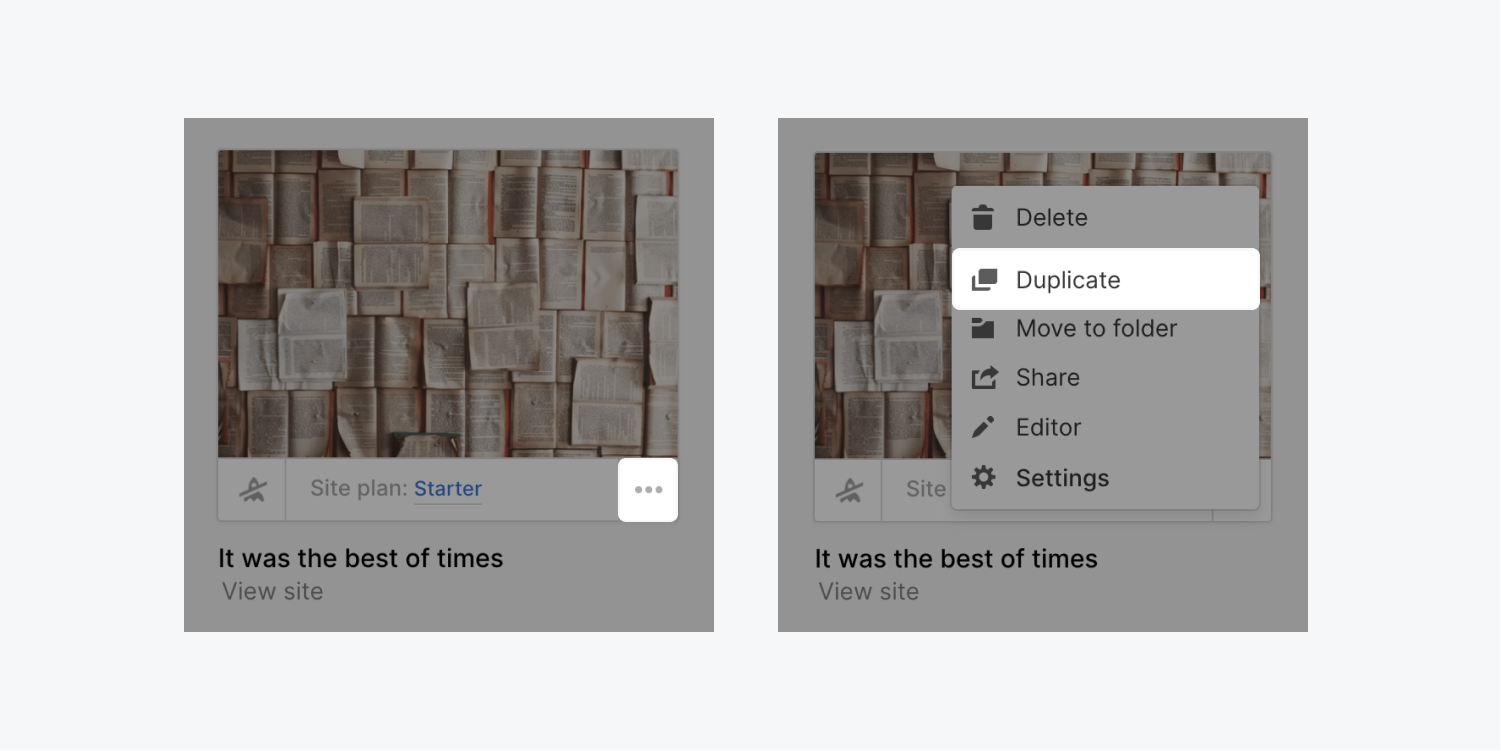
- Open your Dashboard
- Click the 3 disclosure dots under your site’s thumbnail
- Choose Duplicate from the menu
- Confirm and click Duplicate project in the modal
Good to know: Your site, styles, pages, assets, and CMS will be copied to a new site. You can edit the subdomain and the name of your new site after it has been created. Any custom code, custom fonts, and your favicon and web clip will also be copied to the new duplicate site.
Important: All other site-wide configurations and settings such as form notification information, form submissions, backup versions, site members, content editors, billing, and Google Analytics code will be reset to default.
Note: If you wish to duplicate a site that uses a premium template, you'll need to repurchase the template. Learn more about templates.
How to prepare your site for transfer
You can transfer any sites (that aren't hosted or on Made in Webflow) between Workspaces in your Dashboard (e.g., you’re a member of each of the Workspaces). You can also transfer sites to other users who own Workspaces where you’re not a member.
Let’s walk through:
- What happens when you transfer a site
- Where to initiate the transfer
- How to transfer a site to another user
- How to transfer a site to a Workspace in your Dashboard
- How to transfer a hosted site with an active site plan
- How to transfer a Made in Webflow site
- How to transfer an Ecommerce store
What happens when you transfer a site
When you transfer a Webflow site, all your work in the Designer gets transferred to the new Workspace, including styles, pages, content (including CMS content), and custom code.
When you transfer the original site, the following content and settings also get transferred:
- Assets
- Backup versions
- Custom fonts
- Form submissions
- Redirects
- Other site settings
For security and privacy reasons, account- and client-specific configurations are reset to default and therefore not transferred with your site.
These include:
- Custom domain and hosting subscriptions
- Site members
- Content editors
- Form notification information
- reCAPTCHA keys (they're reset on transfer, but reCAPTCHA remains enabled)
- Adobe fonts (if integrated into your account)
- Billing and any other account- or email- specific information
Adobe fonts are only included when the Adobe Fonts API key is integrated into the site and not the account. Learn more about integrating Adobe Fonts into a site.
Note: Google Analytics code will only transfer when you are transferring an original site. It will not transfer when transferring a duplicate site. Learn more about transferring original sites vs duplicates.
Where to initiate the transfer
To access the transfer options:
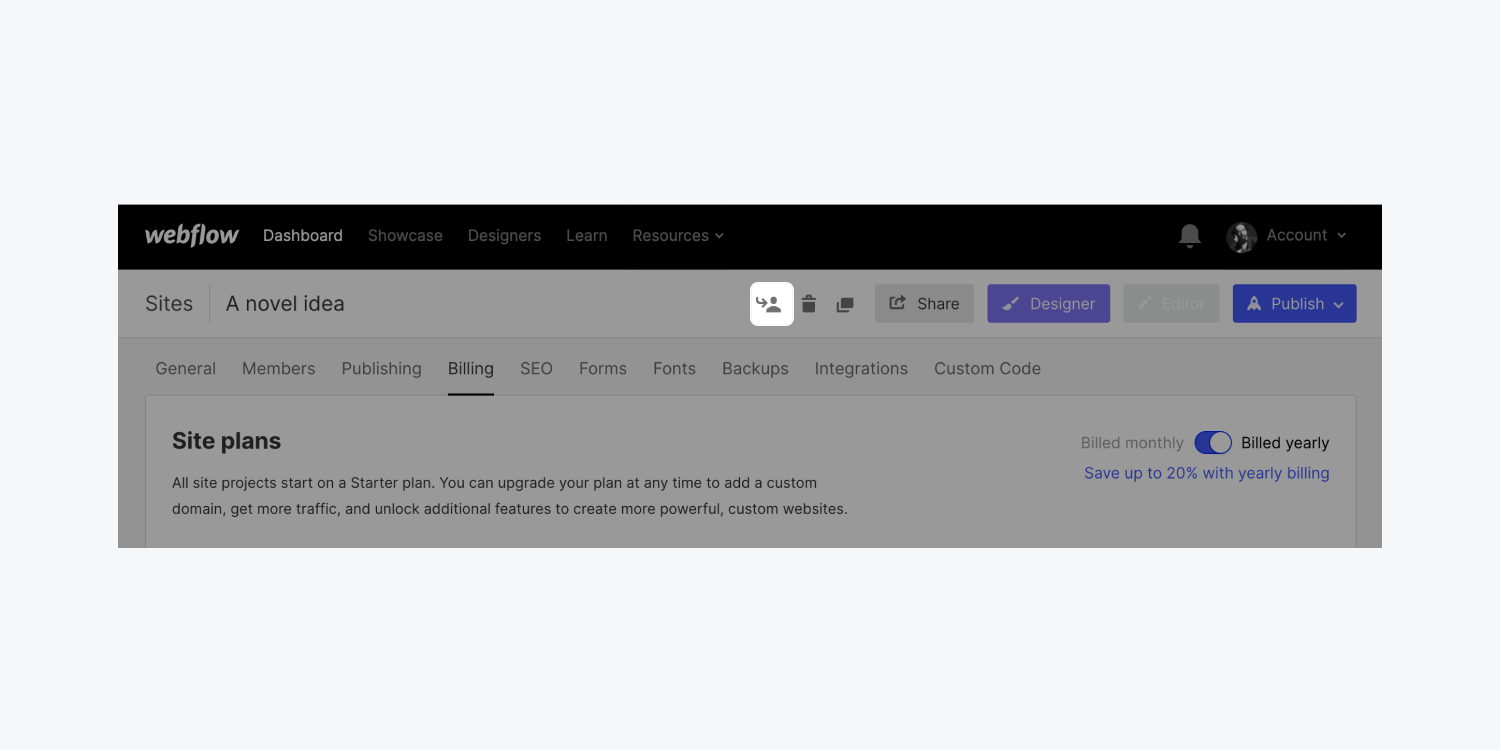
- Open your site’s settings
- Click the “transfer” icon
How to transfer a site to another user
If you need to transfer a site to someone who is not a part of the Workspace(s) you belong to, you can choose to transfer to a specific user:
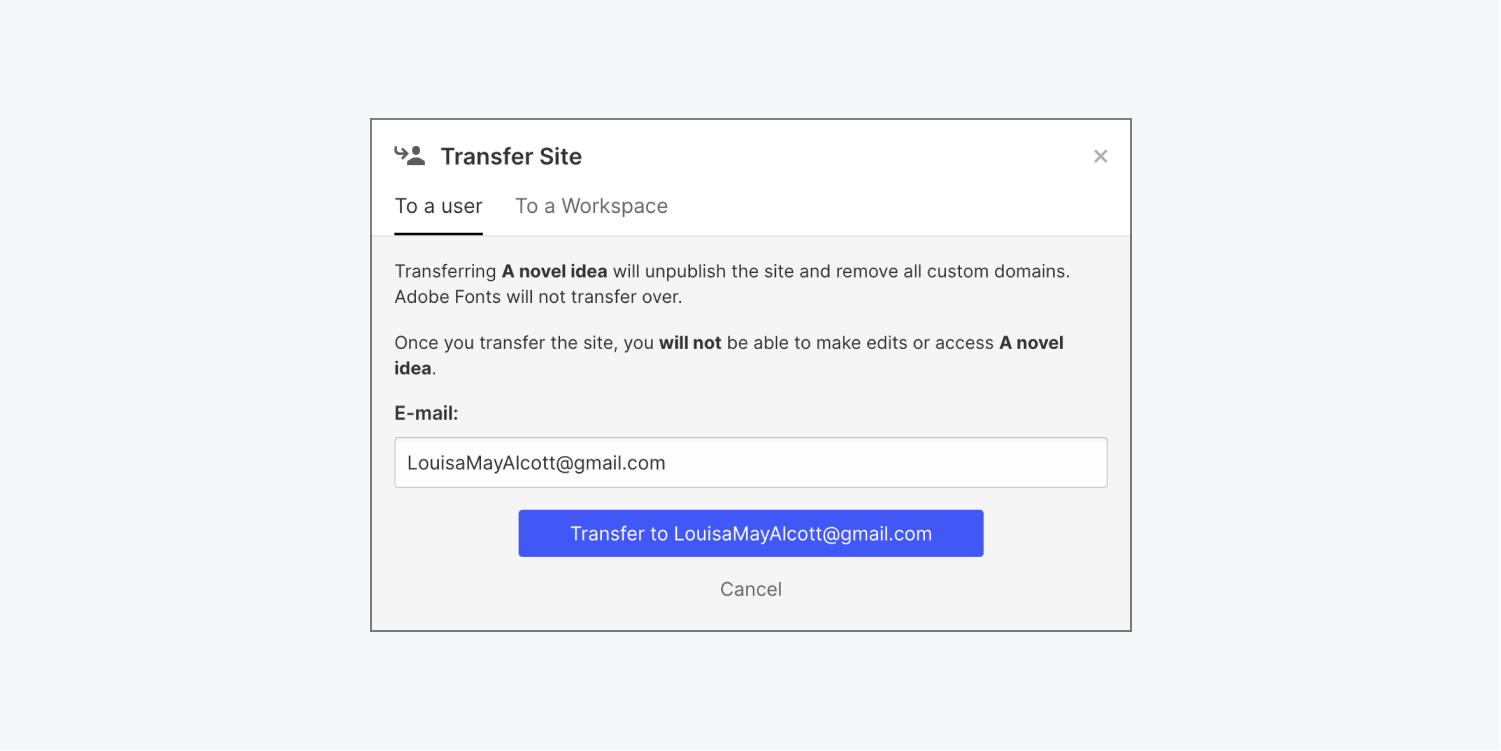
- Initiate your transfer
- Choose “To a user” in the transfer site modal
- Enter the email address of their Webflow account (make sure it’s correct)
- Click Transfer
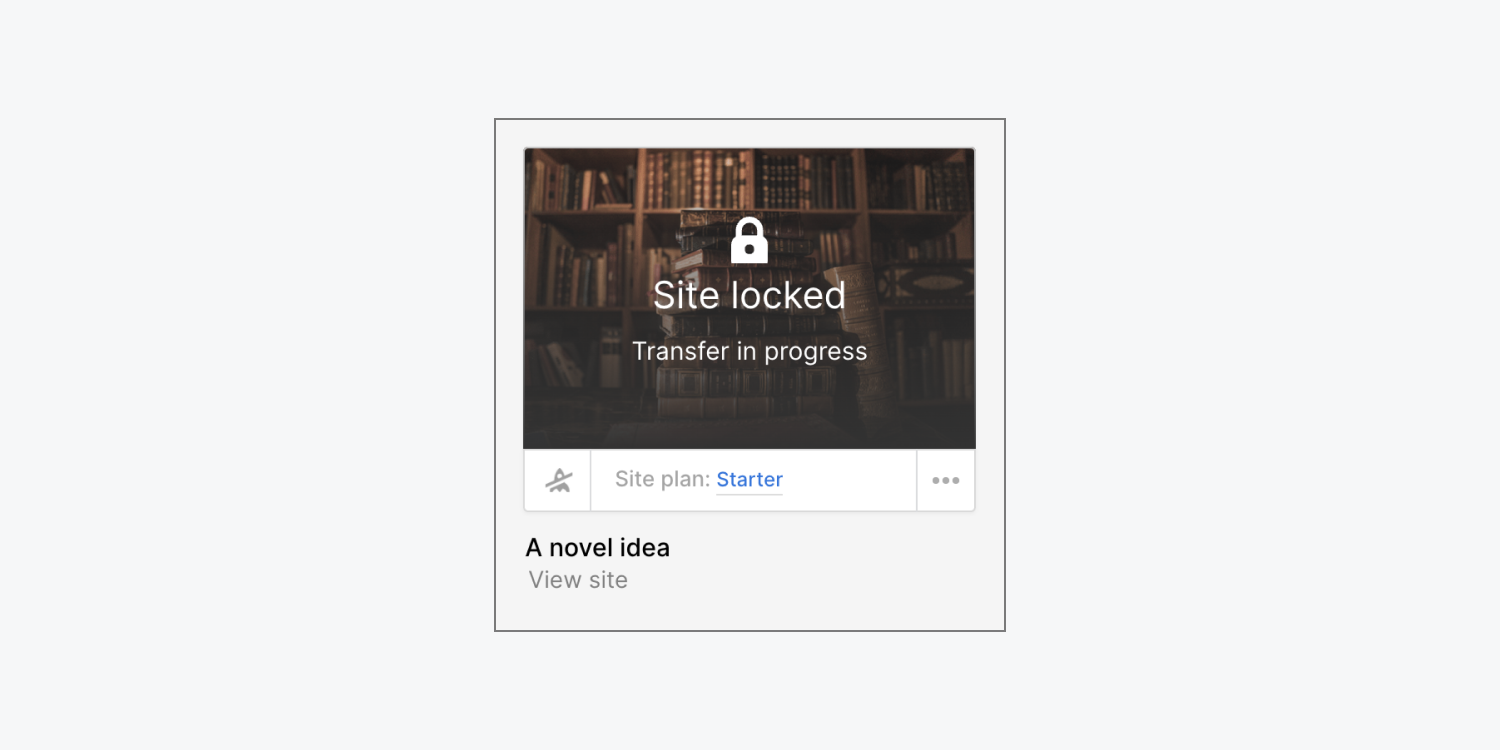
After you’ve started the transfer, the transferred site will appear locked in your Dashboard and will show that a transfer is in progress. The recipient will receive an email and see a banner notification in their Dashboard informing them they need to accept the transfer.
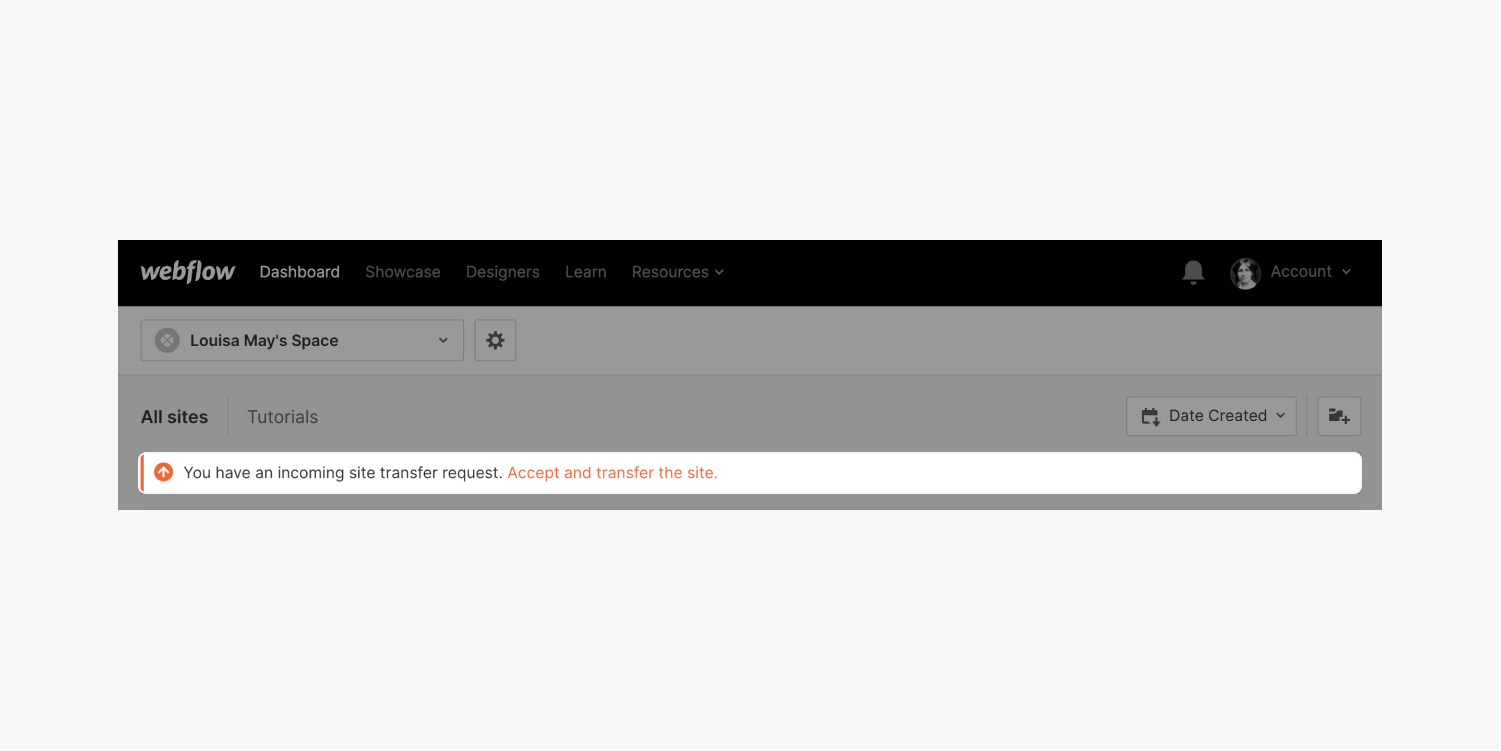
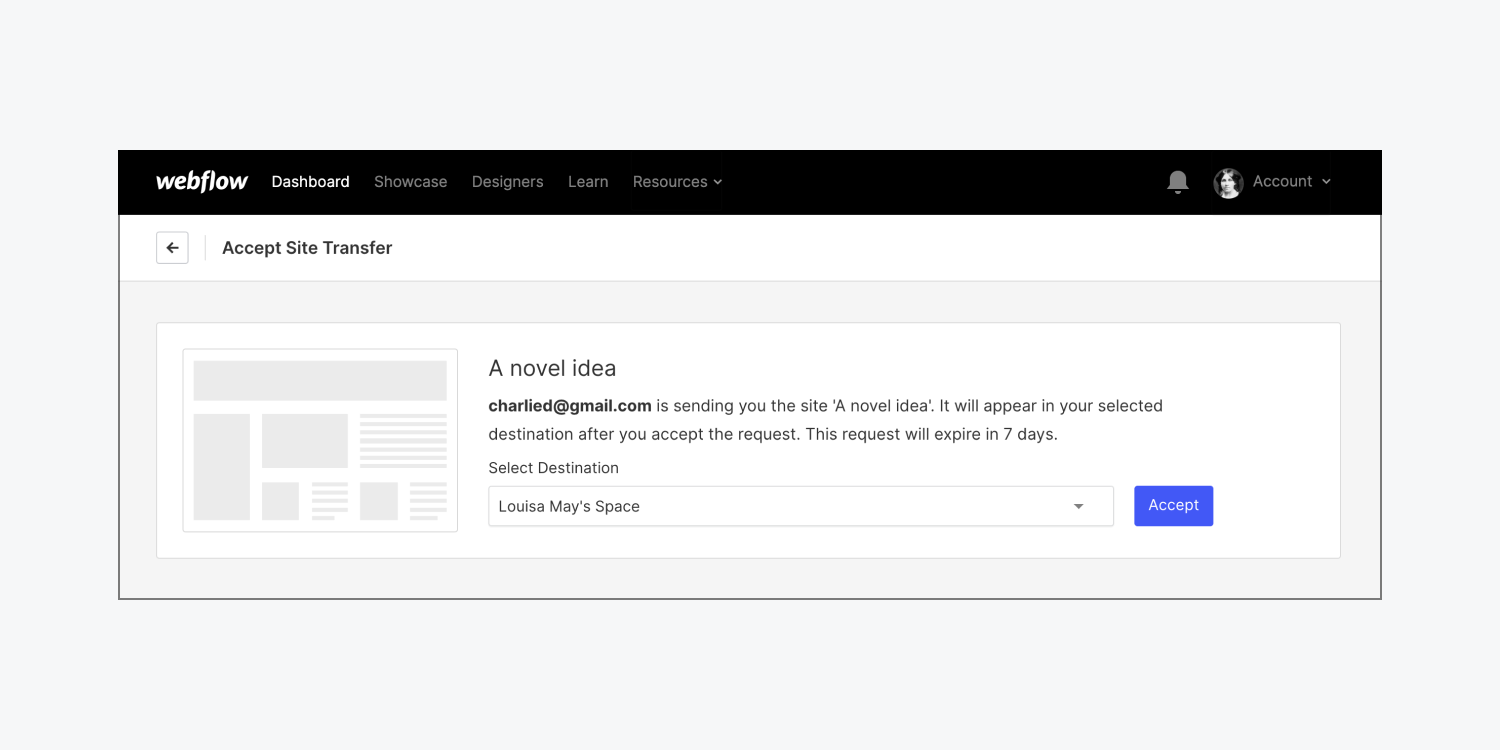
Within 7 days of being notified of the transfer, the recipient will need to accept it by selecting a destination Workspace for the site. If the recipient doesn't accept the transfer within 7 days, the site becomes unlocked in your Dashboard (e.g., the original sender’s Dashboard).
Good to know: If you initiated the transfer in error, you can cancel the transfer. Click the 3 disclosure dots under your site’s thumbnail and choose “Cancel site transfer.”
Transfer a site to a Workspace on another account of yours
Let's say you own multiple individual Webflow accounts (e.g., you log into Webflow accounts with different email addresses), and you belong to different Workspaces in each account. If you want to transfer a site between Workspaces on these separate accounts, first transfer the site to yourself using the email address of the other account. Log in to the recipient account, and transfer the site to the appropriate Workspace.
Transfer a site to a Workspace you're not a member of
If you want to transfer a site to a Workspace you're not a member of, transfer the site to a user who is a member of that other Workspace. They’ll be able to transfer the site to the appropriate Workspace in their Dashboard.
How to transfer a site to a Workspace in your Dashboard
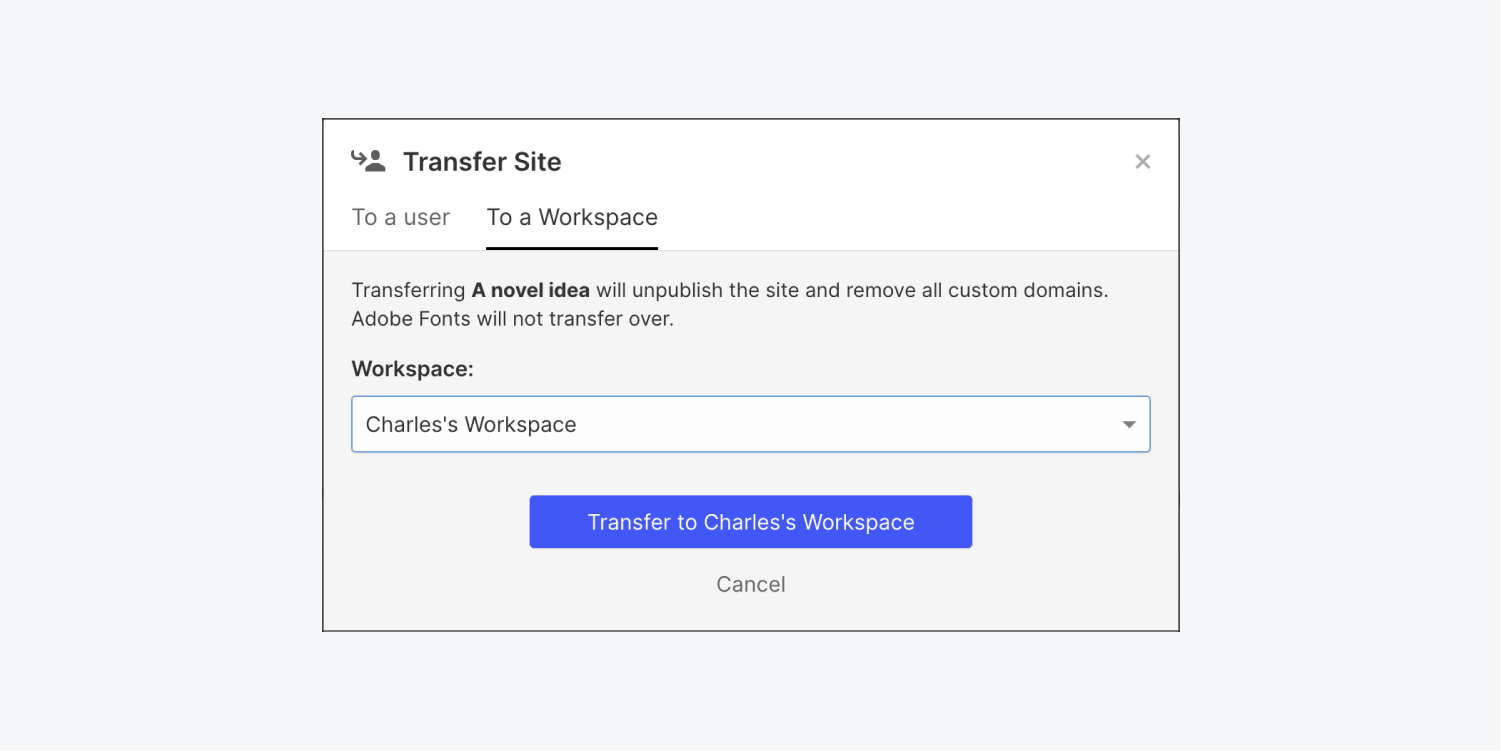
If you’re a member of multiple Workspaces, you can immediately transfer a site to any of them:
- Initiate your transfer
- Choose “To a Workspace” in the transfer site modal
- Choose the destination Workspace from the dropdown menu
- Click Transfer
How to transfer a hosted site with an active site plan
At the moment, you can't directly transfer a site with an active site plan. You'll need to either transfer a duplicate of the site or downgrade to a Starter site plan first.
Note: if you wish to duplicate a site that uses a premium template, you'll need to repurchase the template. Learn more about templates.
Transfer a duplicate of the site
To ensure the minimal amount of downtime when transferring a duplicate of the hosted site, we recommend the following steps:
- Duplicate the site you wish to transfer
- Transfer the duplicate site
- Remove the hosting subscription from the original site
- Add a site plan to the duplicate site
- Add your custom domain to the site and publish
Note: Duplicating a site resets some site-wide configurations and settings to default. This means some settings like form submissions and previous versions won't be included along with the duplicated and transferred site.
Note: Google Analytics code will only transfer when you are transferring an original site. It will not transfer when transferring a duplicate site.
Transfer the original site
If you want to include information such as form submissions and previous versions with the transfer, you'll need to transfer the original site to the Workspace or user of your choice. To keep a copy of the site before transferring the original, you can duplicate the site into your own Workspace. Remember, transferring a site to a user who is not a member of your Workspace(s) is irreversible unless you cancel the transfer before the recipient accepts it, or the new owner (who has either a Workspace owner or site admin role) transfers it back to you.
- (Optional) Duplicate the site you wish to transfer and keep the duplicate in your Workspace
- Remove the hosting subscription from the original site
- Transfer the original site to the other user or Workspace
- Add a site plan to the original transferred site
- Add your custom domain to the original transferred site and publish
How to transfer a Made in Webflow site
If your site is showcased on Made in Webflow, remove it from Made in Webflow to unlock the transfer feature.
Learn how to add and remove a site from Made in Webflow.
How to transfer an Ecommerce store
You can transfer an Ecommerce store just like any other site. Here are some important details to keep in mind:
- Order history is transferred with the store, including fulfilled, unfulfilled, refunded, and disputed orders
- Payment providers (e.g., Stripe) stay connected when you transfer a store, so you may want to manually disconnect payment providers before initiating a transfer
- Site plans can't be transferred with a site, so the new store owner will need to add a new Ecommerce site plan and re-enable checkout to process payments
- New store owners will be able to fulfill previous orders, but if they update any payment accounts, they won't be able to refund prior orders
- If you also have Memberships enabled, all active subscriptions must be canceled prior to transfer (learn how to cancel a subscription)
Are you having trouble?
If you're having any trouble transferring your site, please contact our support team, and we'll do our best to help you resolve it.
How to delete a site from your dashboard
⚠️ Deleting a site is PERMANENT and IRREVERSIBLE. ⚠️ You cannot restore deleted sites.
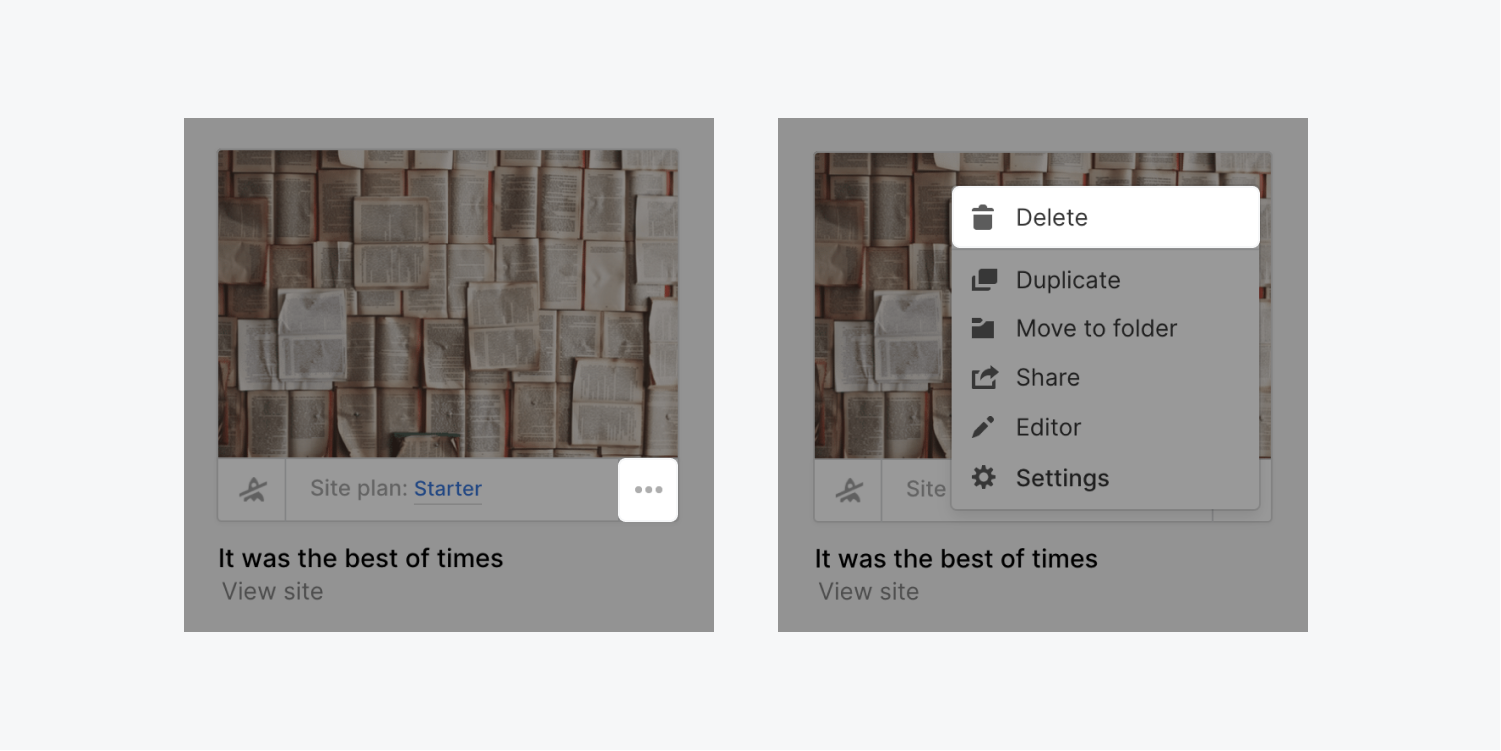
You can delete a site from your dashboard in 1 of 2 ways:
Option 1
- Open your Dashboard
- Click the 3 disclosure dots under your site’s thumbnail
- Choose Delete from the menu
- Type in the name of your site to confirm, and click Delete forever in the modal (this is permanent and irreversible — deleted sites can’t be restored)
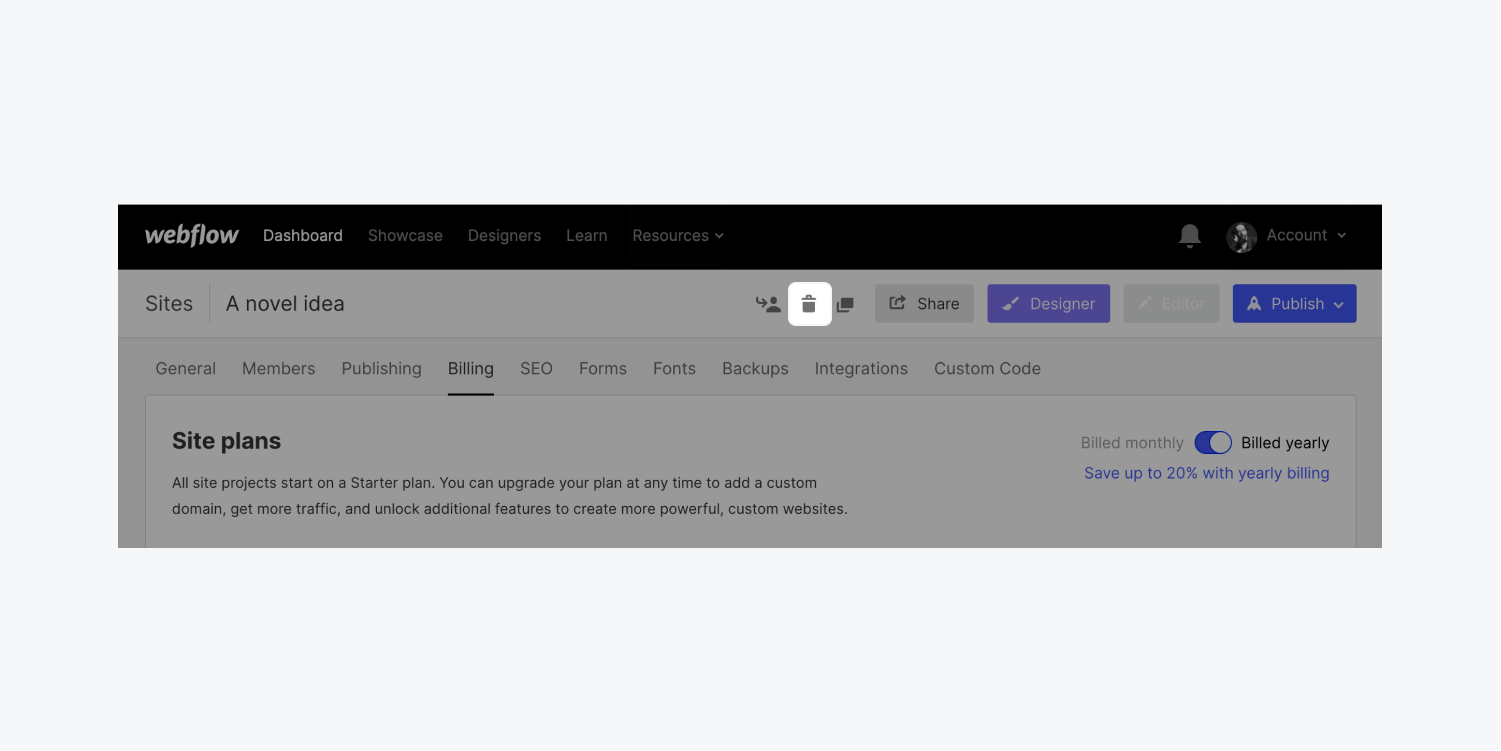
Option 2
- Open your site’s settings
- Click the “trash” icon in the top bar
- Type in the name of your site to confirm, and click Delete forever in the modal (this is permanent and irreversible — deleted sites can’t be restored)
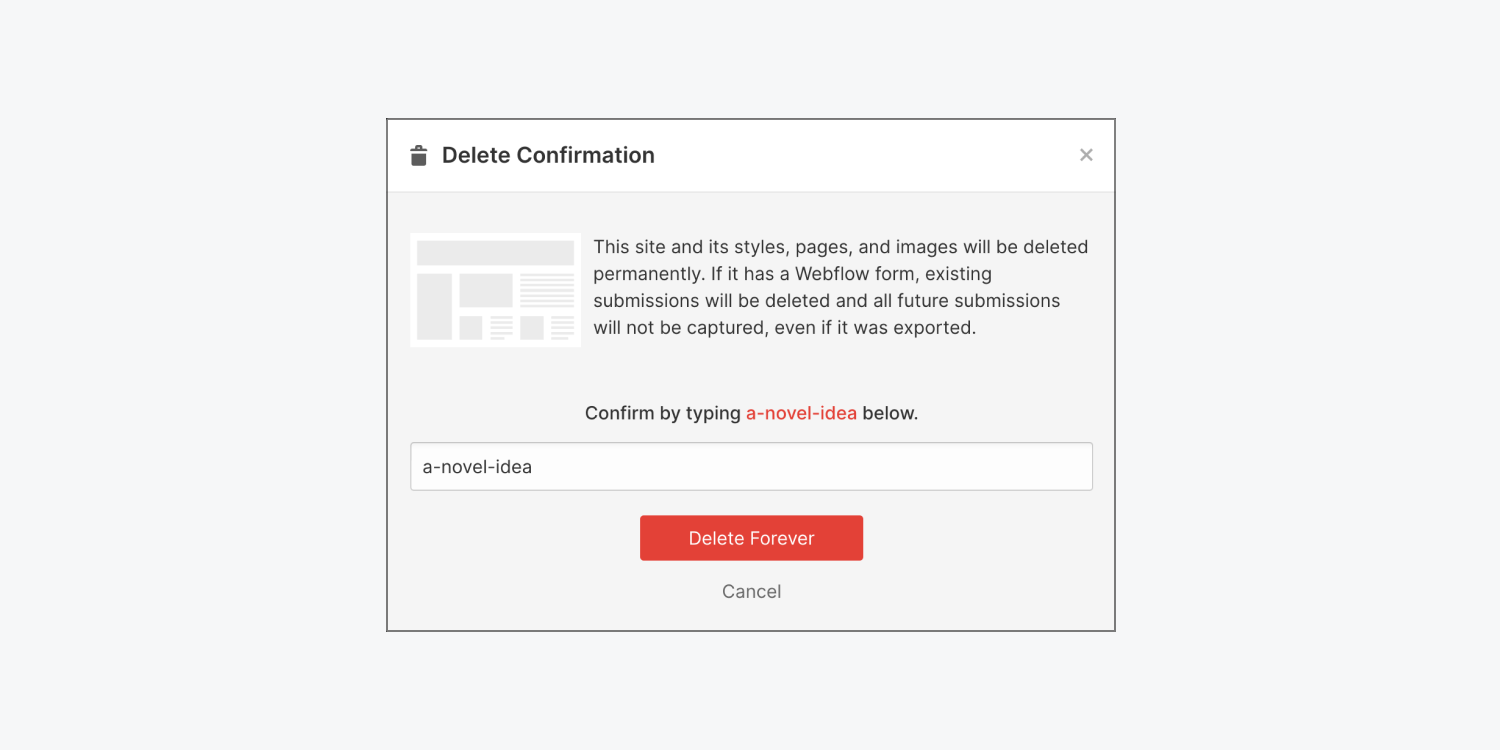
Once you confirm that you want to delete your site, the entire site will be deleted forever including its styles, pages, and all content (including assets like images and files). If your site has a Webflow form, existing form submissions will be deleted and no future submissions will be captured, even if this site was exported. It will also be removed from Webflow's Discover section and your Workspace and public profiles.
Protect sites from deletion
As a Workspace owner or site admin on a Growth or Enterprise plan, you can lower the risk of site deletion by assigning only certain team members to a site admin role.
If a team member’s role is anything other than site admin (e.g., if their roles are “Can design & publish,” “Can design,” or "Can design (limited)") those team members will not be able to delete a site from the Workspace.


