SSL (secure socket layer) is the standard method for establishing an encrypted link between a web server and a browser. It ensures that all data passed between the web server and browsers remain private and integral, so you and your site’s visitors can be sure your information is safe.
Important: Sites that don’t use SSL will be labeled “not secure” by some browsers, strongly discouraging people from visiting your site. Sometimes, your site may be loaded on HTTPS and still show “not secure” warnings. Learn how to troubleshoot these website security issues.
In this lesson, you’ll learn:
- The benefits of Webflow SSL
- How to enable SSL hosting
- How to disable SSL hosting
- How to upload a custom SSL certificate
The benefits of Webflow SSL
- Earn Google’s trust and improve your SEO
- Have complete end-to-end encryption between your website and your users
- Safely run an ecommerce store on Webflow with Dynamic Embeds
Features of Webflow SSL
- End-to-end SSL security between Webflow servers and your websites
- Automatic SSL delivery for HTML/CSS/JS and all images
- Optimized SSL certificates for maximum compatibility
- Instant-on with no setup required
Need to know
- You do not need to generate a CSR. We handle all of that for you. To set up SSL, all you need to do is turn it on in your Site settings.
- Webflow doesn’t support named certificates at this moment
- At the moment, only Enterprise customers can use a certificate purchased from another SSL certificate provider
Note: Webflow SSL hosting certificates are automatically renewed when the old one expires, as long as the DNS records are continuously pointed to Webflow and the site is loading on Webflow SSL hosting servers. The certificates are not set to renew in advance, so your monitoring tool may report warnings if you configured it to warn when the certificate is not installed in advance. Keep in mind, Webflow does not automatically renew custom SSL certificates. You are required to manually update your custom SSL certificate before it expires.
How to enable SSL hosting
As of 14 November 2018, SSL is enabled by default on all new Webflow sites. However, if you disabled SSL and want to re-enable it, you can do so in Site settings.
To enable SSL hosting on a site:
- Go to Site settings > Publishing tab > Advanced publishing options
- Toggle Enable SSL “on”
Important: Each time you disable or enable SSL on a Webflow-hosted site, you’ll need to update your DNS records to ensure that your site works correctly.
How to disable SSL hosting
You can switch SSL off, but we recommend against doing so. Sites that don’t use SSL may be labeled “not secure” by some browsers, strongly discouraging people from visiting your site.
To disable SSL hosting on a site:
- Go to Site settings > Publishing tab > Advanced publishing options
- Toggle Enable SSL “off”
Note: For security, you cannot disable SSL on sites with Users enabled. Additionally, if you disable SSL on an Ecommerce site, the Add to cart button and Checkout functionality will no longer work.
How to upload a custom SSL certificate
To provide increased flexibility when setting up your hosting, you can upload your own custom SSL certificates to your site. Keep in mind, custom SSL certificates need to be obtained from a third-party service, as Webflow does not issue custom SSL certificates.
Note: Custom SSL certificate uploads are only available for Enterprise customers. Contact our sales team for more information.
How to add a custom SSL certificate
First, open Site settings:
- Go to your Dashboard
- Locate the site to which you want to add the custom SSL certificate
- Click the “3 disclosure dots” to open the site options menu
- Click Settings
- Check the name and subdomain of the site in the General tab to make sure you’re in the correct site’s settings
Next, add your custom SSL certificate to your site:
- Go to Publishing tab > Custom SSL certificates
- Click Add Certificate
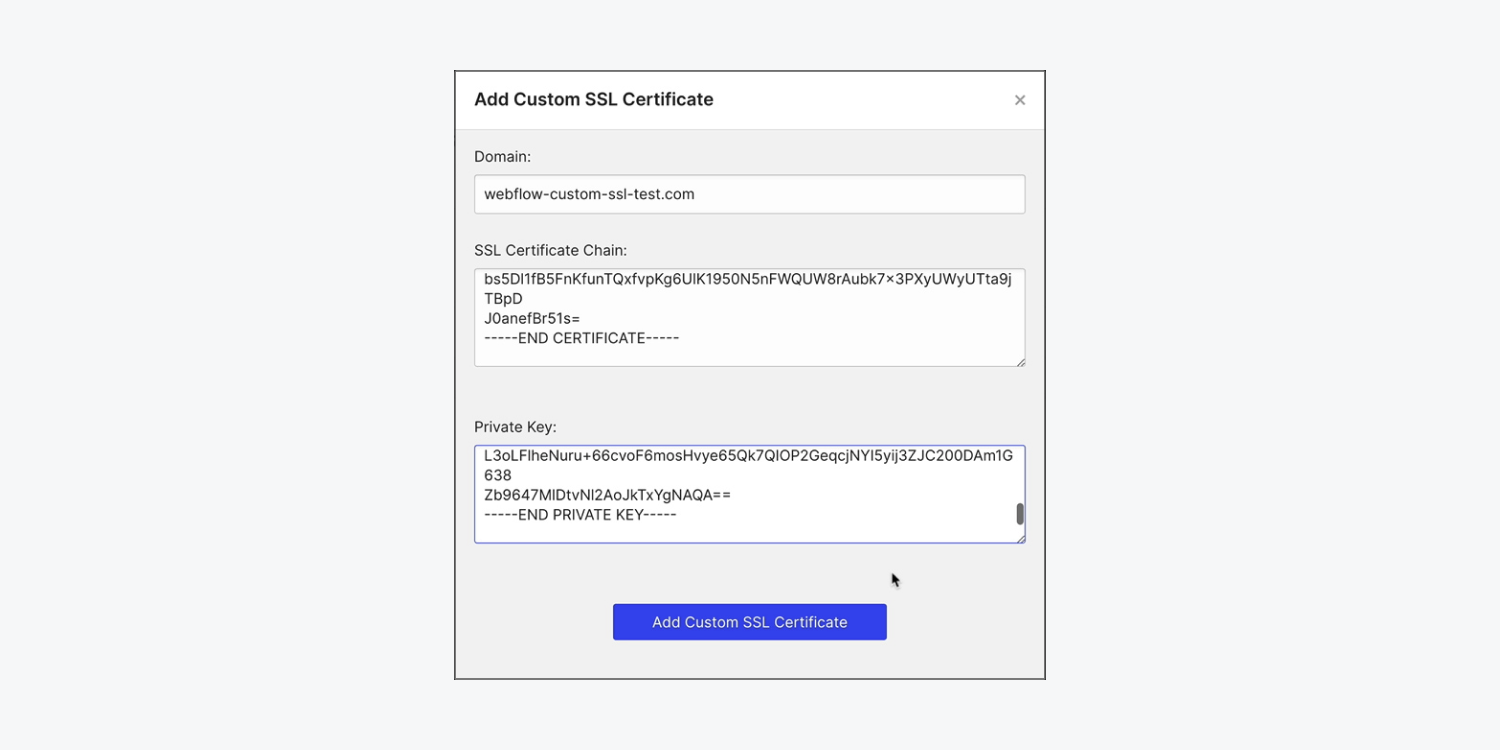
- Add your site’s domain name to the Domain field (e.g., “yourdomain.com”)
- Copy and paste your full certificate chain into the SSL certificate chain field (e.g., place your domain or leaf certificate first, and include any intermediate or root certificates after your domain or leaf certificate)
- Copy and paste your private key into the Private key field (it must be an unencrypted PKCS#8 private key with the header “BEGIN PRIVATE KEY”)
- Click Add custom SSL certificate to add the custom certificate to your site


Note: A single certificate may have multiple domains on it. If you need to apply multiple domains to your certificate, you will need to upload the certificate multiple times — once for each domain. For example, you may have 1 certificate and need to apply it to example.com and www.example.com. In this case, you will need to add the certificate 2 times — once for example.com and once again for www.example.com.
How to update a custom SSL certificate
If you choose to add a custom SSL certificate to your site, you are required to manually update your certificate before it expires.
To update your custom SSL certificate, first open Site settings:
- Go to your Dashboard
- Locate the site to which you want to add the custom SSL certificate
- Click the “3 disclosure dots” to open the site options menu
- Click Settings
- Check the name and subdomain of the site in the General tab to make sure you’re in the correct site’s settings
To delete your original custom SSL certificate and replace it with your updated version:
- Click the Publishing tab > Custom SSL certificates
- Click Delete next to the certificate that you want to delete
- Add your updated custom SSL certificate to your site


