


In this lesson, you’ll learn how to add a jello interaction to your form button using the following:
- Add a form
- Set up your animation
- Test the interaction
Add a form
In the Add panel, scroll to the Form section and drag-in a Form block element onto the canvas.
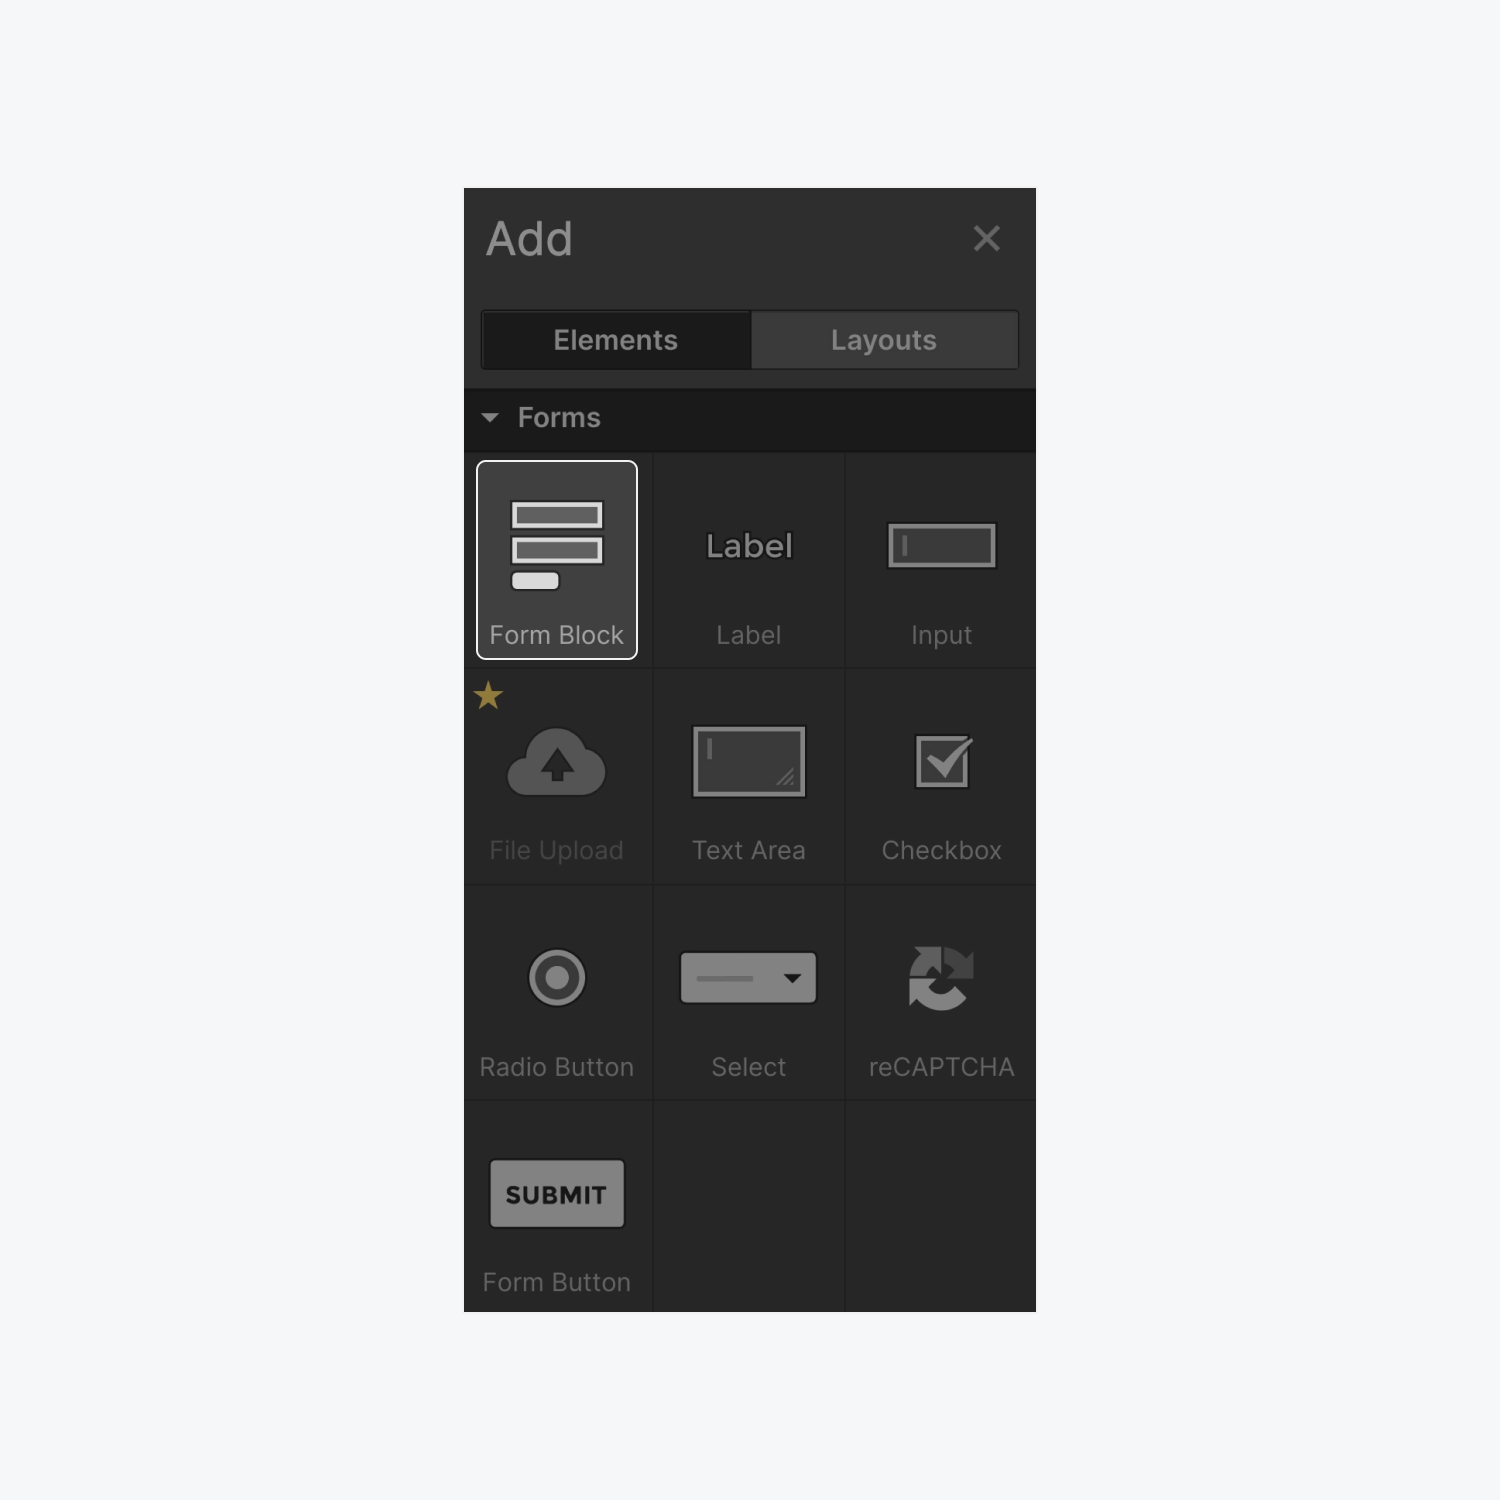
Next, select the element that will have the Interaction. For this example, we’ll select the button.
Set up your animation
Create a trigger
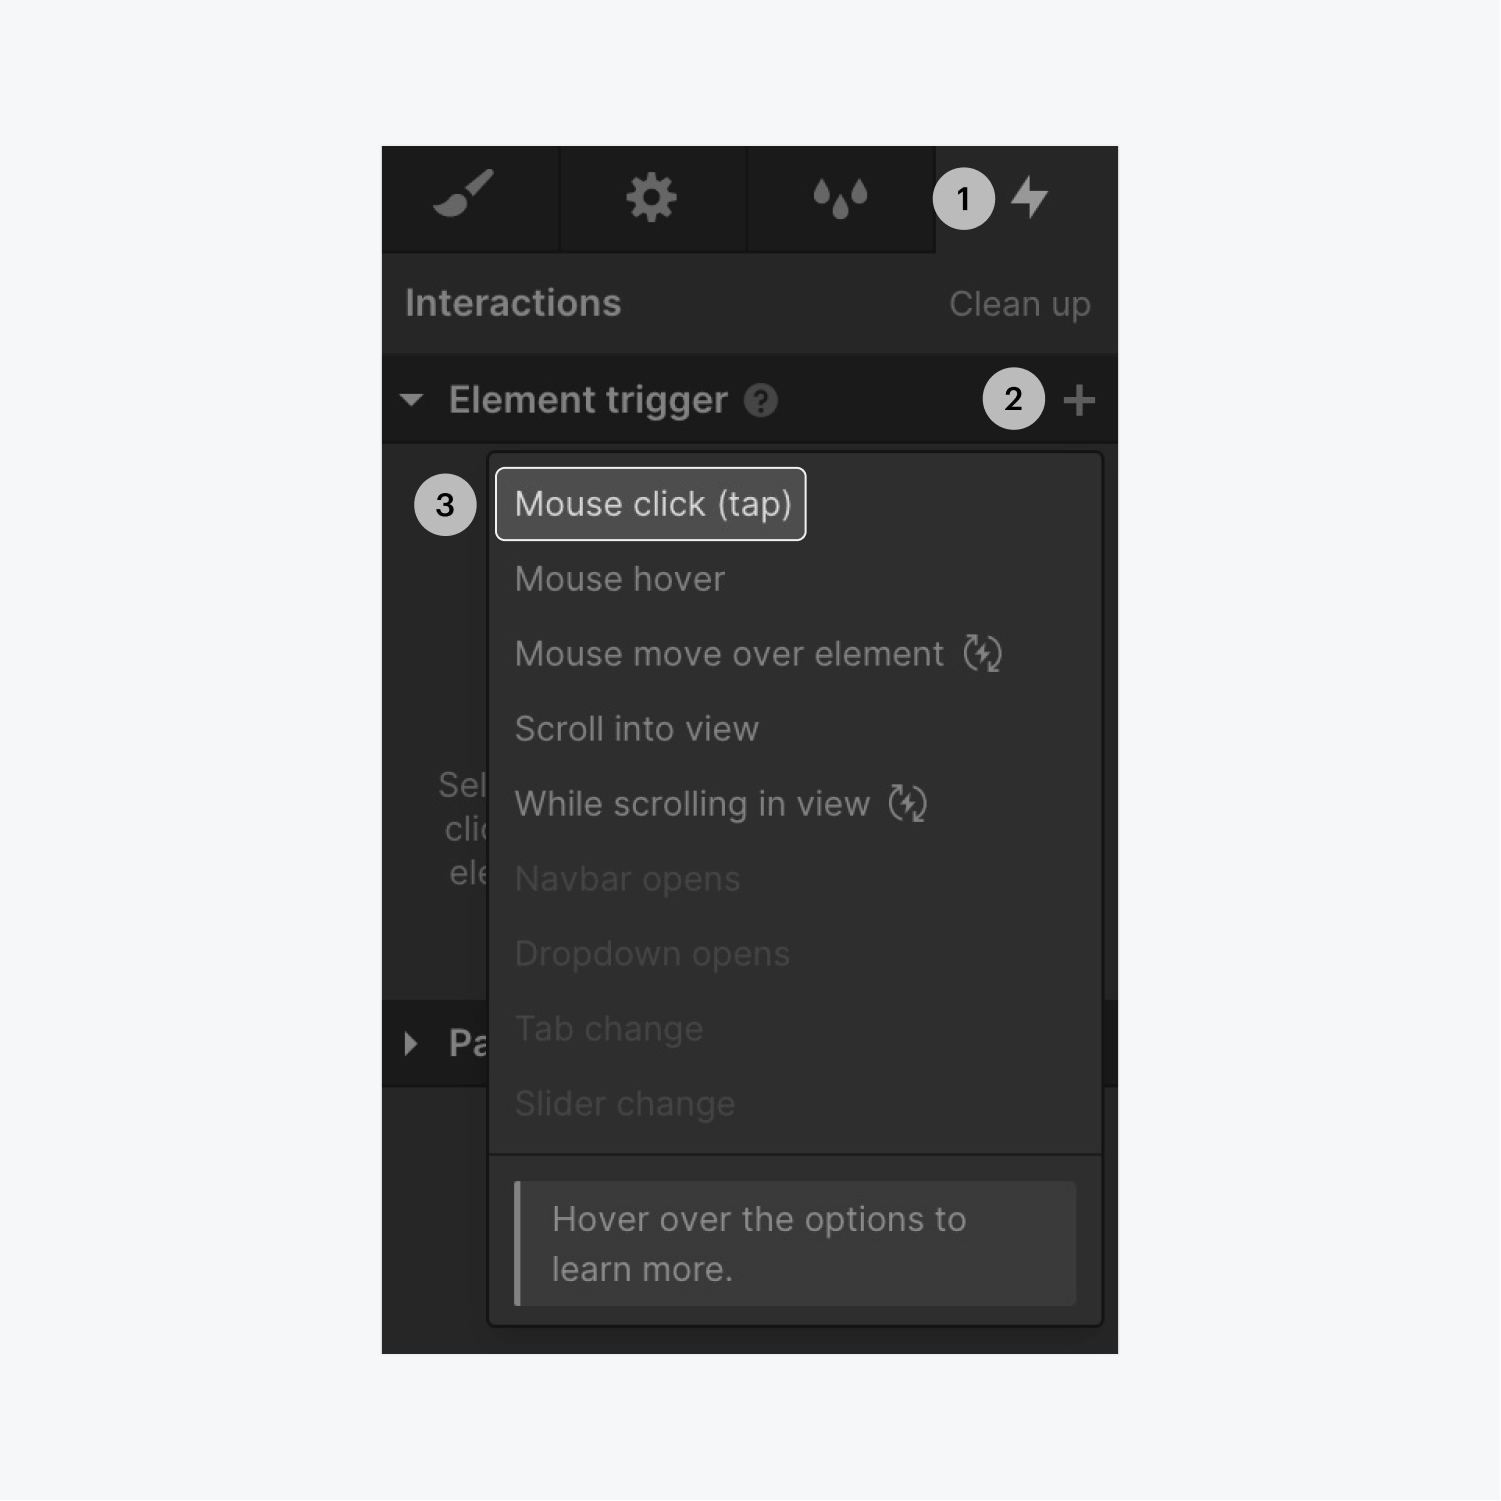
With your button selected - you’ll first create the trigger for the animation (which starts an animation when we interact with an element—like hovering or clicking), and you can do this in 3 steps:
- Open the Interactions panel
- Click the plus icon on the Element trigger section
- Select a trigger (e.g. Mouse click)
Select pre-built animation
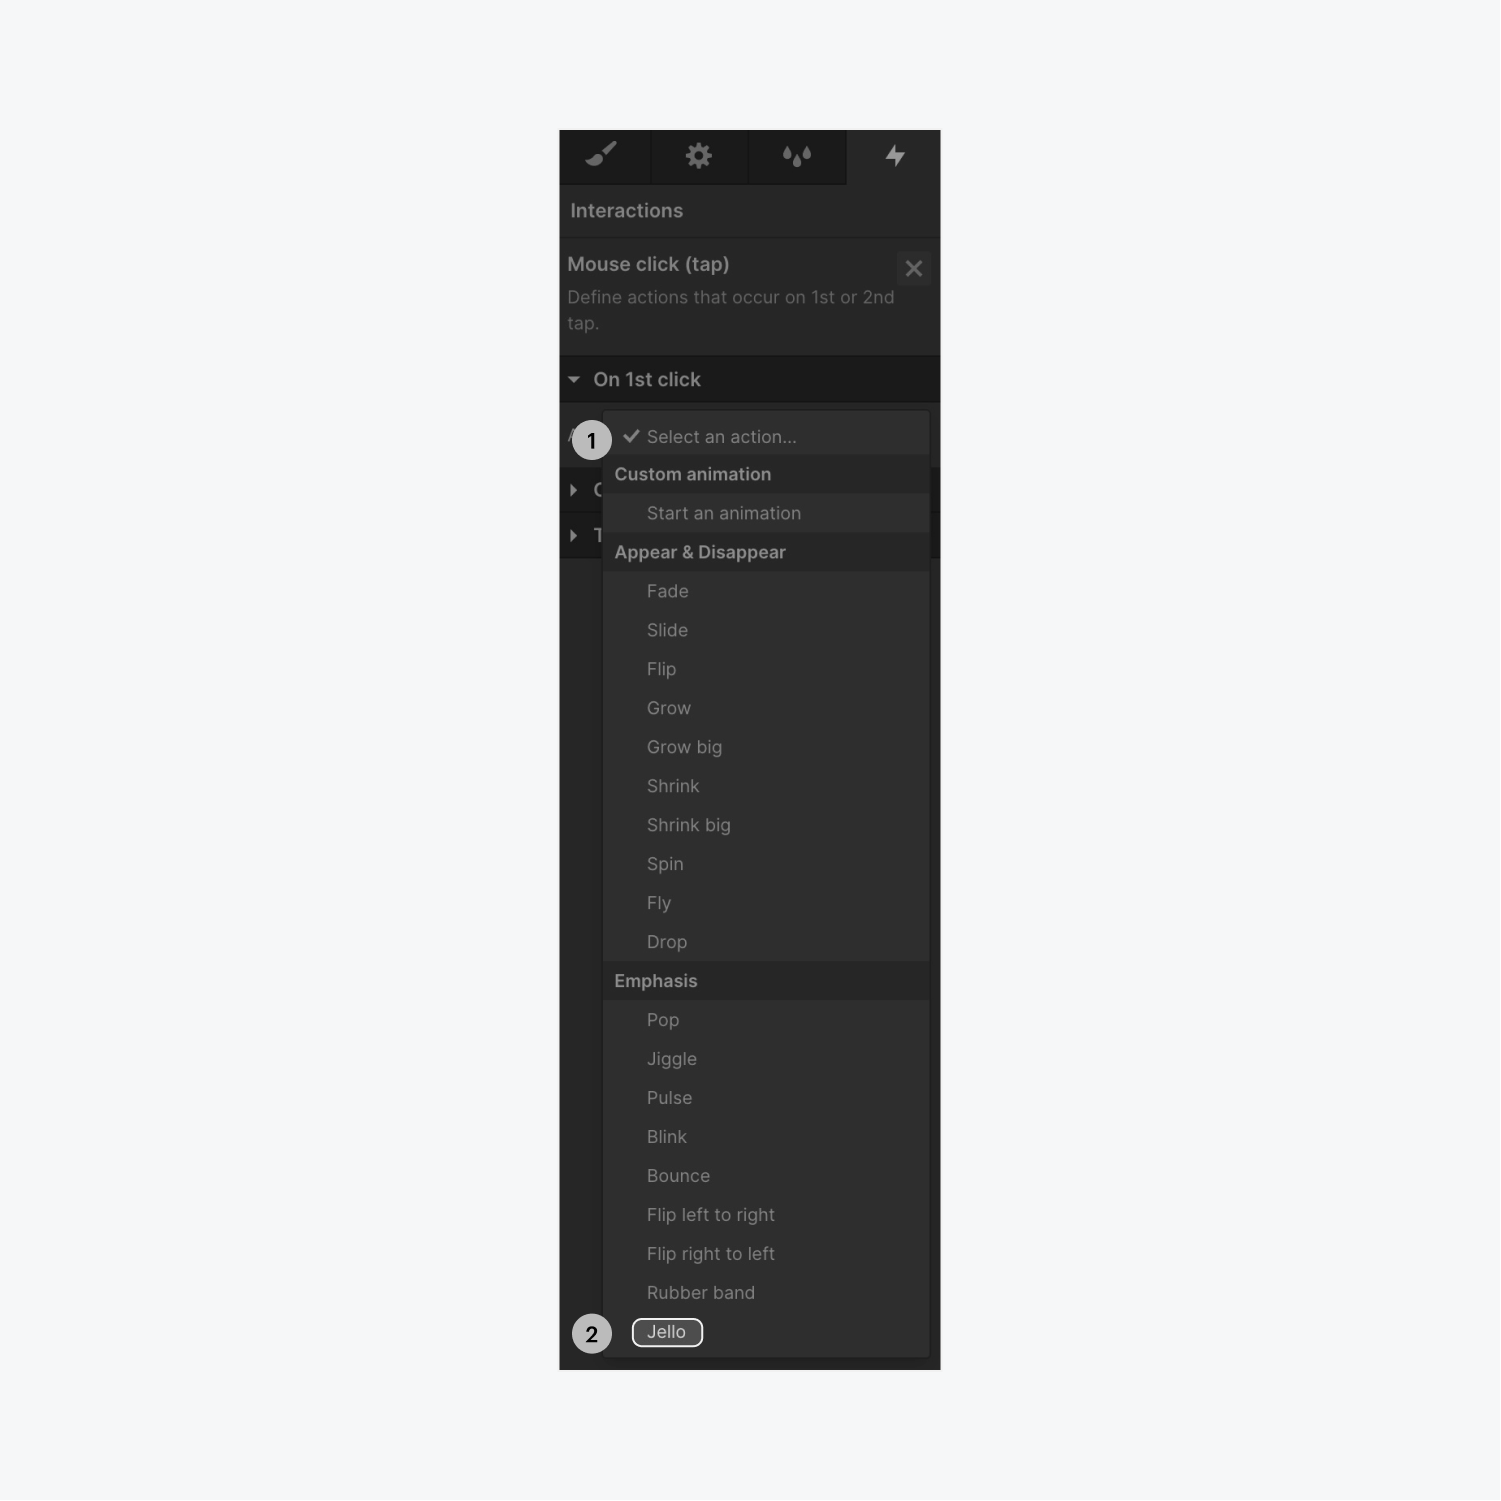
Now, you can select a pre-built option that will animate your button when someone triggers the element.
To do this:
- Click the Select an action dropdown button
- Select any pre-built animation you like (e.g. Jello)
Test the interaction
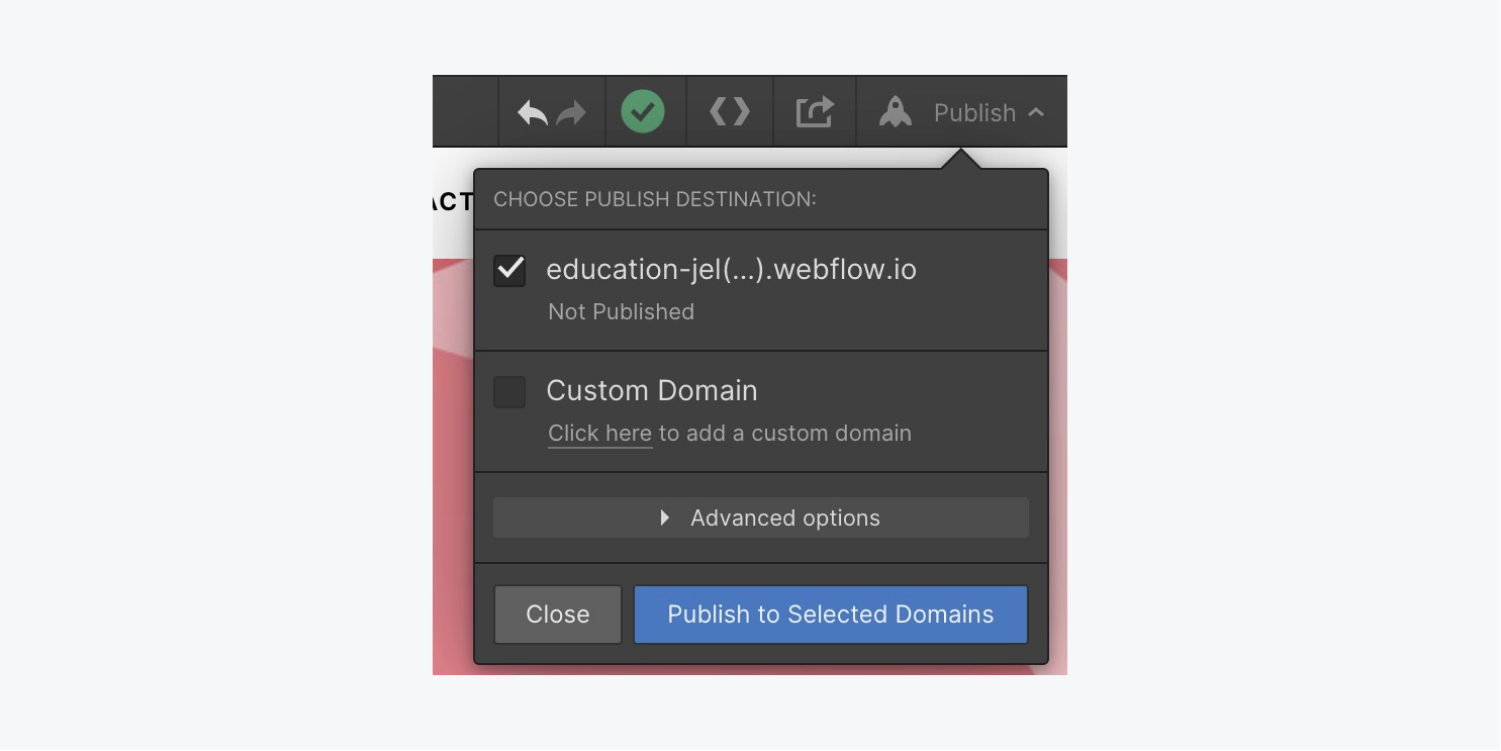
Test your interaction on your live-site. Click the Publish button, select the domain you want to publish, then click Publish to selected domains.
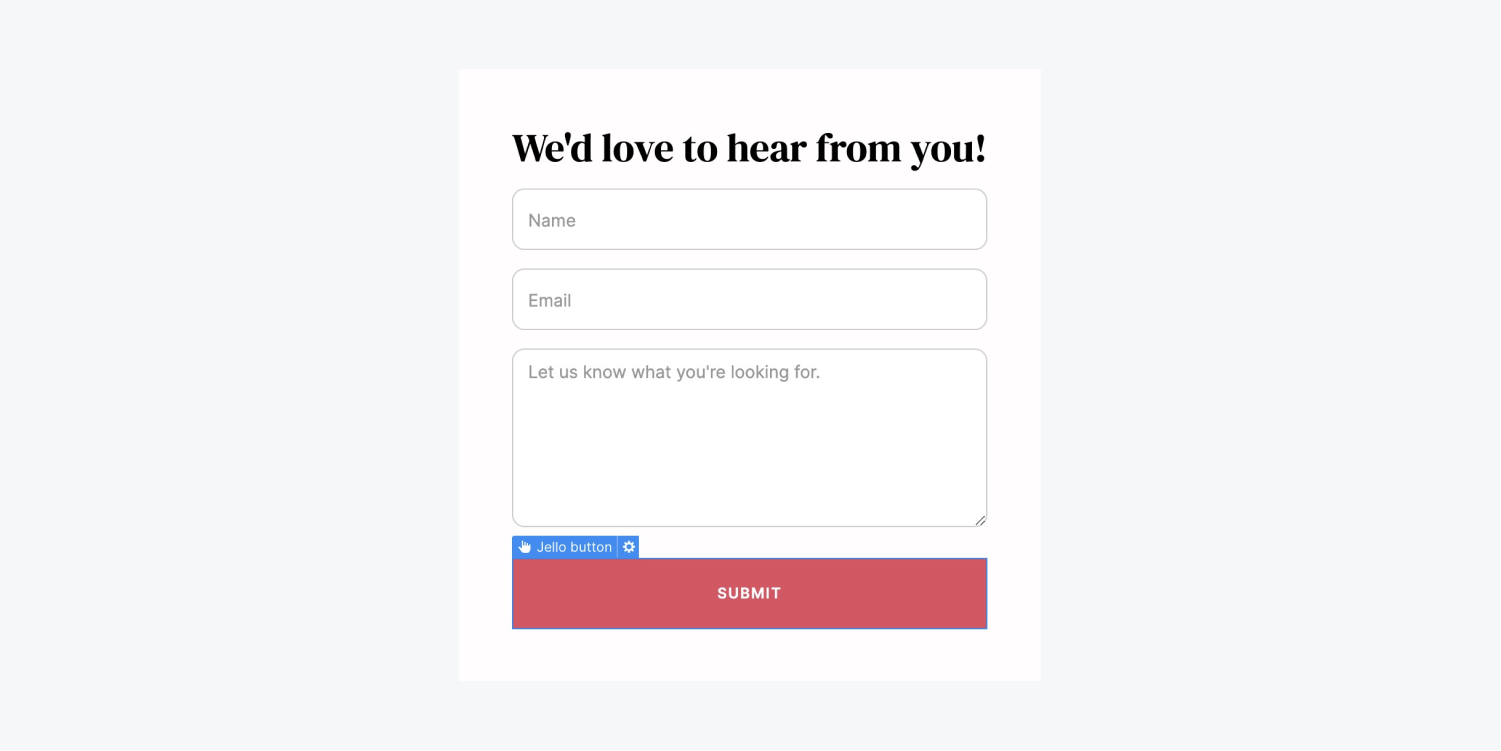
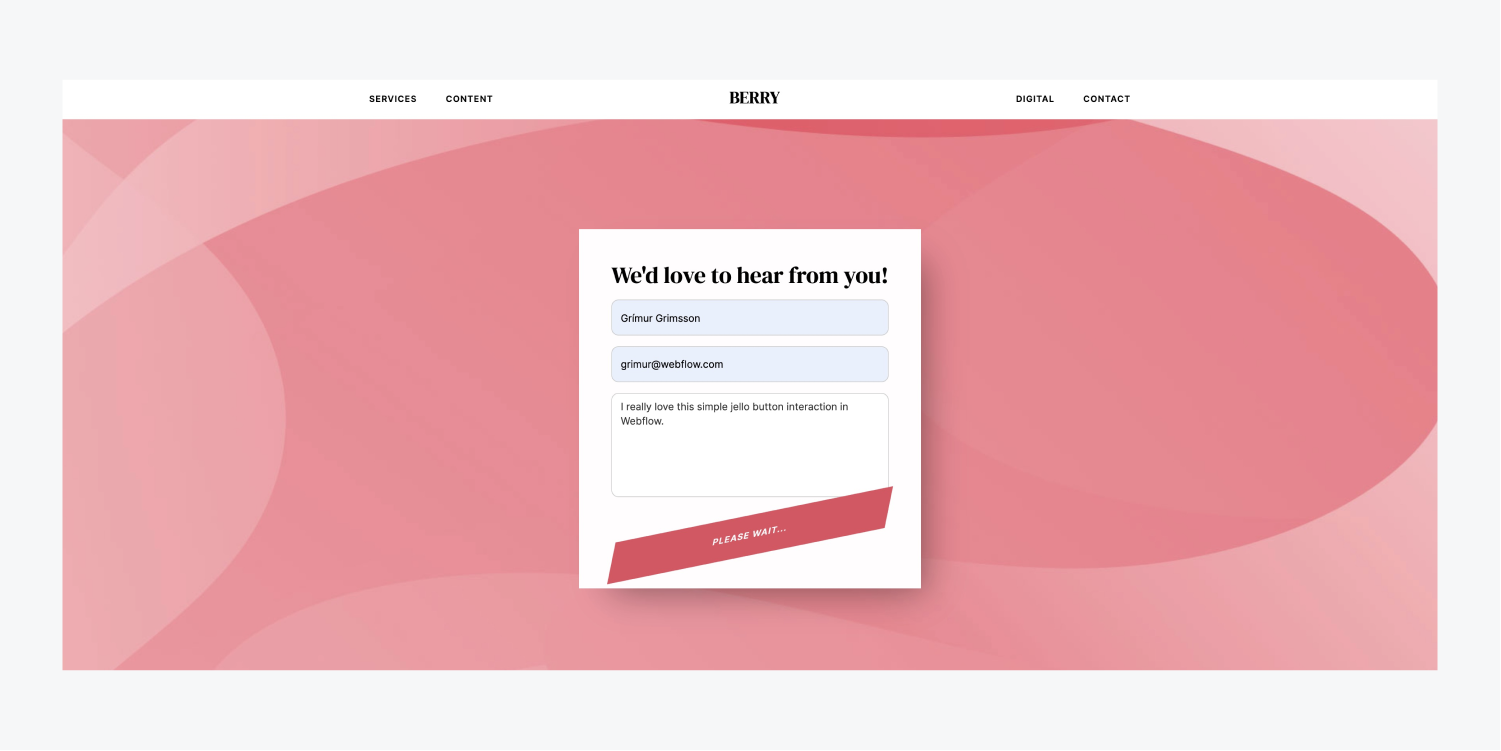
Now, when anyone clicks on your button to submit your form - they’ll be able to see your jello button in action.
But that’s an overview of pre-built animations using Jello in the Webflow Designer.
