The Switch field is a Collection field that is primarily used as a filtering tool. A switch is a field type which can have either of two values: Yes or No. Collaborators can toggle a switch on or off to specify, for example, if a blog post “is featured.” The switch field can be used to filter Collection lists. You can even sort a list using switches. And one of the best ways to use a switch field is by setting conditional visibility on elements in Collection lists and Collection pages.
Common Uses
- Want to display only non-profits? Create a “Non-profit?” switch.
- Want to display featured articles? Create a “Featured?” switch.
- Want to hide specific items until they are ready to be displayed in your site? Create a “Hidden?” switch.
- Want to show an “On Sale” label only for selected items? Create an “Is On Sale?” switch.
In this lesson
- Creating a switch field
- Setting a switch value
- Filtering a Collection list using the switch field
- Sorting a Collection list using the switch field
- Setting conditional visibility using the switch field
Creating a switch field
A switch field can be added to a new or existing Collection. In Collection settings, click on New Field and then choose the Switch field.

Pro Tip
The default value for a switch is “No”. So, when you create a switch, consider labeling it with a question that will in most cases have “No” as answer. So, you’ll only switch it on for the few “Yes” answers. For example, if you want to hide only a few of a hundred blog posts, create a switch called “hidden” instead of “shown”.
Setting a switch value
Whether you’re creating a new item in the CMS from the Designer or the Editor, you can set a switch on or off by simply toggling it to Yes or No.
Filtering a Collection list using the switch field
If you want to create a Collection list that only displays items that have a specific switch set to Yes, like a Collection list of featured posts, you can create a filter that will do that:
- Select the Collection list you want to filter
- Go to the Settings panel (D)
- Add a Filter under Collection List Settings
- Select your switch field in the first dropdown
- Choose Is On in the second dropdown
- Click Save
The filter rules that you can use with the link field and values are:
- Is On - looks for CMS items that have set the switch On for this switch field
- Is Off - looks for CMS items that have left the switch Off for this switch field
Learn more about filtering collection lists.
Sorting a Collection list using the switch field
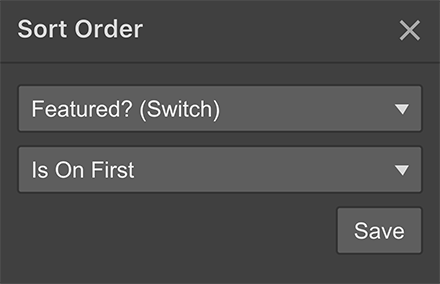
Sometimes, you don’t want to exclude Collection items in a Collection list, but you would like to display specific items first, followed by less important items. So, instead of using a filter, you can specify a sort order using a switch field:
- Select the Collection list you want to filter
- Go to the Settings panel (D)
- Add a Sort order under Collection List Settings
- Select your switch field in the first dropdown
- Choose the sort order in the second dropdown: Is Off First or Is On First
- Click Save

Setting conditional visibility using the switch field
To make the most of Switches, you can use the conditional visibility feature to achieve a variety of designs. Here are a few examples:
Showing special labels
If you have labels such as “Featured”, “On-sale”, “Out of stock”, etc. You can use conditional visibility to show them only on items that have a specific switch set to Yes.
- Select the label
- Go to the Settings panel (D)
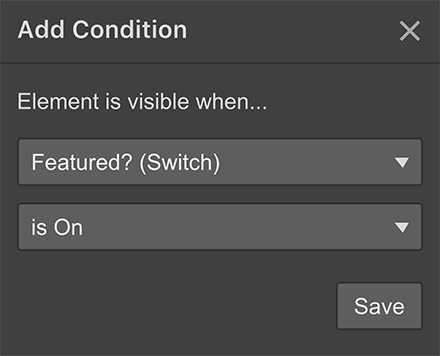
- Add a Condition (when this element is visible) under Conditional visibility
- Select your switch field in the first dropdown
- Choose Is On in the second dropdown
- Click Save

Showing an entire section
You can create unique Collection pages that can each have totally different layouts based on the conditions set on sections of a Collection page.
For example, you can create a contact form section on the Collection page. Then, you can create a switch called "Show contact form" in your Collection. Now, if you set a conditional visibility rule on this section, the contact form will only show on Collection pages for Collection items with the contact form switch set to Yes.
To create a condition like this:
- Select the entire section you want to show/hide
- Go to the Settings panel (D)
- Add a Condition (when this element is visible) under Conditional visibility
- Select your switch field in the first dropdown
- Choose Is On (or is Off) in the second dropdown
- Click Save


