Workspace plans let you share design and editing controls with members of your Workspace to collaborate more efficiently. But, at times, you may need to collaborate with people outside of your Workspace, like clients or store owners. With a CMS, Business, or Ecommerce site plan, you can invite content editors to collaborate on site content (e.g., text, links, images, products, and CMS content) or change page settings in the Webflow Editor.
If you’re on a Core, Growth, or Enterprise plan, all members of your Workspace can access the Editor on any website within your Workspace. If you’d like to collaborate with people who aren’t part of your Workspace, you can add them to your site as content editors.
If you add a CMS site plan or Standard Ecommerce site plan to a site within your Workspace, you can invite up to 3 content editors to your site.
If you add a Business site plan or Ecommerce Plus or Advanced site plan to a site within your Workspace, you can invite up to 10 content editors to your site. Additional content editors may be added to any Business site plan or Ecommerce Plus or Advanced site plan for $6 per month, per person.
In this lesson, you’ll learn:
More resources
- Intro to the Editor
- Client’s Guide to the Editor free video course
- Client’s Guide to the Editor free cloneable Webflow template
How to add a content editor to a site
You can add content editors to a site from within the Designer or from Site settings > Members tab.
To add a content editor from the Designer:
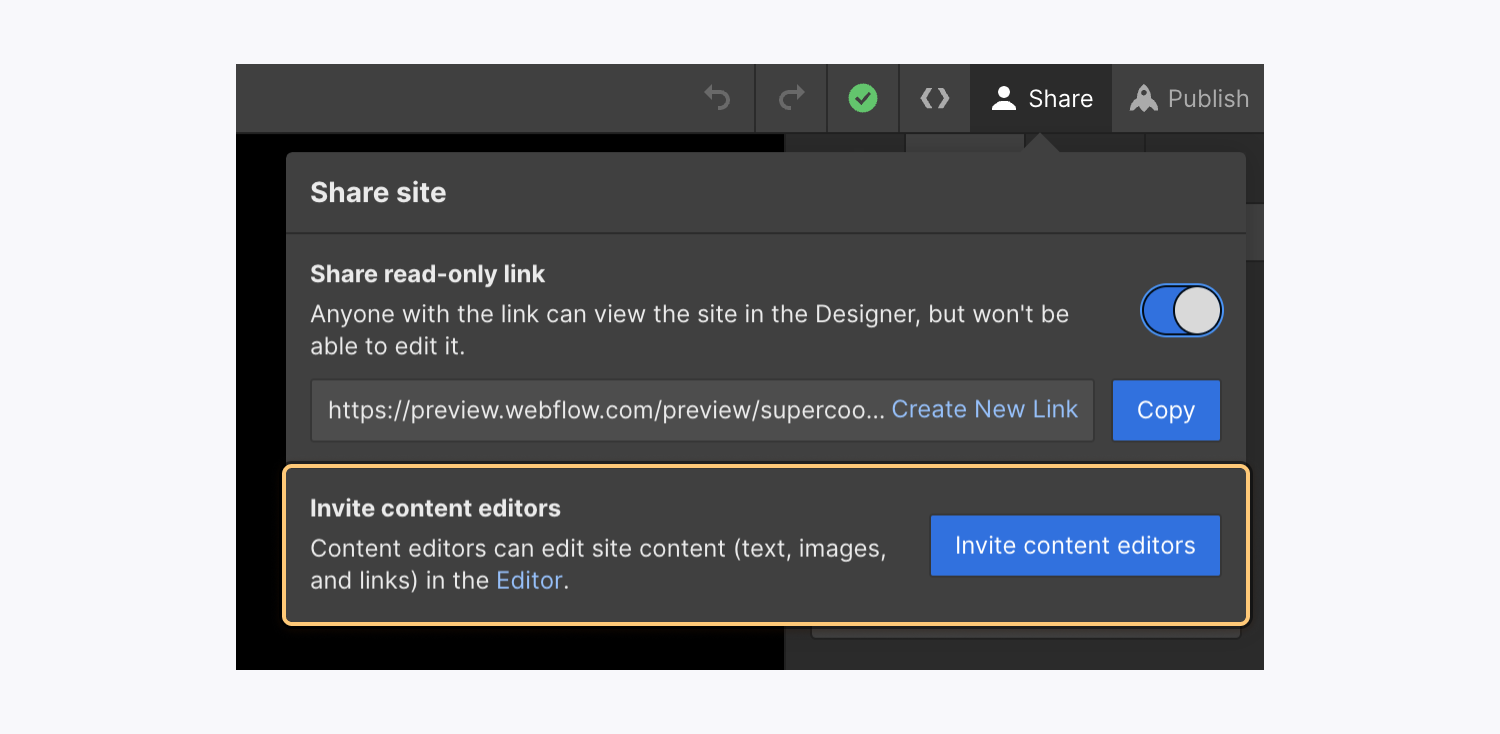
- Click the “share” icon in the top toolbar
- Click Invite content editors – this will redirect you to Site settings > Members tab
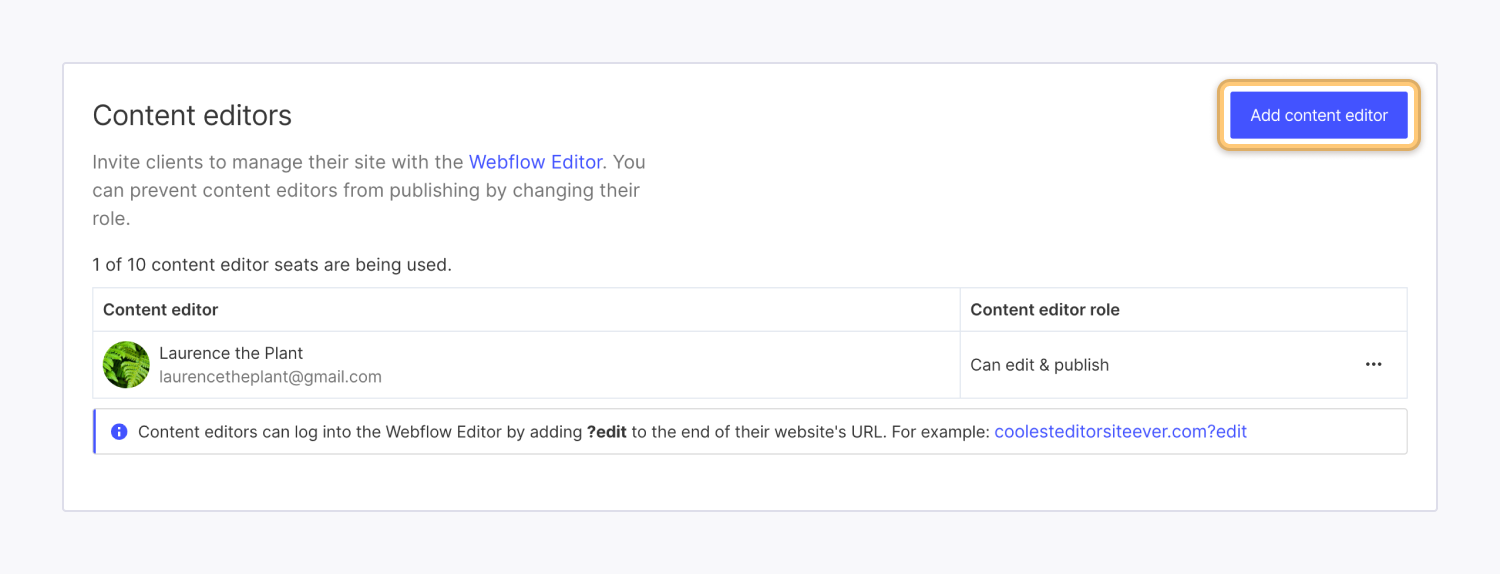
- Click Add content editor
- Enter the content editor’s email address in the email field
- If you’re on a Growth Workspace, choose the content editor’s role from the dropdown (e.g., Can edit or Can edit & publish)
- Click Send invite

To add a content editor from your Site settings:
- Go to Site settings > Members tab > Content editors
- Click Add content editor
- Enter the content editor’s email address in the email field
- If you’re on a Growth Workspace, choose the content editor’s role from the dropdown (e.g., Can edit or Can edit & publish)
- Click Invite
If you’ve chosen the Can edit role for your content editor, copy the content editor invite link in the following modal window and send it to your content editor. If you’ve chosen the Can edit & publish role for your content editor, the content editor will need to accept the invitation using the link they receive in the confirmation email.

Important: If you’ve enabled whitelabeling on your site (i.e., if you’ve replaced the Webflow logo in the Editor), then your content editors will not receive an email invitation from Webflow. Instead, you’ll need to provide them with a direct link to edit your site. Learn more about whitelabeling and Editor branding.
How to create a content editor account
After following the invitation link in the confirmation email, your content editor will need to create a content editor account by setting up a username and password. They’ll use this account to log in to your site as a content editor. Content editor accounts are separate from any other Webflow account(s) your content editor(s) may have. Site owners cannot create content editor accounts.
Note: Passwords must be a minimum of 10 characters and should include 1 uppercase letter, 1 lowercase letter, and 1 number, at minimum.
Content editors can access the Editor by adding “?edit” to the end of the site’s URL (e.g., www.your-site.com/?edit). Then, they can log in and access the Editor by clicking Edit site.
How to reset a content editor password
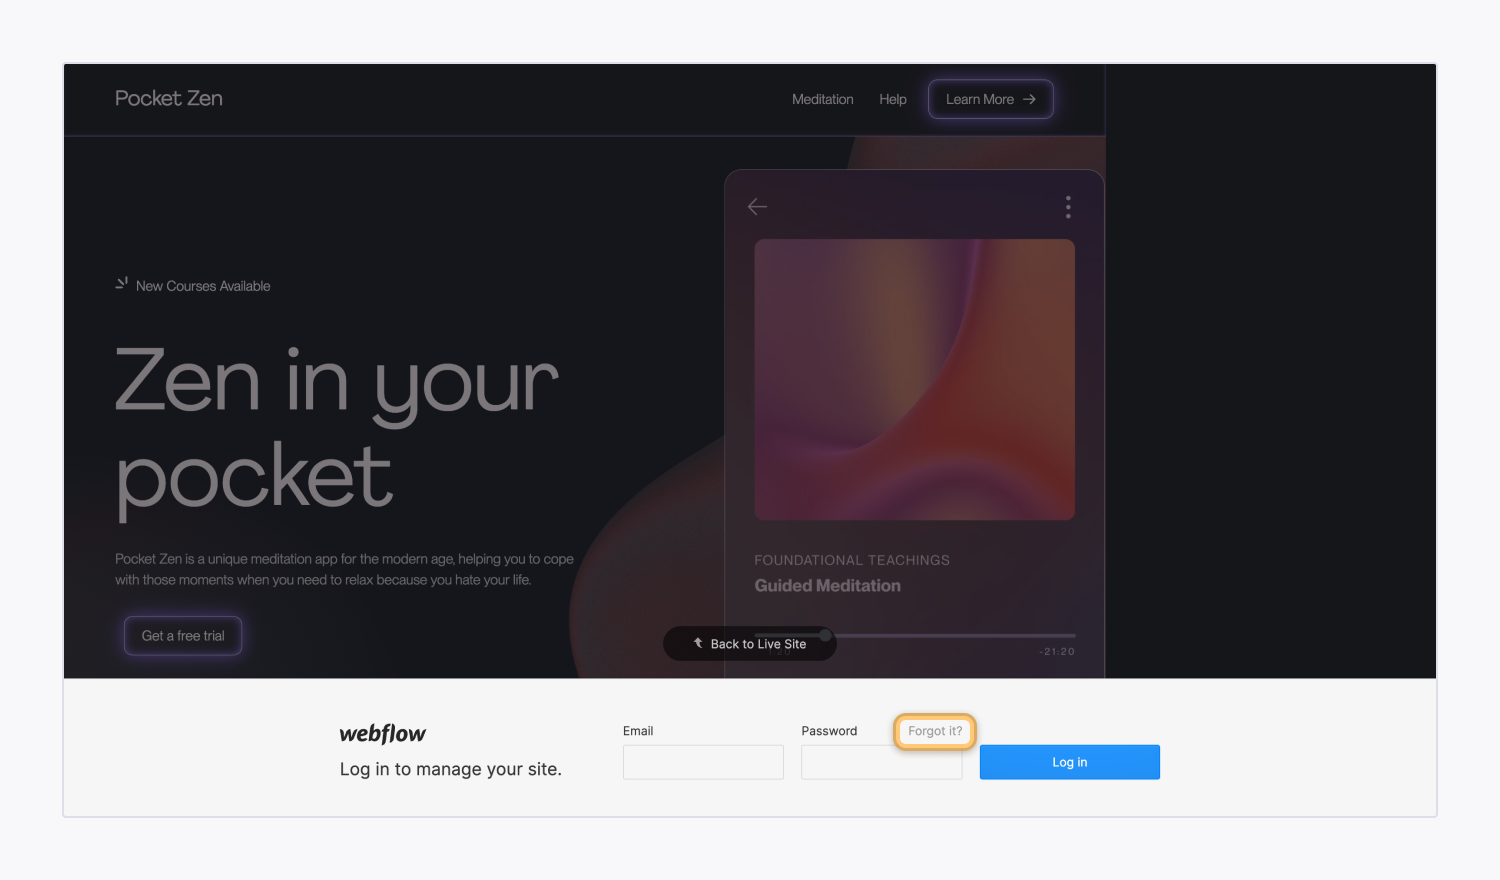
Content editors can reset their password by opening the Editor (i.e., add “?edit” to the end of the site’s URL (e.g., www.your-site.com/?edit)) and following these steps:
- Click Forgot it? on the Editor’s login page
- Enter your email address in the Email address field
- Click Send reset email
- Check your email for a “Reset your password” email
- Follow the instructions in the email to change your password


