Set up your creator profile, add your showcased Made in Webflow sites to it, and make it easy for potential clients to contact and follow you.
In this lesson, you’ll learn:
- About creator profiles
- How to edit your personal creator profile
- How to edit your Workspace creator profile
About creator profiles
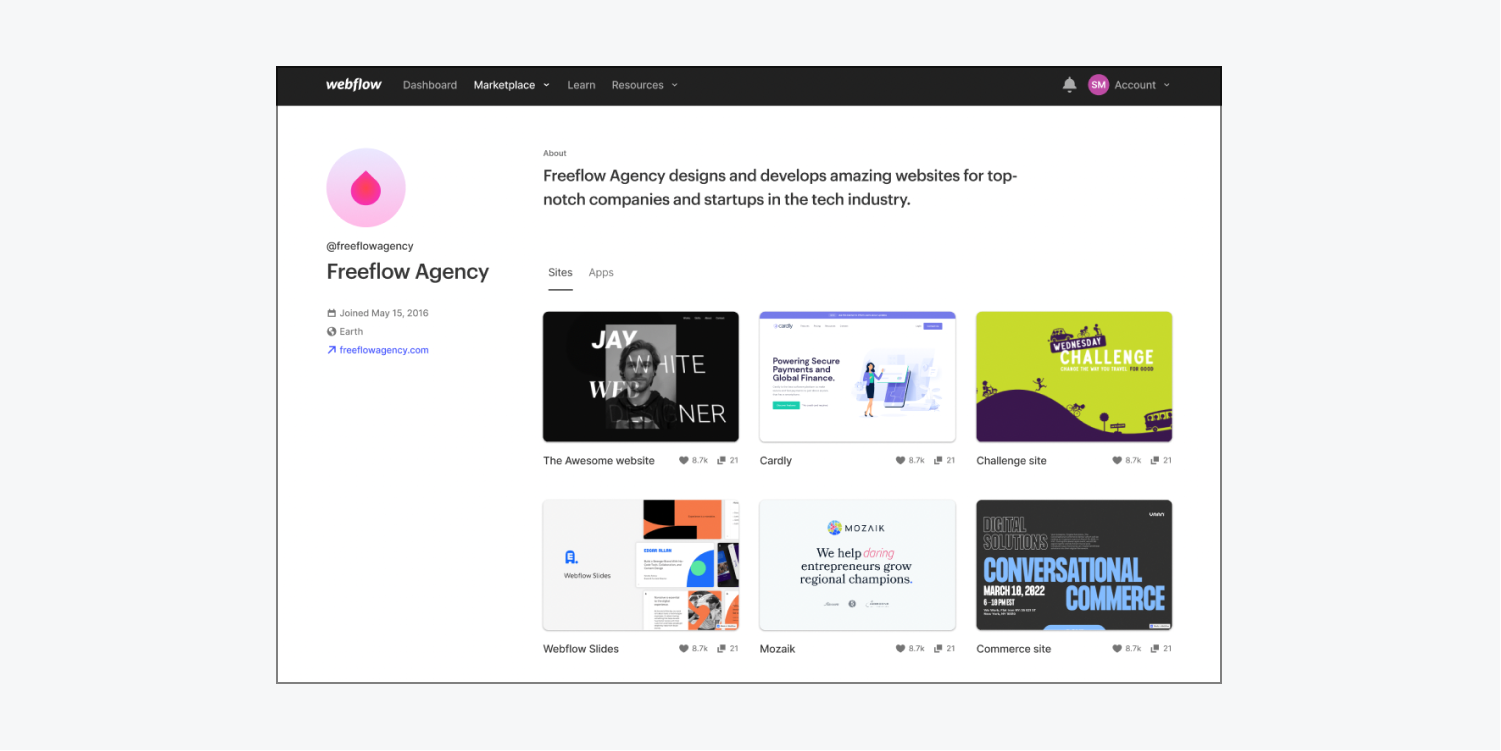
You’ll have a customizable, public page (formerly public Webflow profiles) where you can:
- Add information about yourself, such as a bio and avatar
- Include skills tags (e.g., “interaction design,” “marketing,” etc.)
- Showcase your Made in Webflow sites
- Showcase your published Marketplace Apps (Workspace creator profiles only)
Other Webflow users will also be able to follow you from your creator profile. They can find your profile on your Made in Webflow site description pages.
How to edit your personal creator profile
By default, your profile is private. You can make it public so others in the community can view your information and creations, and follow you right from your profile.
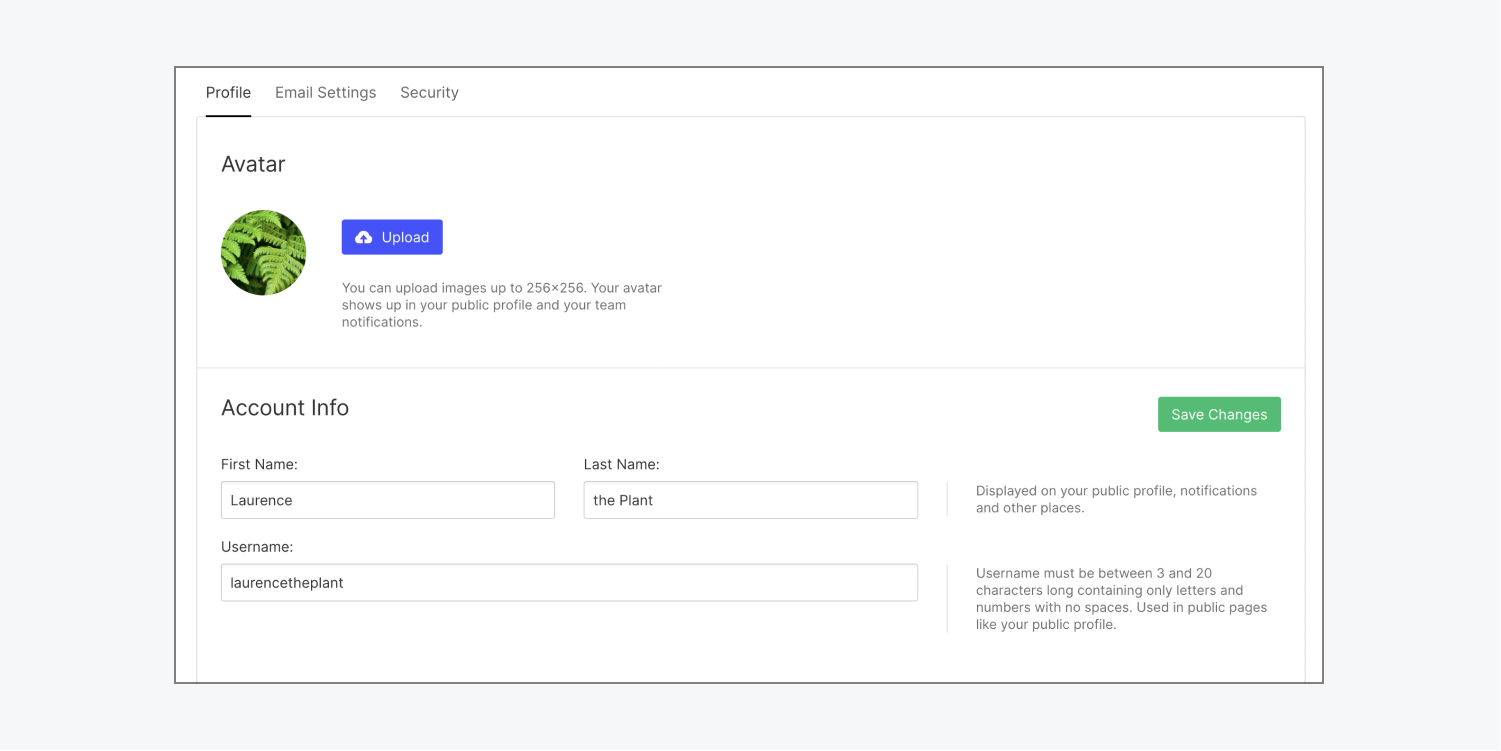
In the Profile tab, you can set your profile image or avatar and choose which information to share by filling the proper fields (e.g., first name, city, title, etc.).
To edit your personal creator profile:
- Go to the Account dropdown menu on your Dashboard
- Click Profile settings
- Go to Profile tab
- Update your avatar and the fields in Account info and Profile info as needed
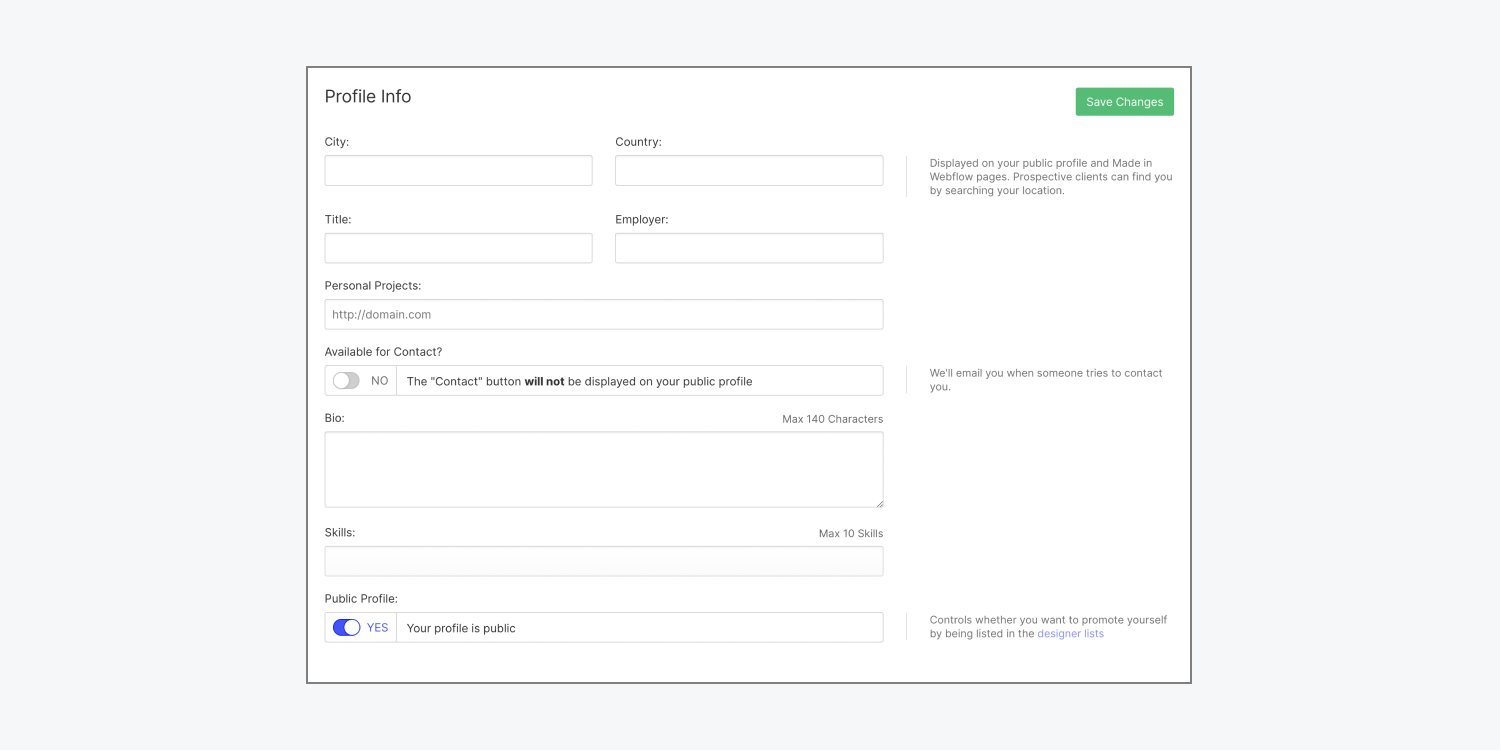
Note: If you have sites showcased on Made in Webflow in your personal creator profile, you won’t be able to set your profile to private. To disable your personal creator profile, remove all your sites from Made in Webflow and then set your profile to private.
How to edit your Workspace creator profile
By default, a Workspace is private and doesn’t have a profile page. You can create a Workspace creator profile and make it public so others in the community can view your team’s information and creations, and follow your team right from your profile.
If you are a Workspace owner or Workspace admin, you can toggle “on” your Workspace’s creator profile and edit it by following the steps below.
To edit your Workspace creator profile:
- Go to the Account dropdown menu on your Dashboard
- Click Workspaces
- Choose the Workspace you want to update the profile for
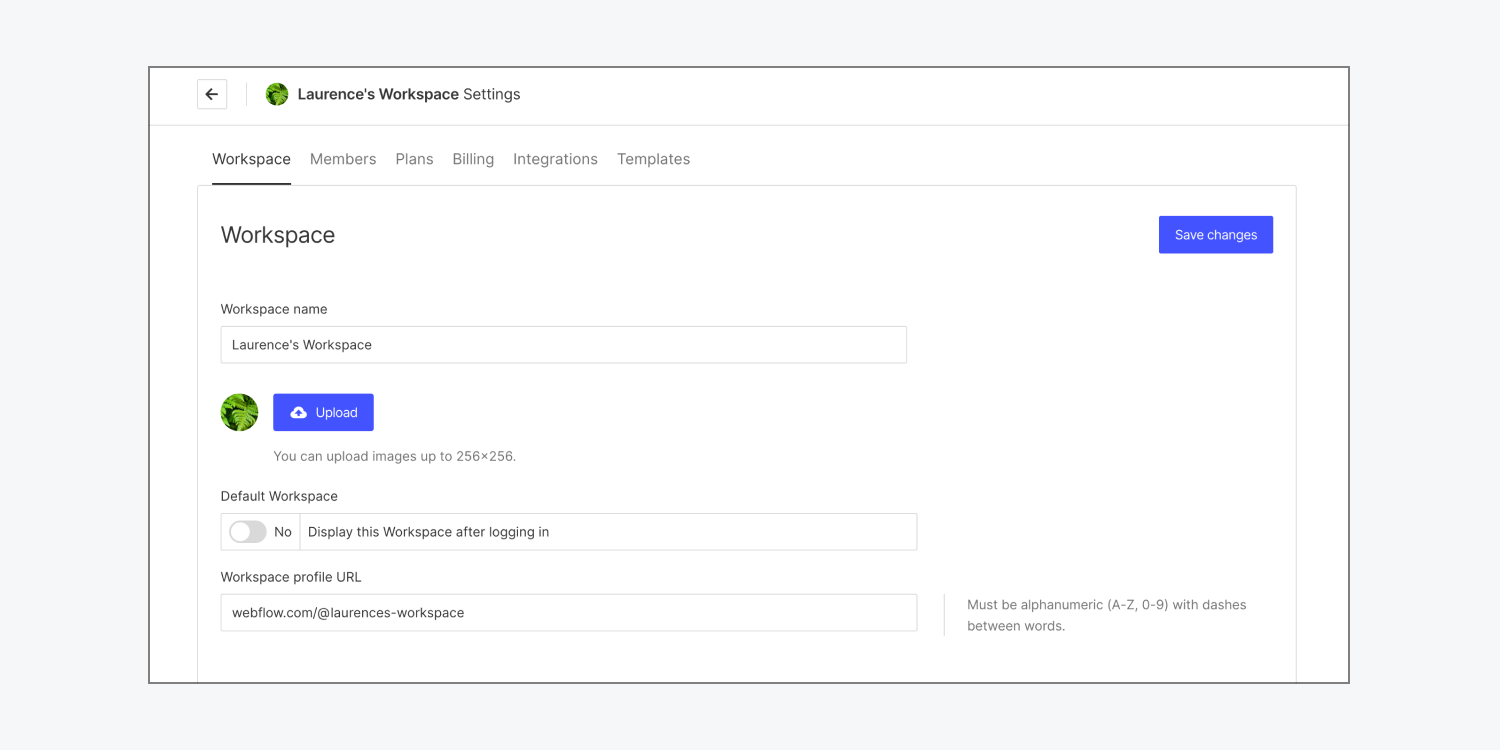
- Go to Workspace settings > Workspace tab
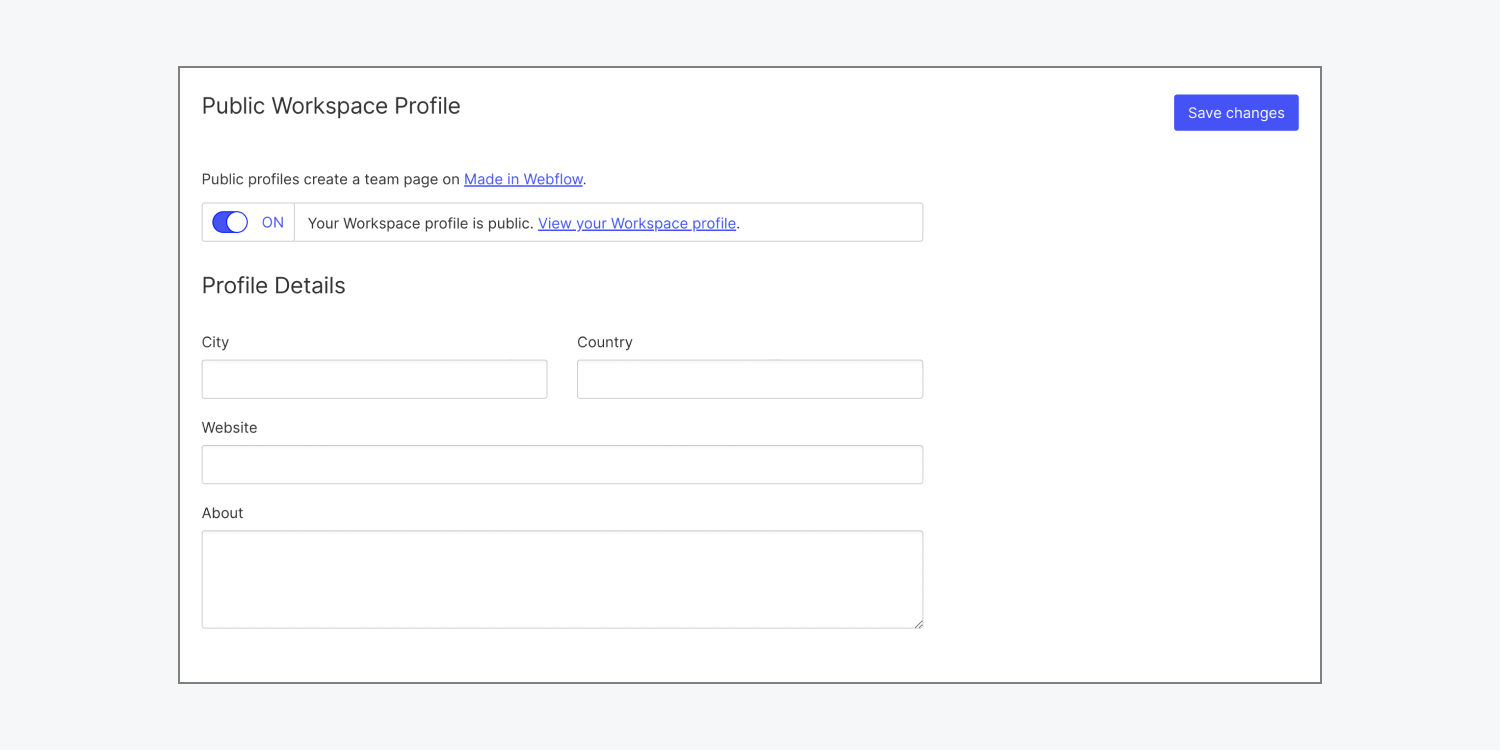
- Update your Workspace name, avatar, Workspace profile URL, and the fields in the Public Workspace profile section as needed
In the Workspace section, you can set your profile image or avatar and add your Workspace name. You can also set the URL for your Workspace profile in the Workspace profile URL field.
In the Public Workspace profile section, you can add other information about your team (e.g., city, website, about, etc.) You can also toggle “Public profile” to “on” if you want your Workspace creator profile to be public.
Note: If you have sites showcased on Made in Webflow in your Workspace creator profile, you won’t be able to set your profile to private. To disable your Workspace creator profile, remove all your sites from Made in Webflow and then set your Workspace creator profile to private.
