Facebook pixel allows you to track your website visitors' actions. Tracked conversions will appear in your Facebook Ads Manager and your Facebook Analytics dashboard and can be used to analyze the effectiveness of your conversion funnel and to define custom audiences for dynamic ad campaigns.
In this guide
- Integrate your Facebook pixel ID
- Enable ecommerce events
- Delay for cookie consent
- Create a pixel cookie consent banner
- Set up advanced event tracking
Integrate your Facebook pixel ID
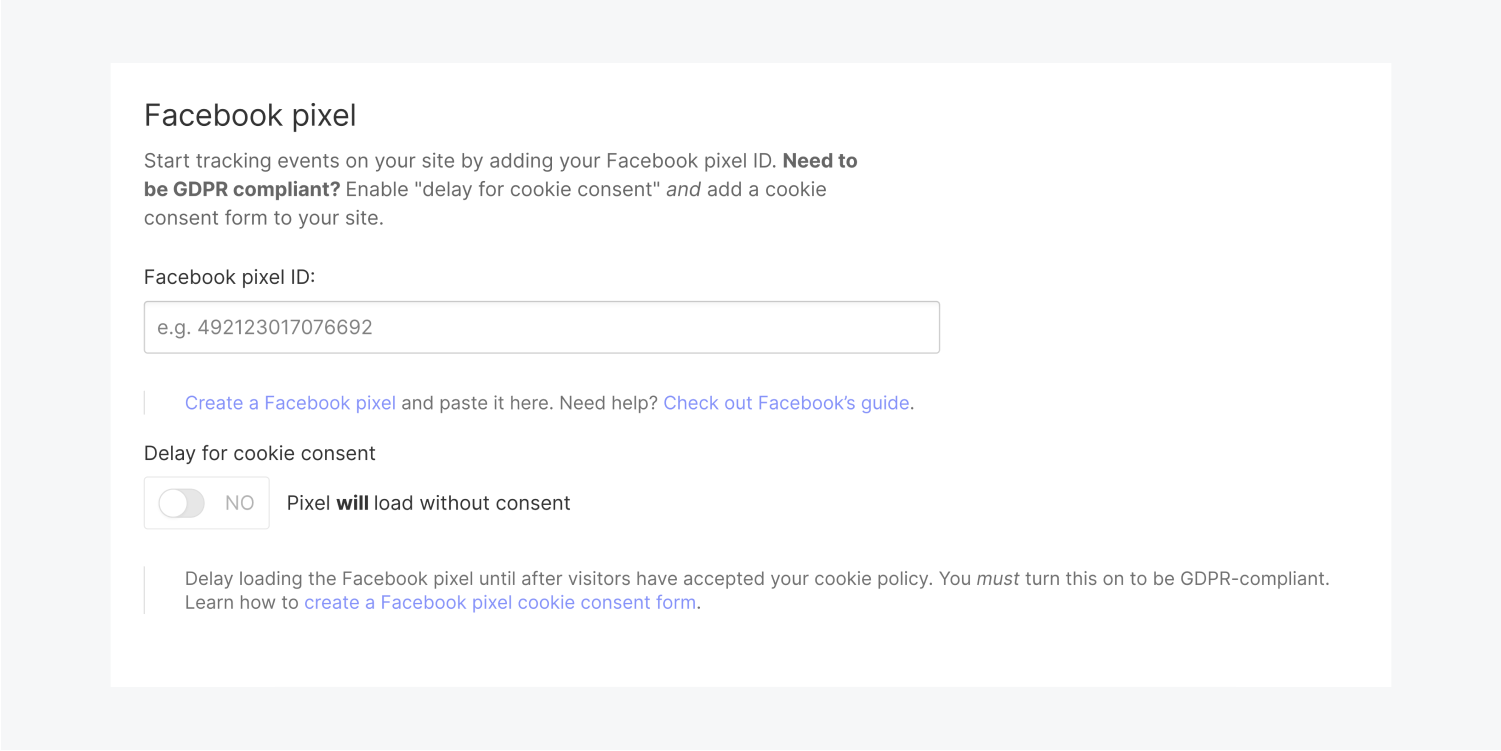
With the Webflow Facebook pixel integration, you can track pageviews, product viewed, product added to cart, and product purchased. To embed a Facebook pixel in your Webflow project, paste the pixel ID in project settings > integrations > Facebook pixel.

Add multiple pixels
You can only add one pixel to your site using this integration. If you need to add more pixels, use custom code to embed your pixels. Learn how to add the Pixel code.
Important: To avoid conflict, if you've already embedded pixel on your site, make sure to remove the code that initiates the pixel form your project's code before adding your pixel ID in the Facebook pixel integration section.
Enable ecommerce events
Once you enable Ecommerce for a project, Webflow will automatically pass the following events over to Facebook Business Manager:
- Viewed product
- Added product to cart
- Purchased product
These events will allow you to effectively measure and improve your advertising campaigns on Facebook and Instagram.
Resources
- Syncing products to Facebook Catalog Manager
- Setting up Instagram Shopping
- Set up Dynamic Facebook Ads for your products [↗]
Delay for cookie consent
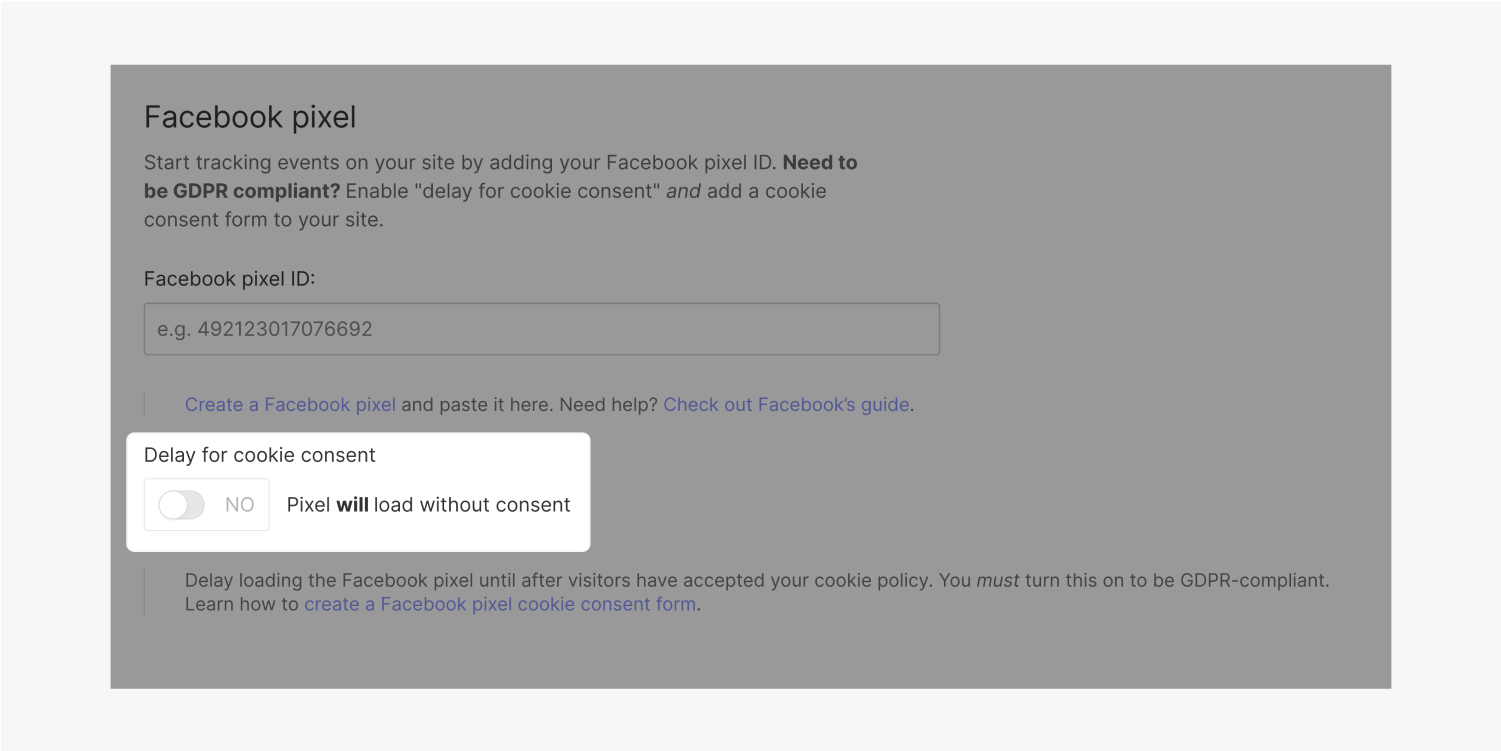
If you host websites that collect personal data from EU residents, you need to comply with GDPR. To do that, you can delay loading the pixel until your site visitors accept your cookie consent. Of course, when you enable this, you'll need to request consent on your site. To do that, add a cookie consent banner.

Create a pixel cookie consent banner
To request consent, create a Facebook pixel cookie consent banner. Simply create a banner in the Designer and add the custom code in your project's footer.
Design your banner
- Create the banner. Include your cookie notification message.
- Give the banner an ID. We're using the following ID: consentPopup
- Add an "Accept pixel cookies" button or text link. Give it a class. Give this button an ID as well. We're using: consentBtn
- Add a "decline" or "close" button. Give it the same class.
- (optional) Include a "learn more" link and link your users to your privacy policy page.
- Drag the banner inside of a div block, give it a class: "Popup wrapper". Set this wrapper's position to fixed. Choose a preset position or manually adjust the position of your popup wrapper.
- Save the Popup wrapper as a symbol. Add it to all of your pages.
Create the interactions
- Select the "Accept" button. Add a mouse click trigger. Set the trigger to affect the class of the button. Under on mouse click, create a new animation: "Close the cookie popup". Select the "Popup wrapper" and add an action:
- Move → y-axis = 100%. Make sure to set the target to affect the class.
- Select the "Decline" button. Add a mouse click trigger. Set the trigger to affect the class of the button. Under on mouse click, select "Close the cookie popup".
- Add a page trigger. Under when page starts to load, create a new animation: "Show the cookie popup". Select the "Popup wrapper" and add 2 actions:
- Move → y-axis = 100%. Set this as the initial state. Make sure to set the target to affect the class.
- Move → y-axis = 0.
- Go to each of your pages and add a page trigger. Under when page starts to load, choose "Show the cookie popup".
Important: Make sure that you select the "Popup wrapper" when creating animation actions. If you apply the actions to the banner itself, the custom code may not function correctly.
Embed the code
To make the cookie consent work, embed the following code in your project's footer:
Important: If you've used different IDs for your popup and "accept" buttons, make sure to replace the bolded IDs in the code above with the one's you're using. Replace "consentPopup" with the ID you've set for the banner. Replace "consentBtn" with the ID you've set for the "Accept cookies" button.
Resources
- Check our Facebook's consent guide [↗] to learn more about creating a cookie consent
- Check out the European Commission’s Cookie Consent Kit [↗]
Set up advanced event tracking
For advanced pixel event tracking, check out Facebook’s events guide [↗]. Also, check out additional Facebook pixel use cases [↗] like tracking clicks on buttons.
Add the event code
You can add these events to the <head> code section</head> of one or more pages on your site.
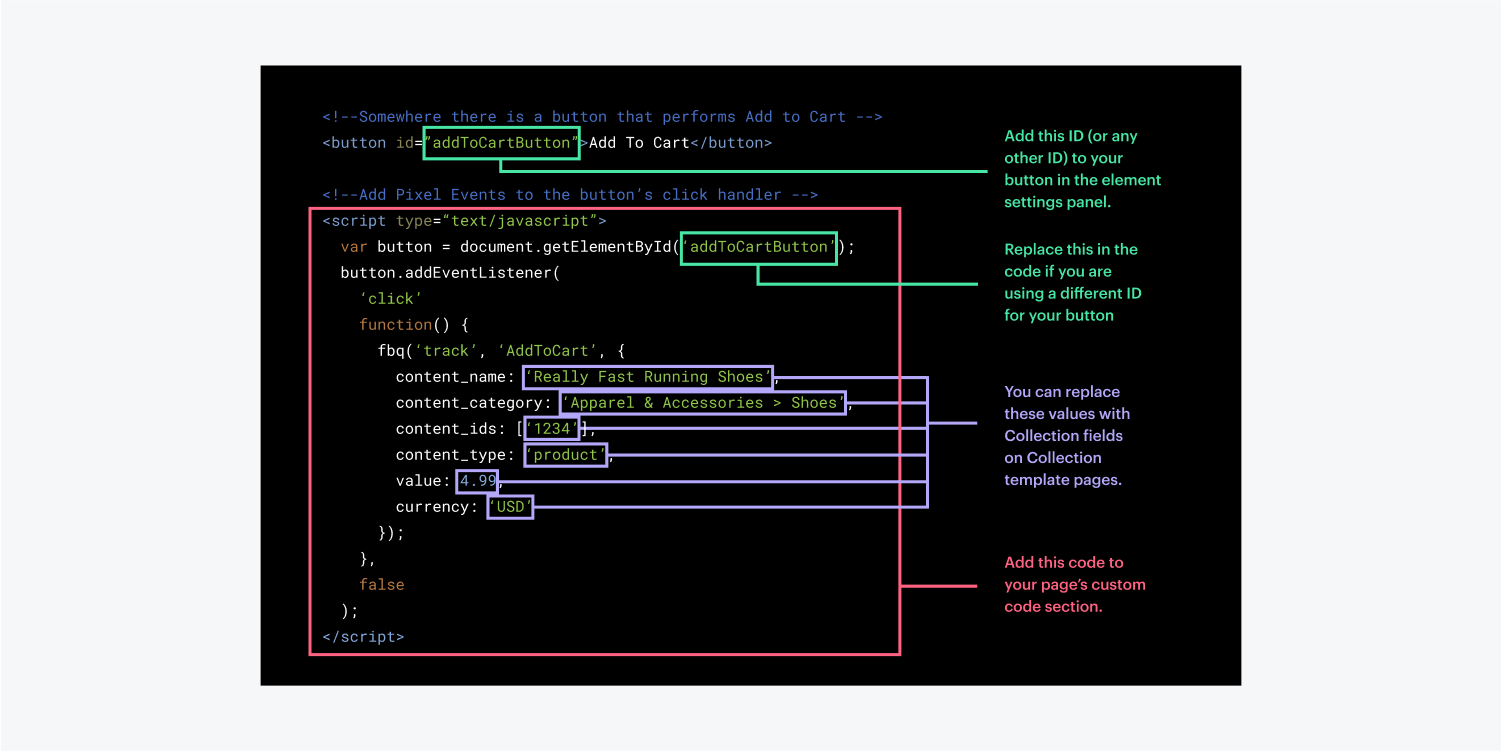
If you want to track clicks on links or buttons, make sure to set an ID for those elements in the Designer. Then, embed the script in your page's code. Don't forget to replace the ID in the code with the one you applied to your buttons and links.
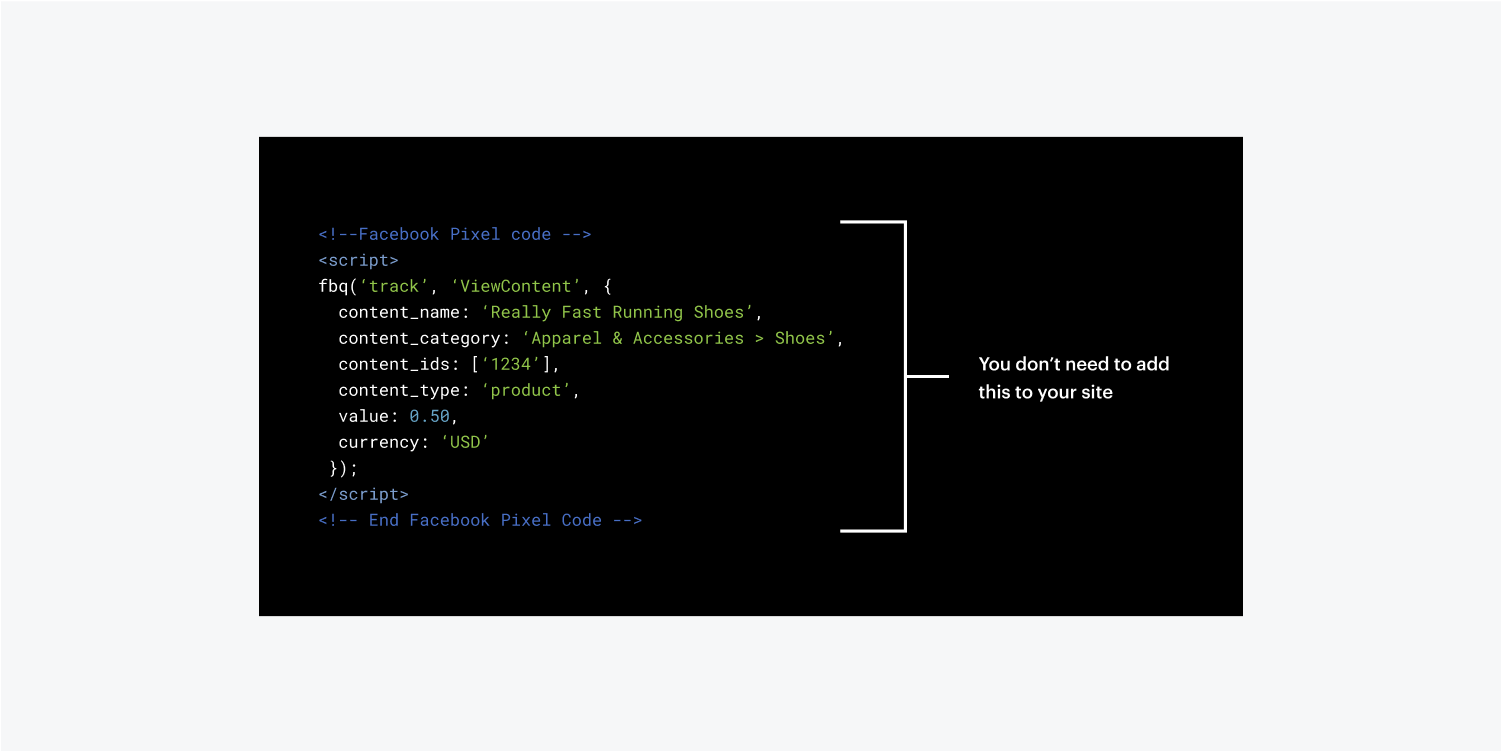
Need to know: You don't need to add the Facebook pixel code to your site if you've already added the pixel ID in your project settings → integrations → Facebook pixel section.
Example

Then fire AddToCart either on a new page load or on the click of an Add To Cart button. There are multiple ways to handle clicks on buttons. Here's an example adding eventListener to a button.

Need more help?
If you need more help integrating pixel events, you can always post on the code help section [↗] of the Webflow Community Forum [↗] with as much information as possible (read-only link, screenshots, the code you're trying to integrate, and a description of the issue), and our amazing community and staff can help you there.


