You can verify ownership of your custom domain by adding a TXT record. One thing to note: Although the steps are similar, they can vary depending on your domain provider. Reach out to your domain provider for more specific help with adding a TXT record.
In this lesson:
- Log in to your domain provider
- Access our DNS settings
- Add text to the name field
- Add text to the value field
Log in to your domain provider
The domain provider is usually who you bought your custom domain from, and logging in could be somewhat different depending on your provider or registrar. In this example, we’ll click Sign In and sign in using our Google Account login information.
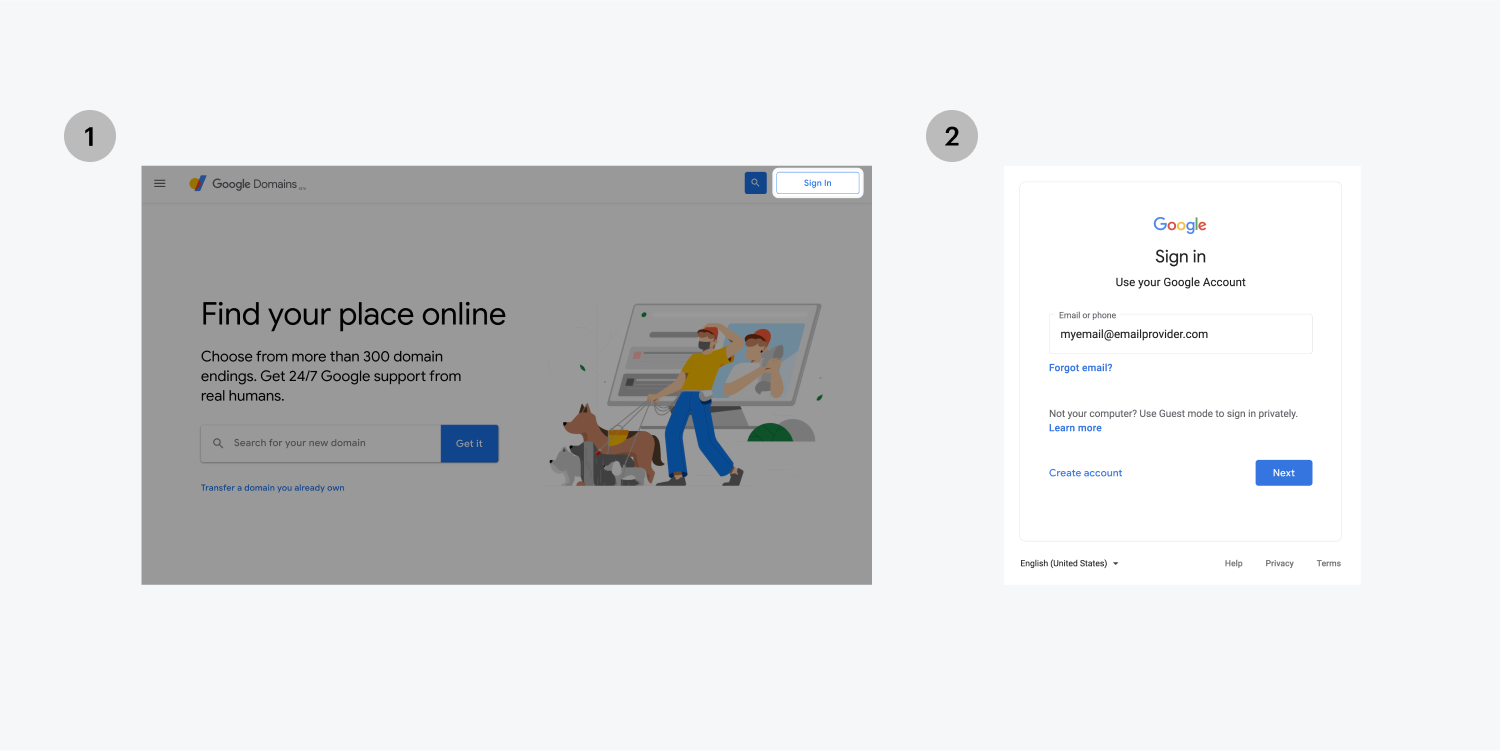
Access your DNS settings
Now that you’re logged in, you’re ready to access your DNS settings.
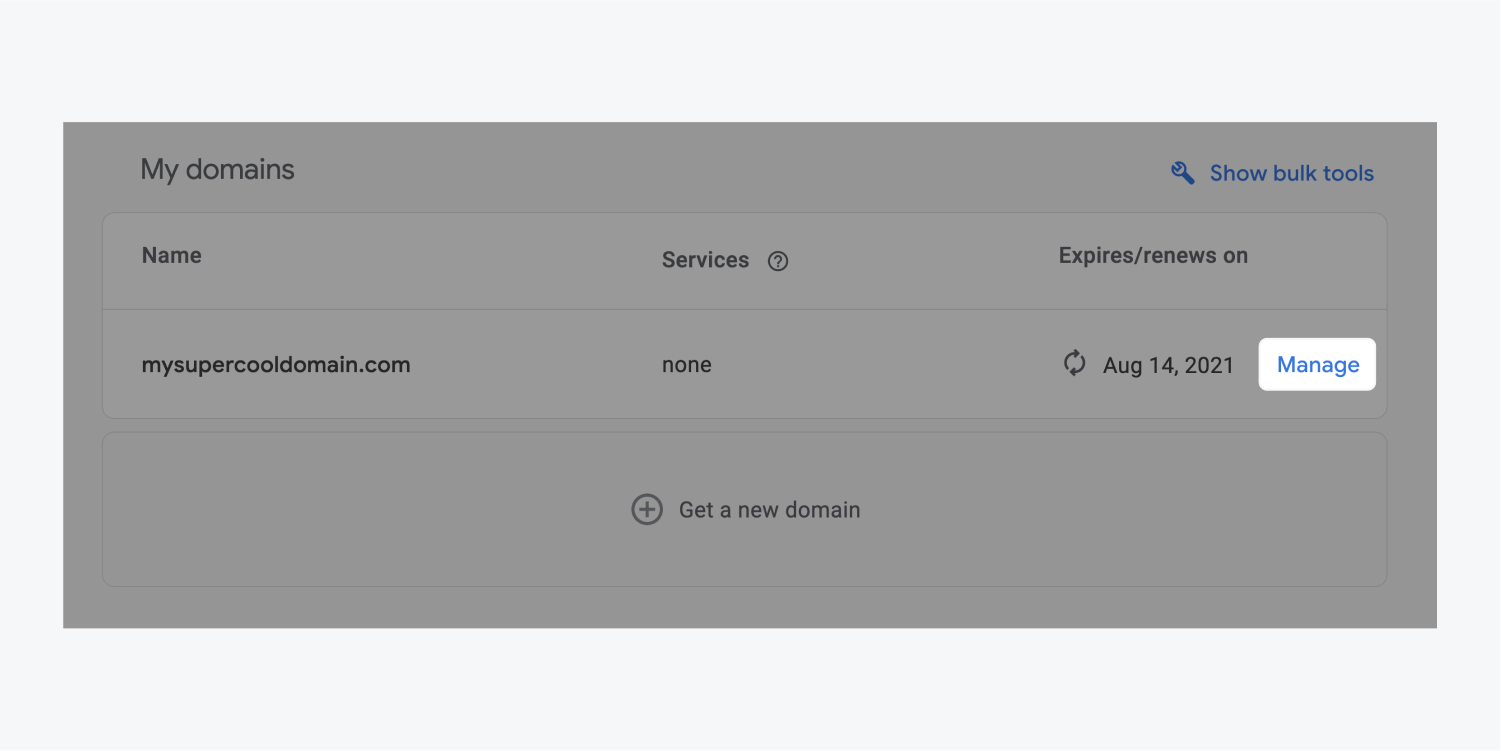
You can do this within your domain provider’s dashboard by selecting the domain you’d like to manage. For this example click on the Manage link next to the domain you want to verify.
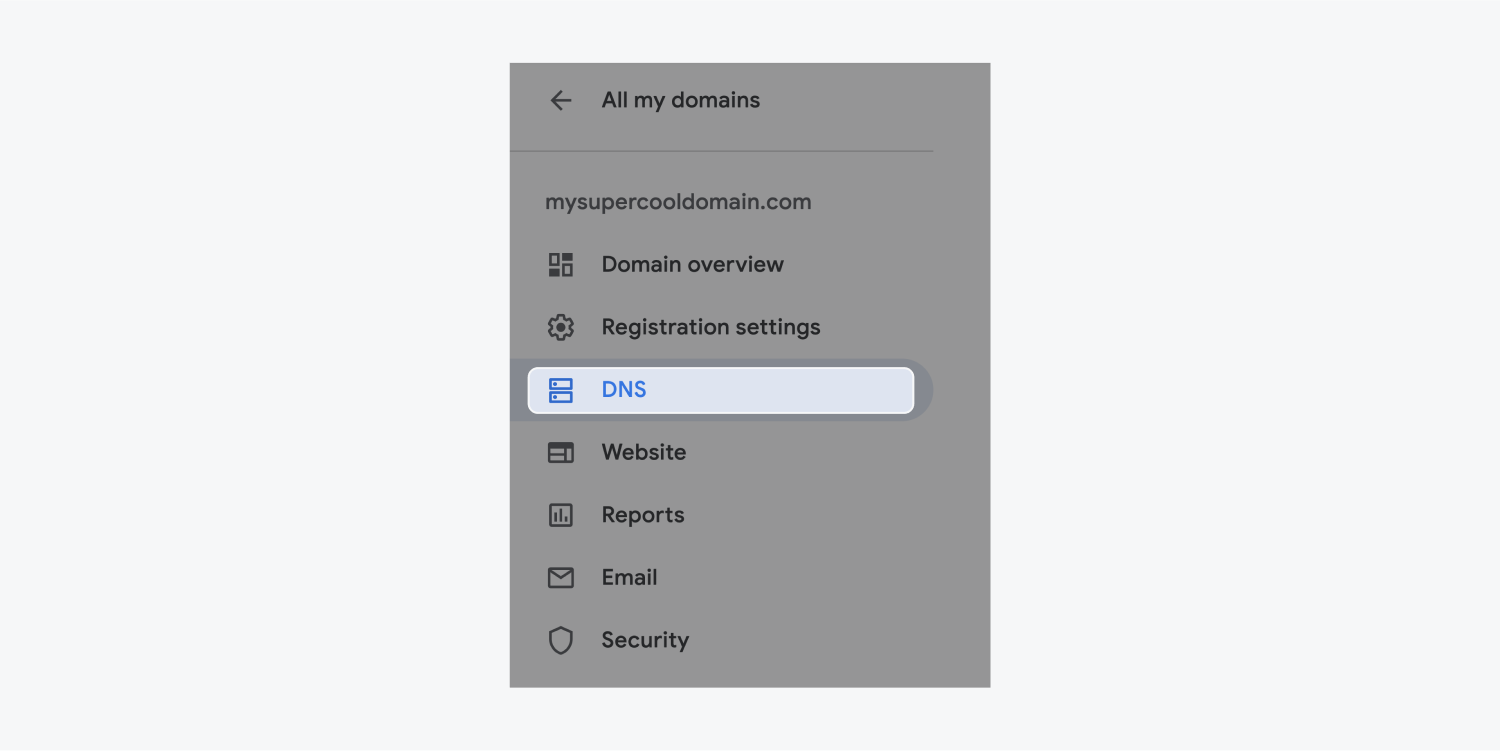
When you click on the DNS menu option, you’ll see all of the Domain Name System (DNS) values for your domain.
Add text to the name field
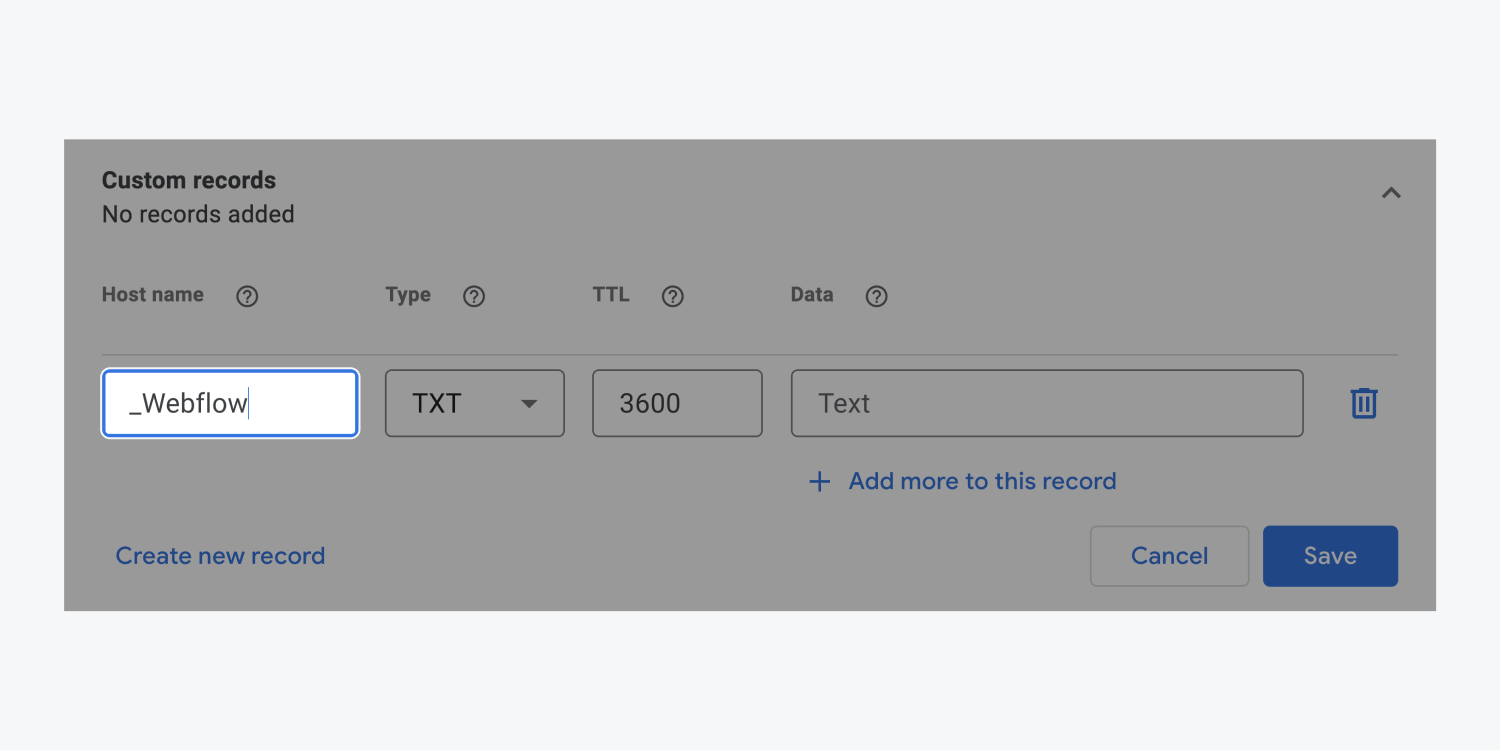
Scroll to the custom resource records on the DNS page. To add your record, choose TXT from the record dropdown.
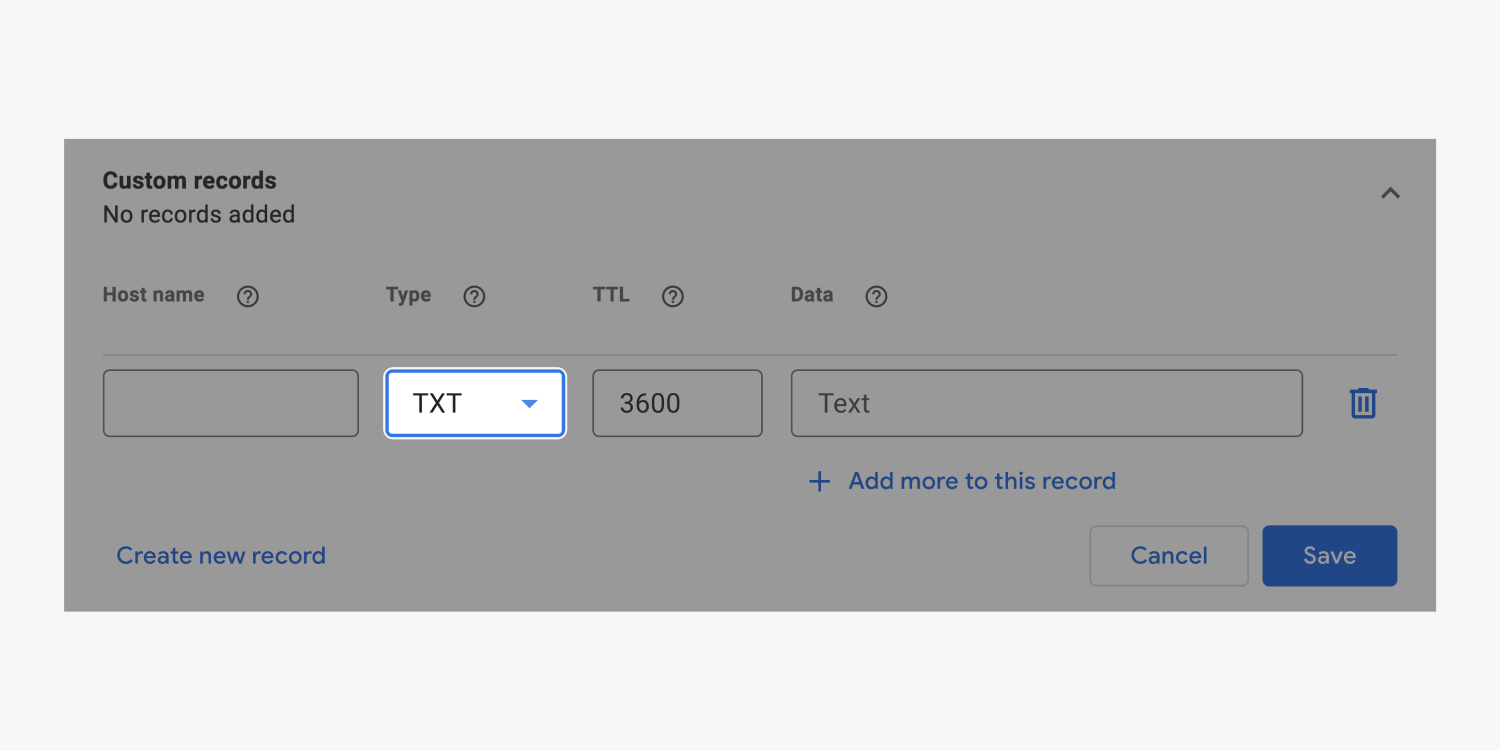
After selecting TXT, enter _Webflow in the “Name” field (some domain providers call this the “host” field)
Add text to the value field
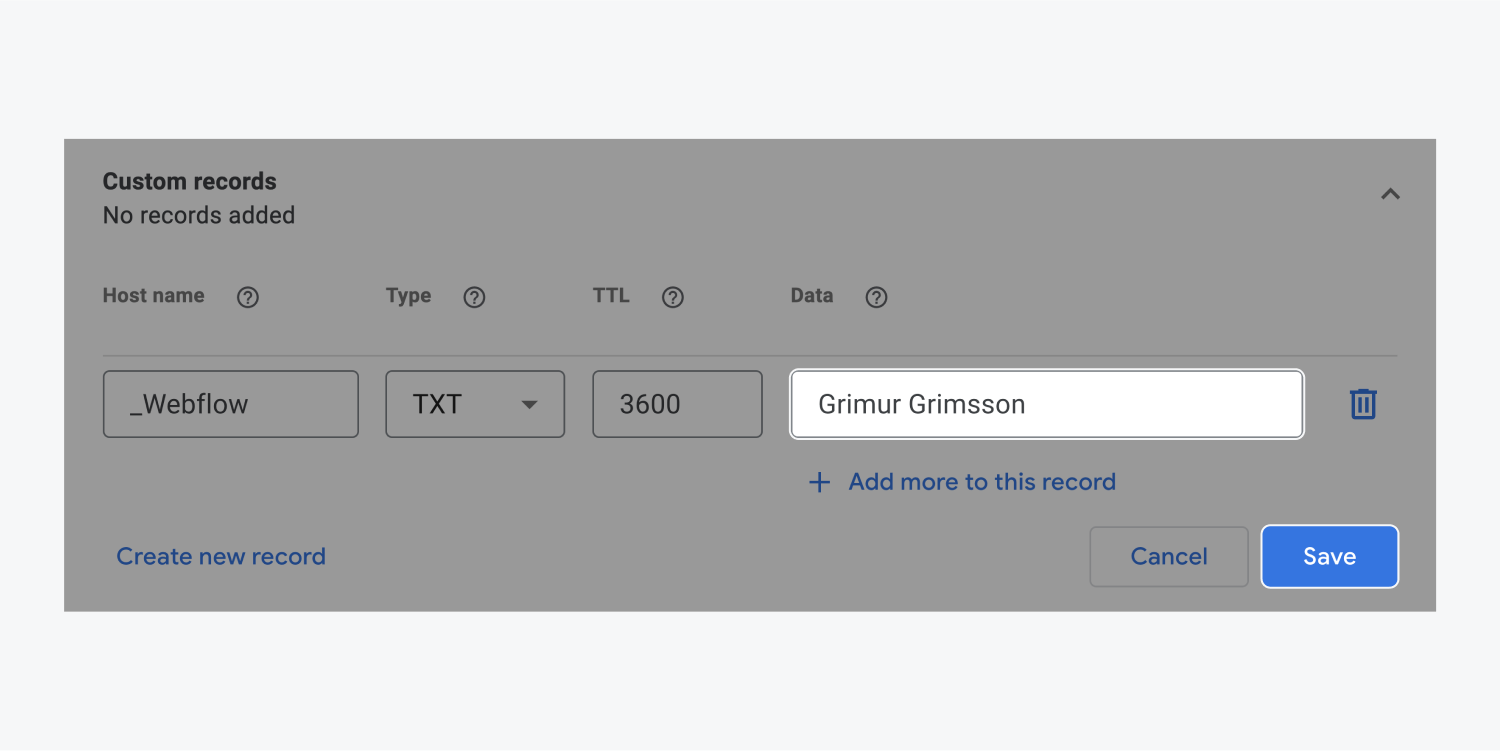
And for the last step, enter your name in the data field (sometimes this is called value or text). This can be your first and last name, but a Webflow team member might ask for something more specific if you're working together.
Now, click Add.
DNS changes can take a few minutes to propagate — or even longer (up to 48 hours) if it’s a new domain. Once you’re done, reach out to Webflow to make sure the TXT record has been successfully added.
And, if you're having trouble adding the TXT record, your domain provider should be able to help. If that doesn't work, let us know, and we'll do our best to get everything sorted.


