As part of our series on After Effects and Lottie in Webflow, we rendered a video in Cinema 4D and made it into an image sequence in Adobe Media Encoder. In this tutorial, we’ll set up the asset to animate on scroll.
In this lesson:
- Set up image sequence
- Configure image in After Effects
- Export image with Bodymovin extension
- Import image to Webflow
- Set up scroll-based trigger
- Link the trigger to the image sequence
Set up image sequence
Our goal is to have an image sequence — one image per frame, in order. So let’s turn this video into an image sequence:
- Open Adobe Media Encoder and drag your video into the Queue
- Click the dropdown under Format and choose JPEG
- Click the slug under Output File to make sure your output destination is set
- Press the play button in the top left to finalize turning your video into an image sequence
And presto — you have an image sequence!

Configure image in After Effects
To configure your images in After Effects:
- Open After Effects and drag your image sequence into your project bin
- Drag all your selected images into the Layers area
In the New Composition from Selection box that pops up, make sure it has the following settings:
- Create: Single Composition
- Still Duration: 0:00:00:01 (each still is 1 frame)
- Sequence Layers: on
- Overlap: off
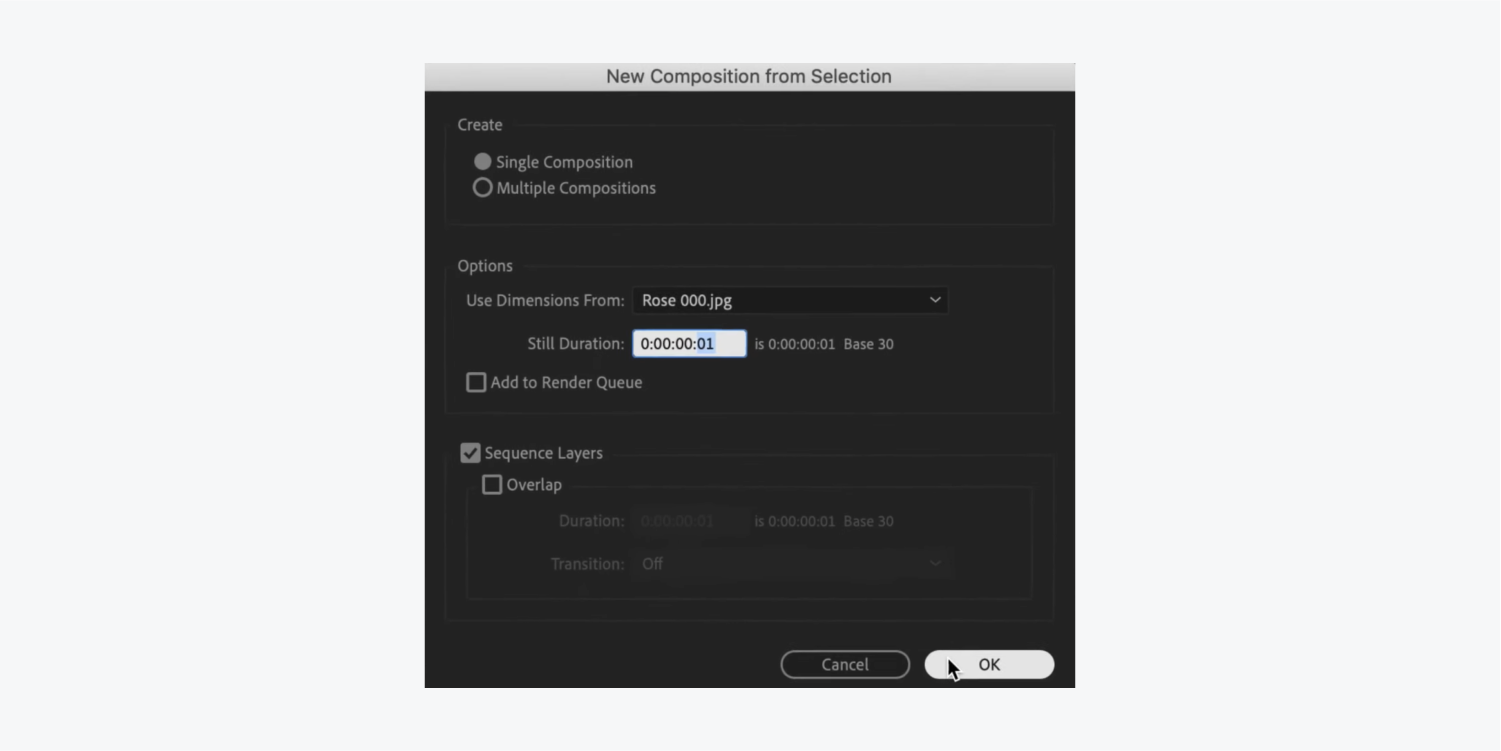
Click OK to load your image into After Effects.
Export image with Bodymovin extension
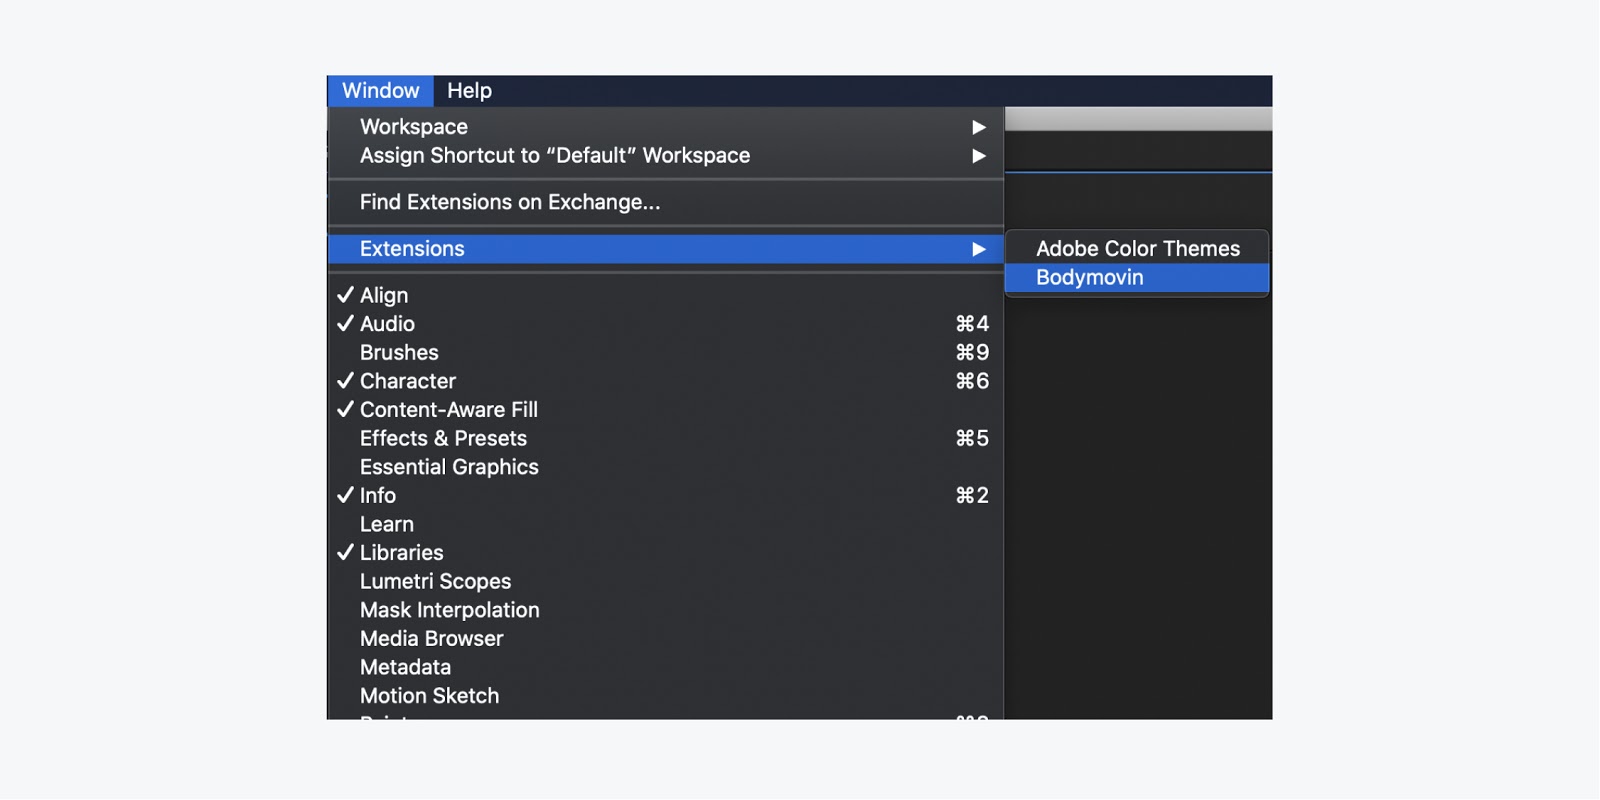
In After Effects choose Window > Extensions > Bodymovin.
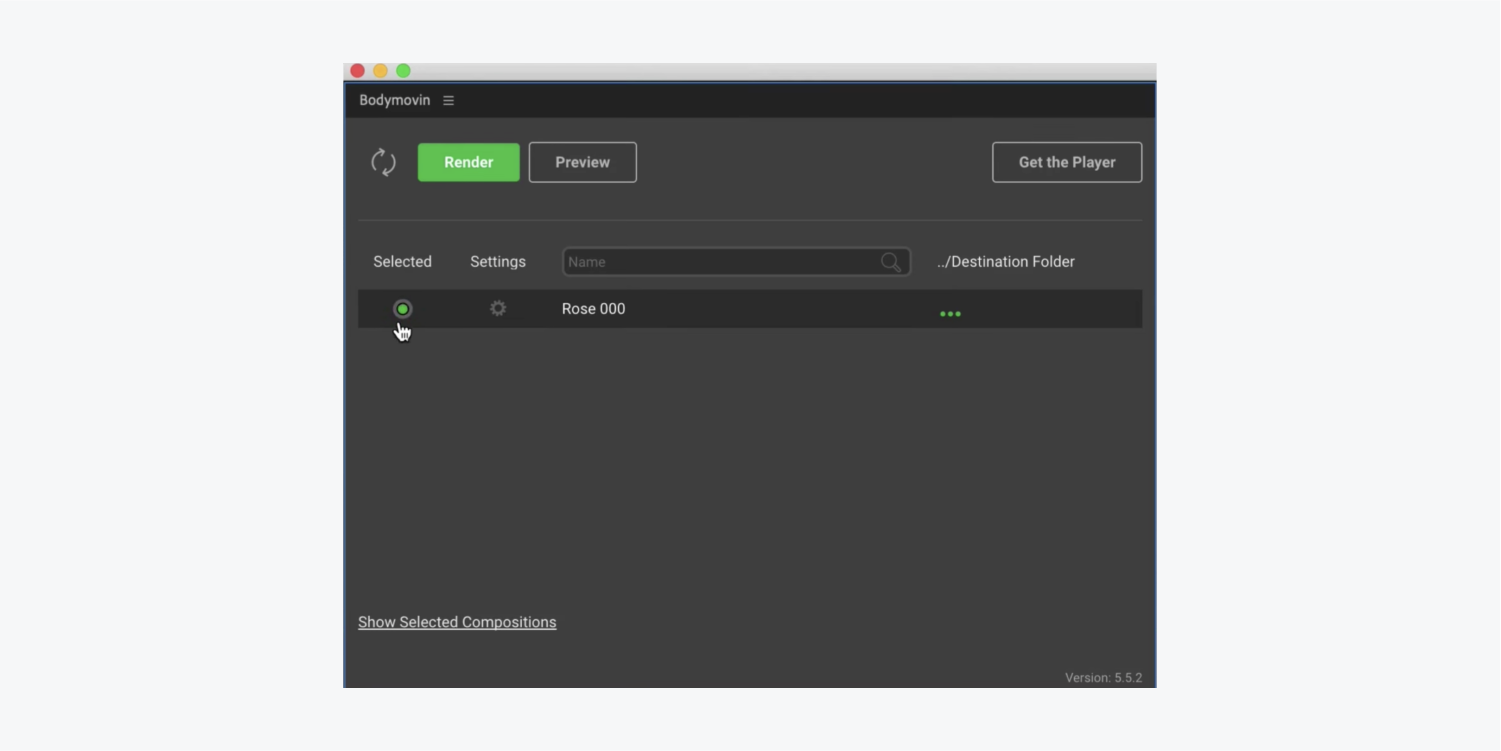
Make sure the composition is selected for render.
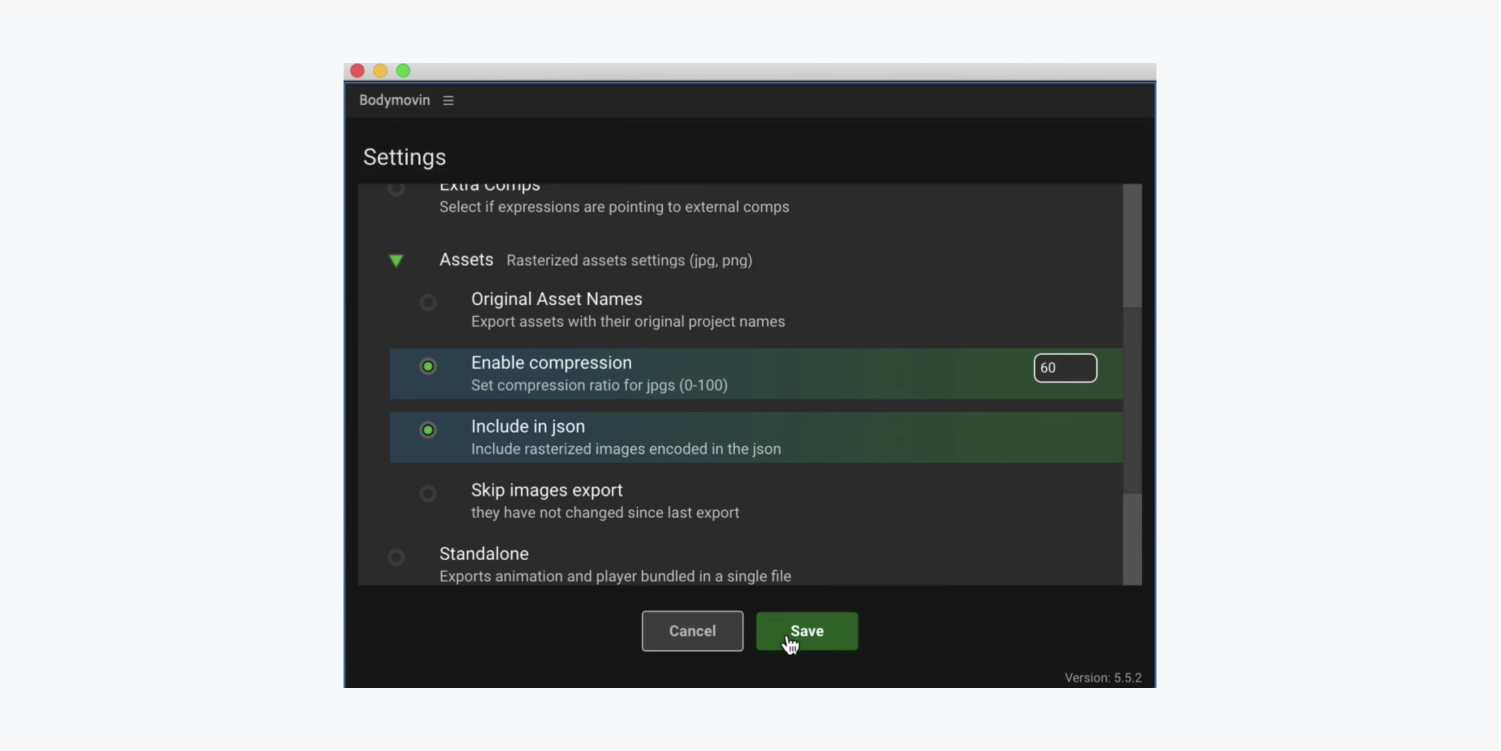
Click into the settings and under Assets, select Enable compression and set the ratio (e.g., 60).
Make sure Include in json is also selected under Assets in that same window and save your changes.
Click the 3 dots under ../Destination Folder to make sure your json file exports to the right place.
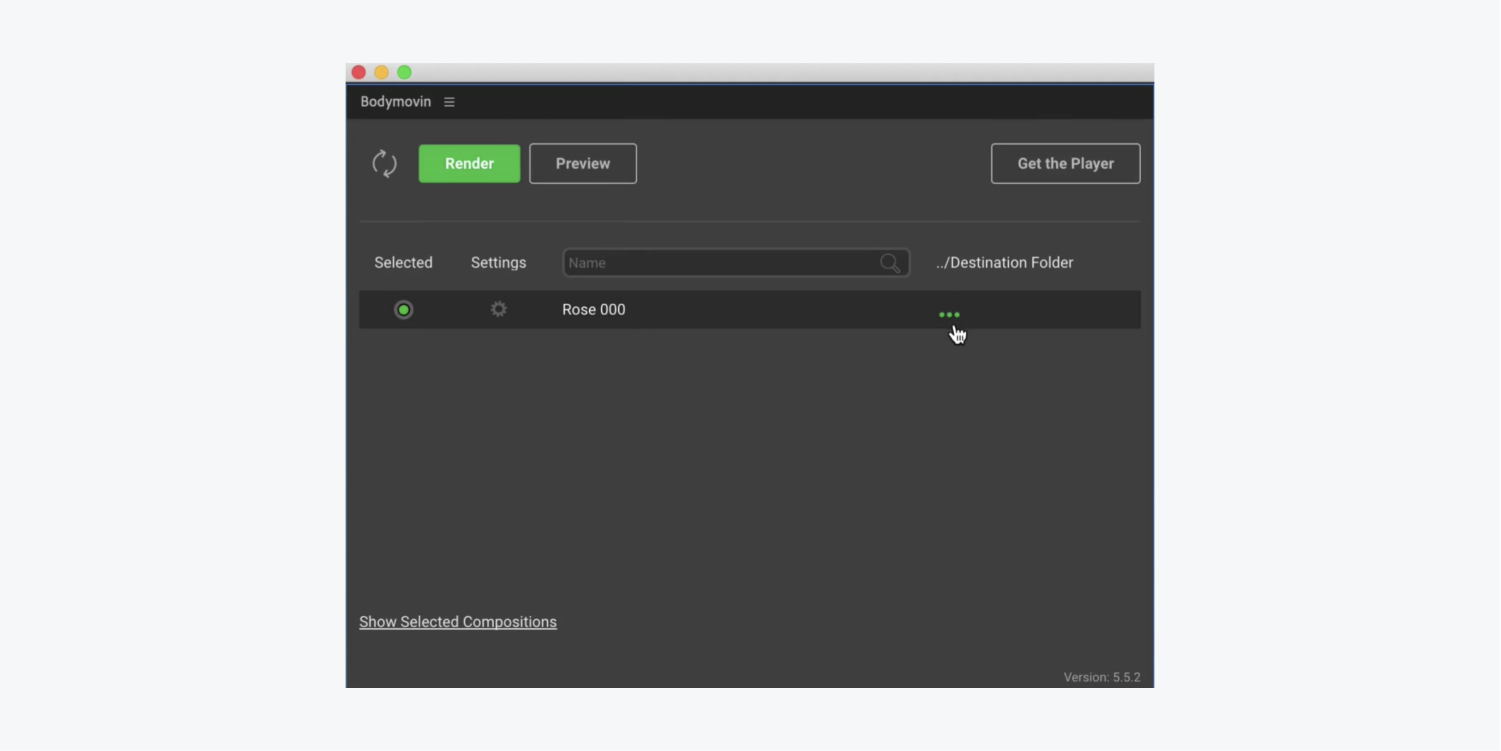
Click Render and grab a snack while you wait.
Import image to Webflow
To import the image to Webflow:
- Choose the image icon from the Asset panel
- Select Upload and choose the json file you just exported from After Effects
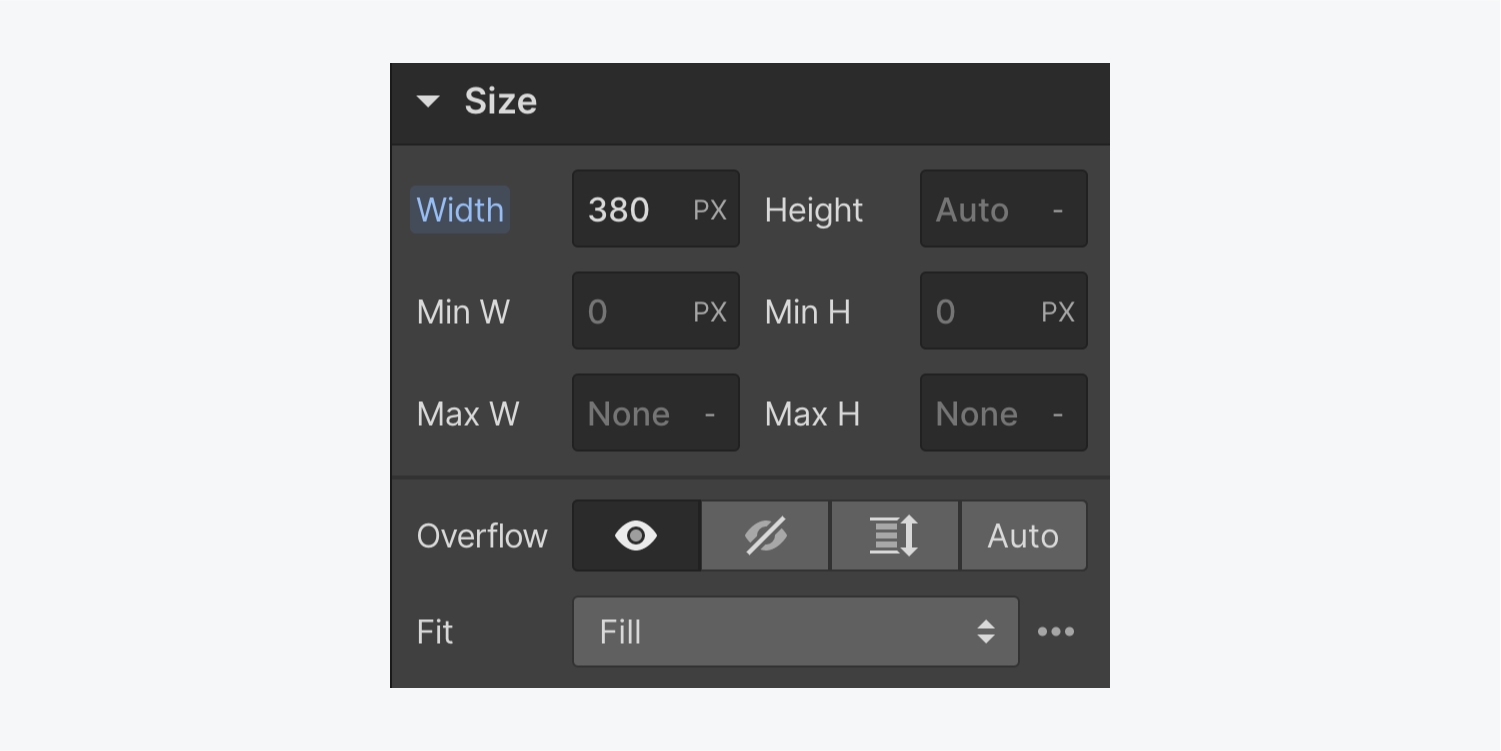
- Drop your file onto the canvas and in the Style panel under Size, give it a width (e.g., 380 PX)
Set up scroll-based trigger
- Click the plus sign in the Interactions panel next to Page trigger
- Choose While page is scrolling from the dropdown menu
Stay put in the Interactions panel for the final step.
Link the trigger to the image sequence
- Choose Play scroll animation from the Action menu
- Click the plus sign next to Scroll animations to name it
- Click the plus sign next to Scroll actions and choose Lottie from the dropdown menu
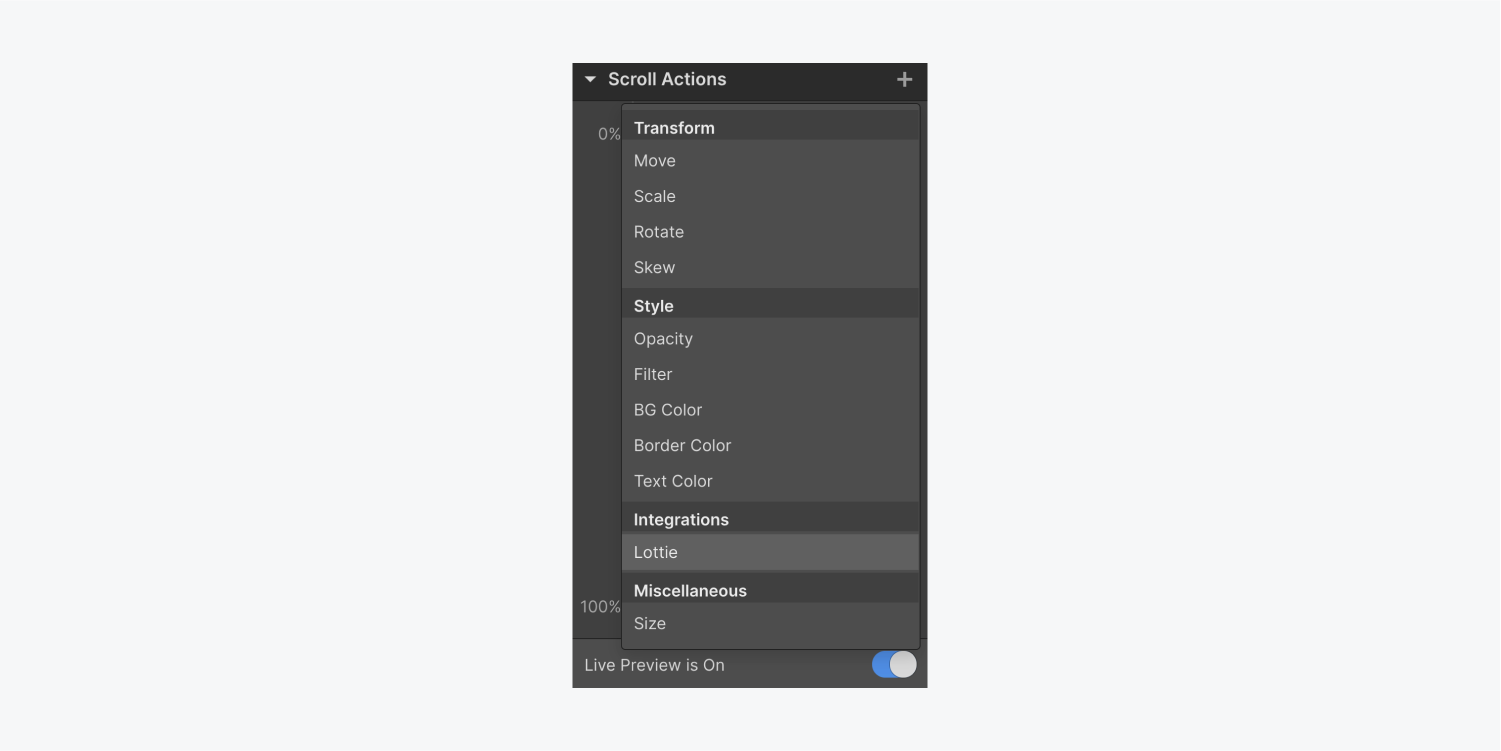
Select the animation in the timeline at 100% and under Lottie, toggle it to 100%. You may have to play around with the value here to get your image sequence at the right frame.
When you go to preview mode and scroll, nothing will happen — don’t panic! Because there’s nothing on the page other than our animation, there’s no ability to scroll.
To fix this, leave preview mode and, in the Style panel, give the body element a height of 200 VH (200% of the viewport height) and set the Position to Fixed (so it stays put in the viewport).
And that’s how you animate a video on scroll — nice work! Check out our example project that uses this rose animation inside the context of a real layout.


